Deploying MetalSoft using OVAs
In addition to the Kubernetes-based deployment we also provide ready-to-go virtual appliance images for both the Global Controller and the Site Controller.
The virtual images are provided in VMDK format. The URL, username and password will be provided by the MetalSoft team.
An ESXi host (or other hypervisor) is required to run both the Global Controller and the Site Controller VMs.
The host should have an absolute minimum of 48GB of RAM, 20 cores and 1TB of Disk space which should be SSDs rather than HDDs.
If the VMs are deployed separately, the following are the minimum resources that should be available to them:
Global Controller OVA:
- 16 cores
- 32GB RAM
- 500GB Disk space
Site Controller OVA:
- 4 cores
- 8GB RAM
- 300GB Disk space
Download the images
Section titled “Download the images”You should have received the URL, username and password from the MetalSoft team. Use the following to download all files. Alternatively you can use your browser to download them.
USER=PASS=URL=mkdir -p metalsoftcd metalsoftwget -c -r --no-parent -nH --cut-dirs=1 --user "$USER" --password "$PASS" $URL
% ls -lhatotal 19629760drwxr-xr-x  6 alex  staff   192B Mar 14 12:52 .drwx------@ 9 alex  staff   288B Mar 14 12:52 ..-rw-r--r--  1 alex  staff   3.3G Mar  9 18:34 agent-disk001.vmdk-rw-r--r--  1 alex  staff   6.4K Mar  9 18:34 agent.ovf-rw-r--r--  1 alex  staff   6.1G Mar 10 12:35 controller-disk001.vmdk-rw-r--r--  1 alex  staff   7.1K Mar 10 12:35 controller.ovf
Note that the size of the images might vary.
Installing & configuring the Global Controller VM
Section titled “Installing & configuring the Global Controller VM”The following tutorial shows how to deploy the virtual appliance images in an ESXi server, but other virtualization solutions could also be used.
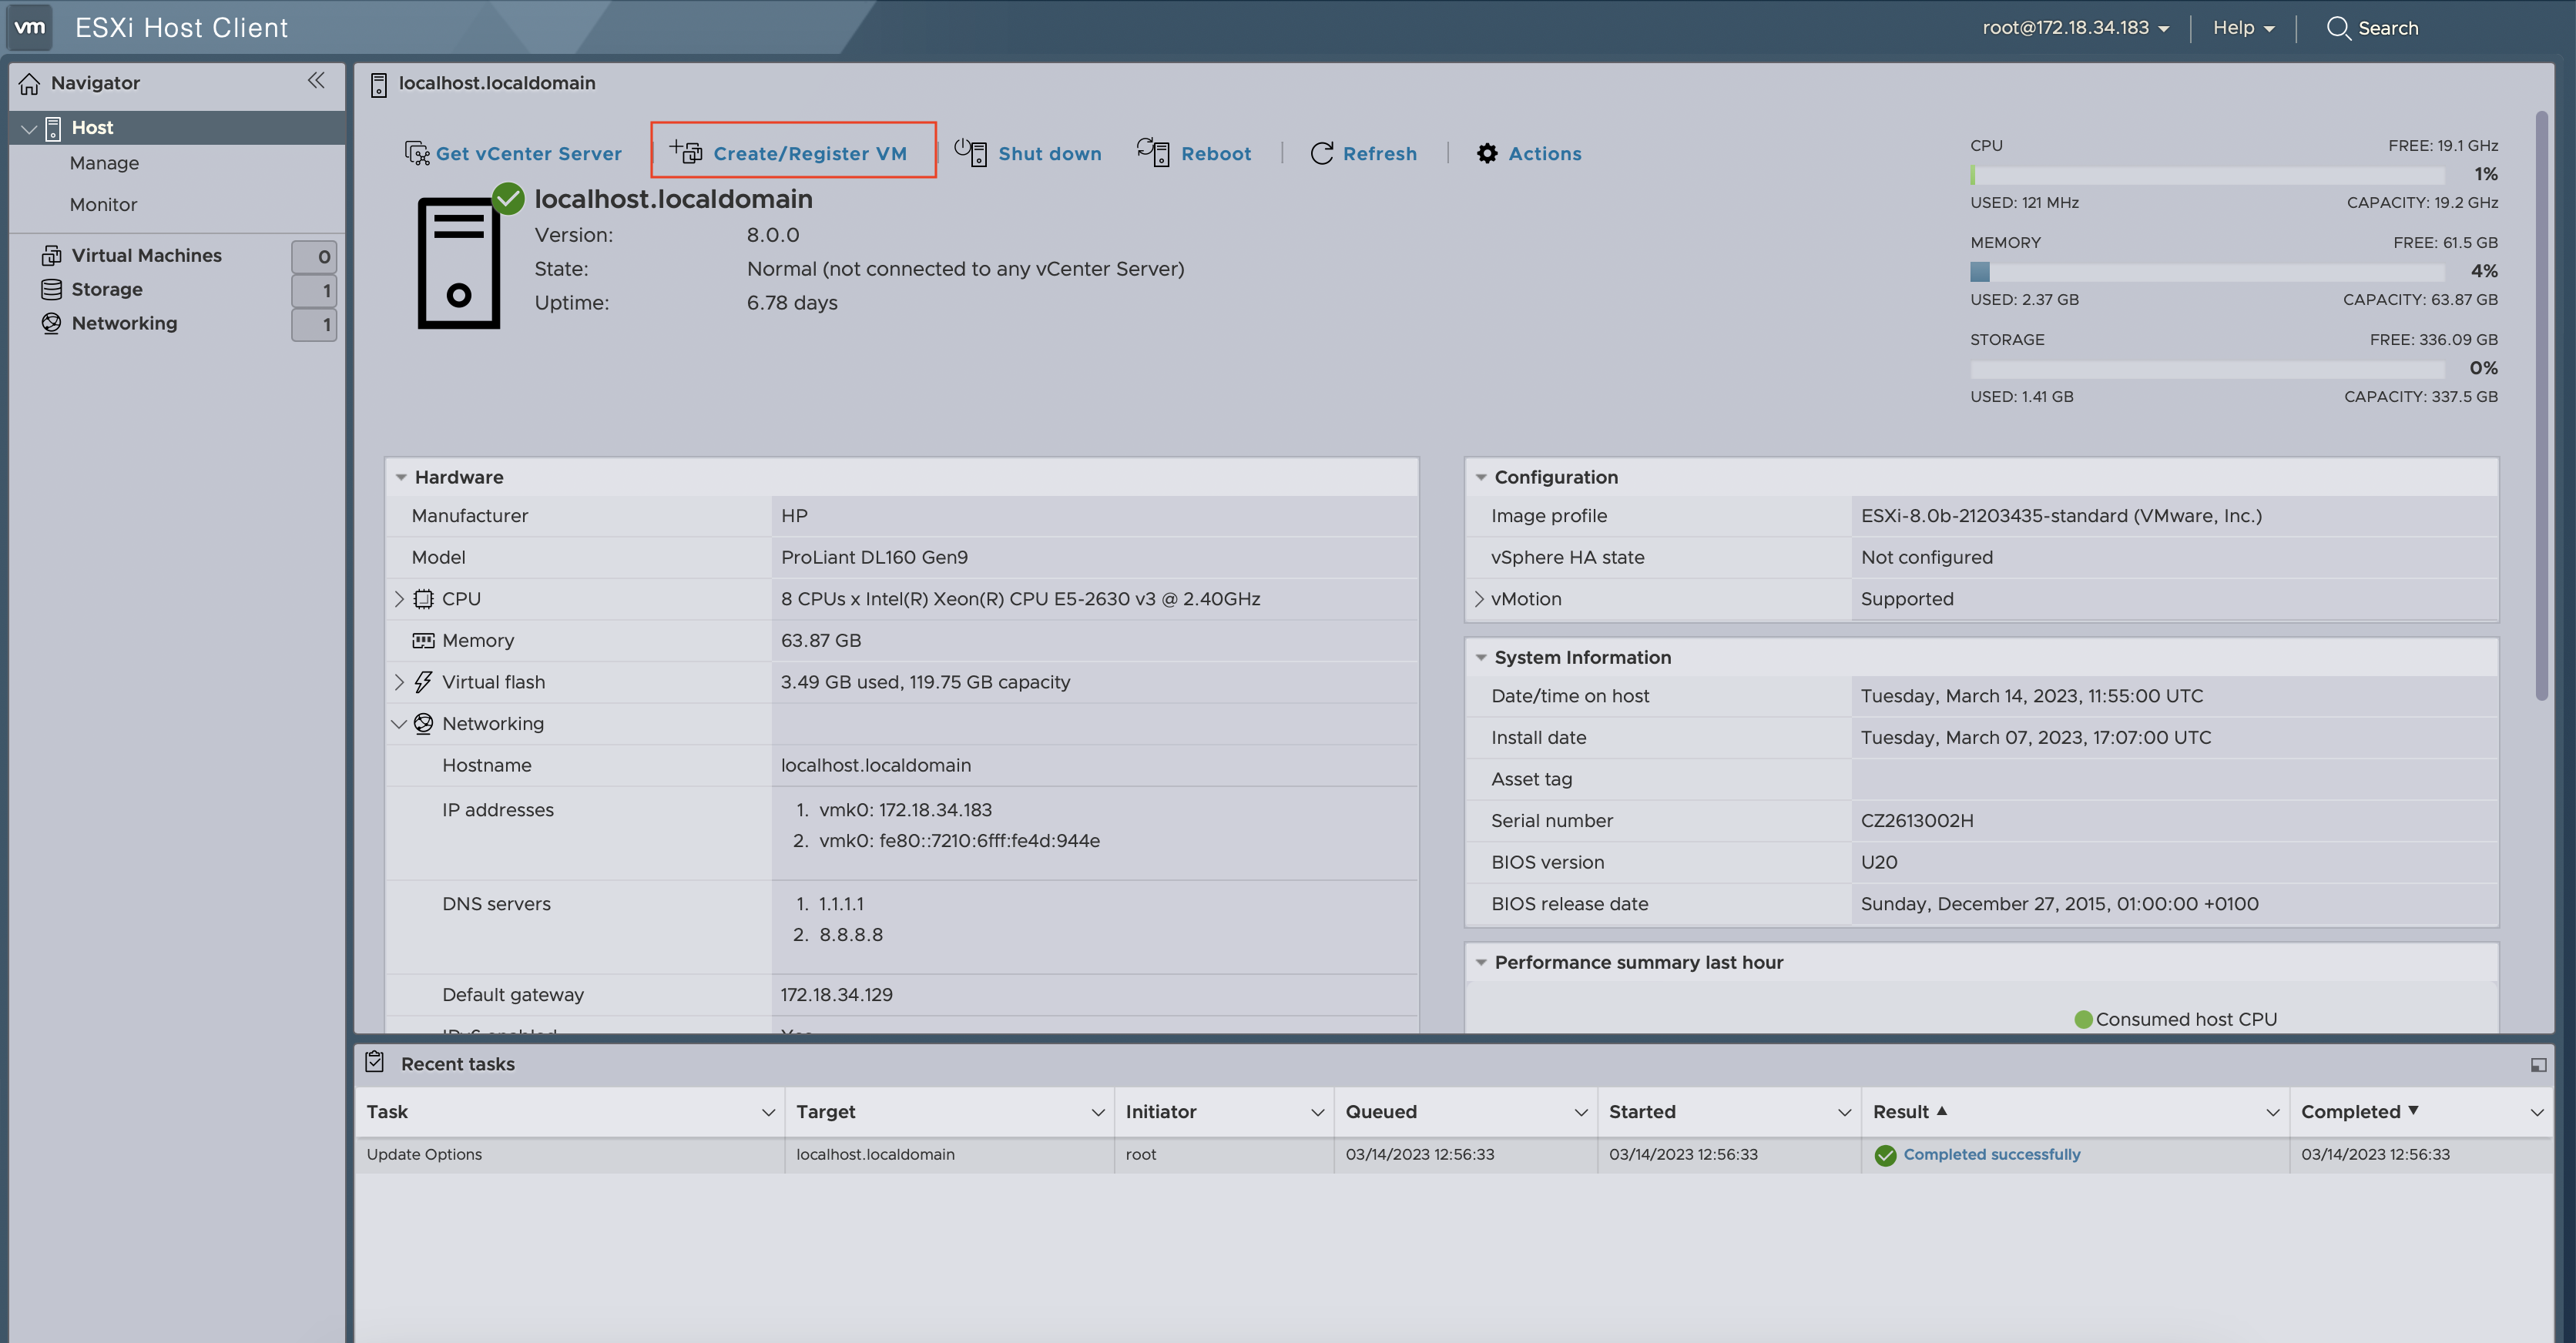
1. Deploy the Global Controller Appliance VM in ESXi
Section titled “1. Deploy the Global Controller Appliance VM in ESXi”- Use the Create VM button:
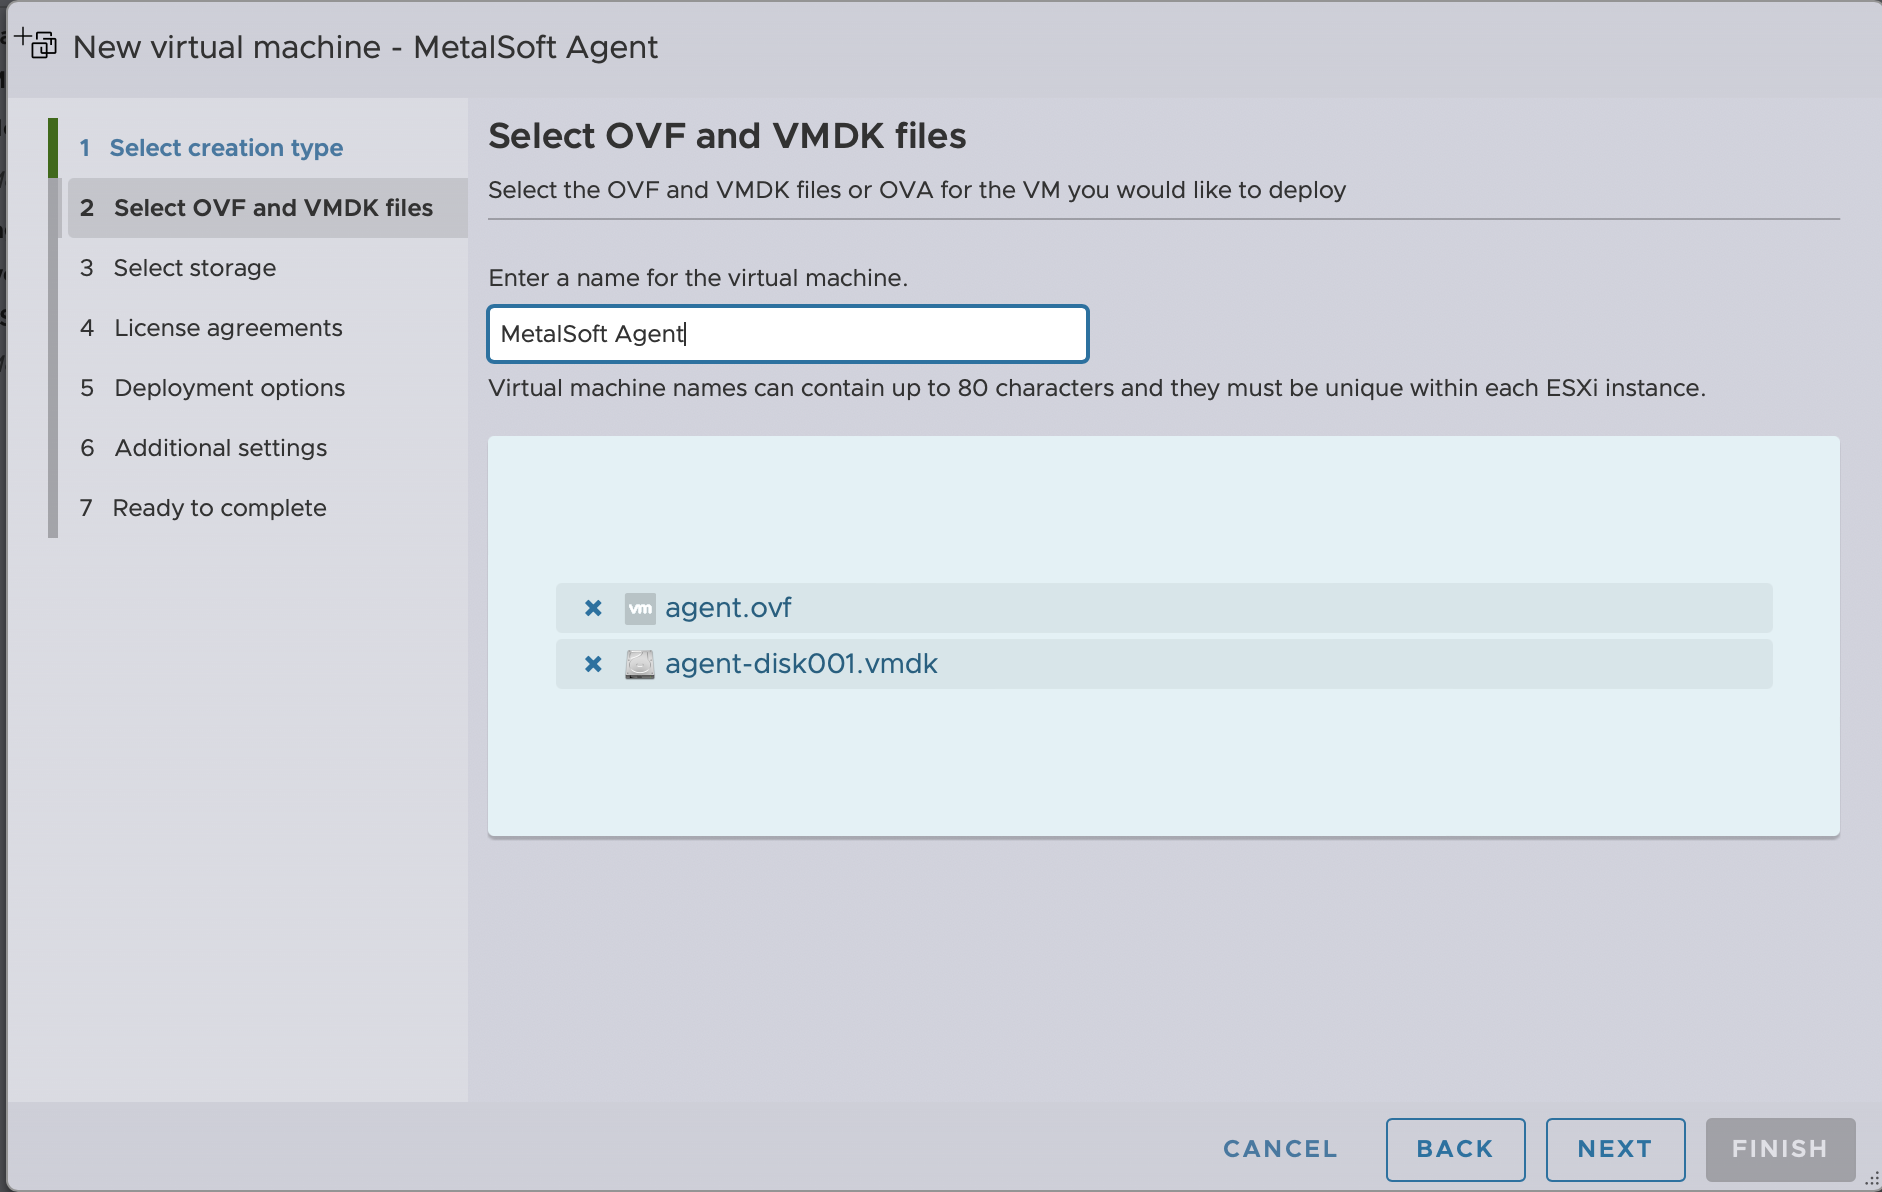
- Create a VM from an OVF for the Controller:
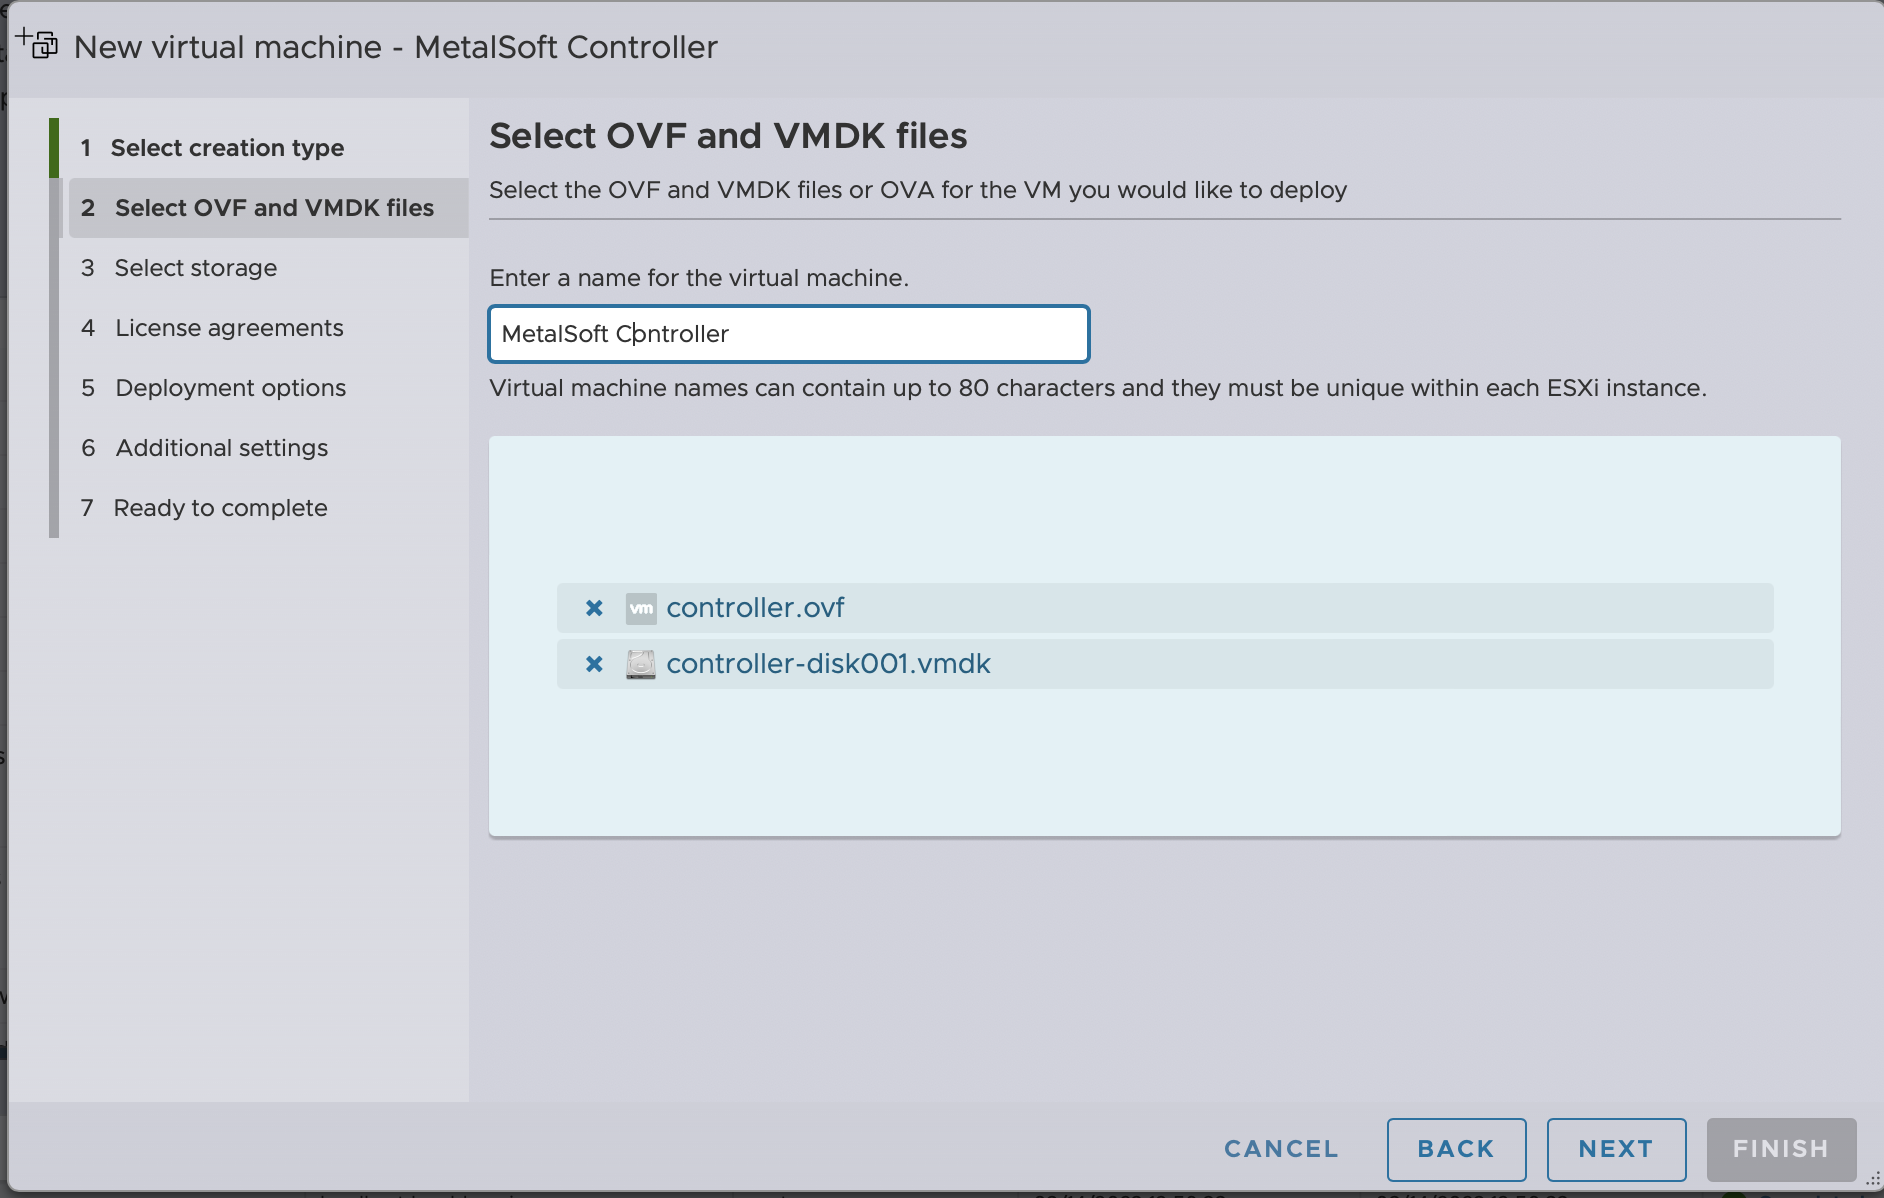
- Wait until it is uploaded and the image created:

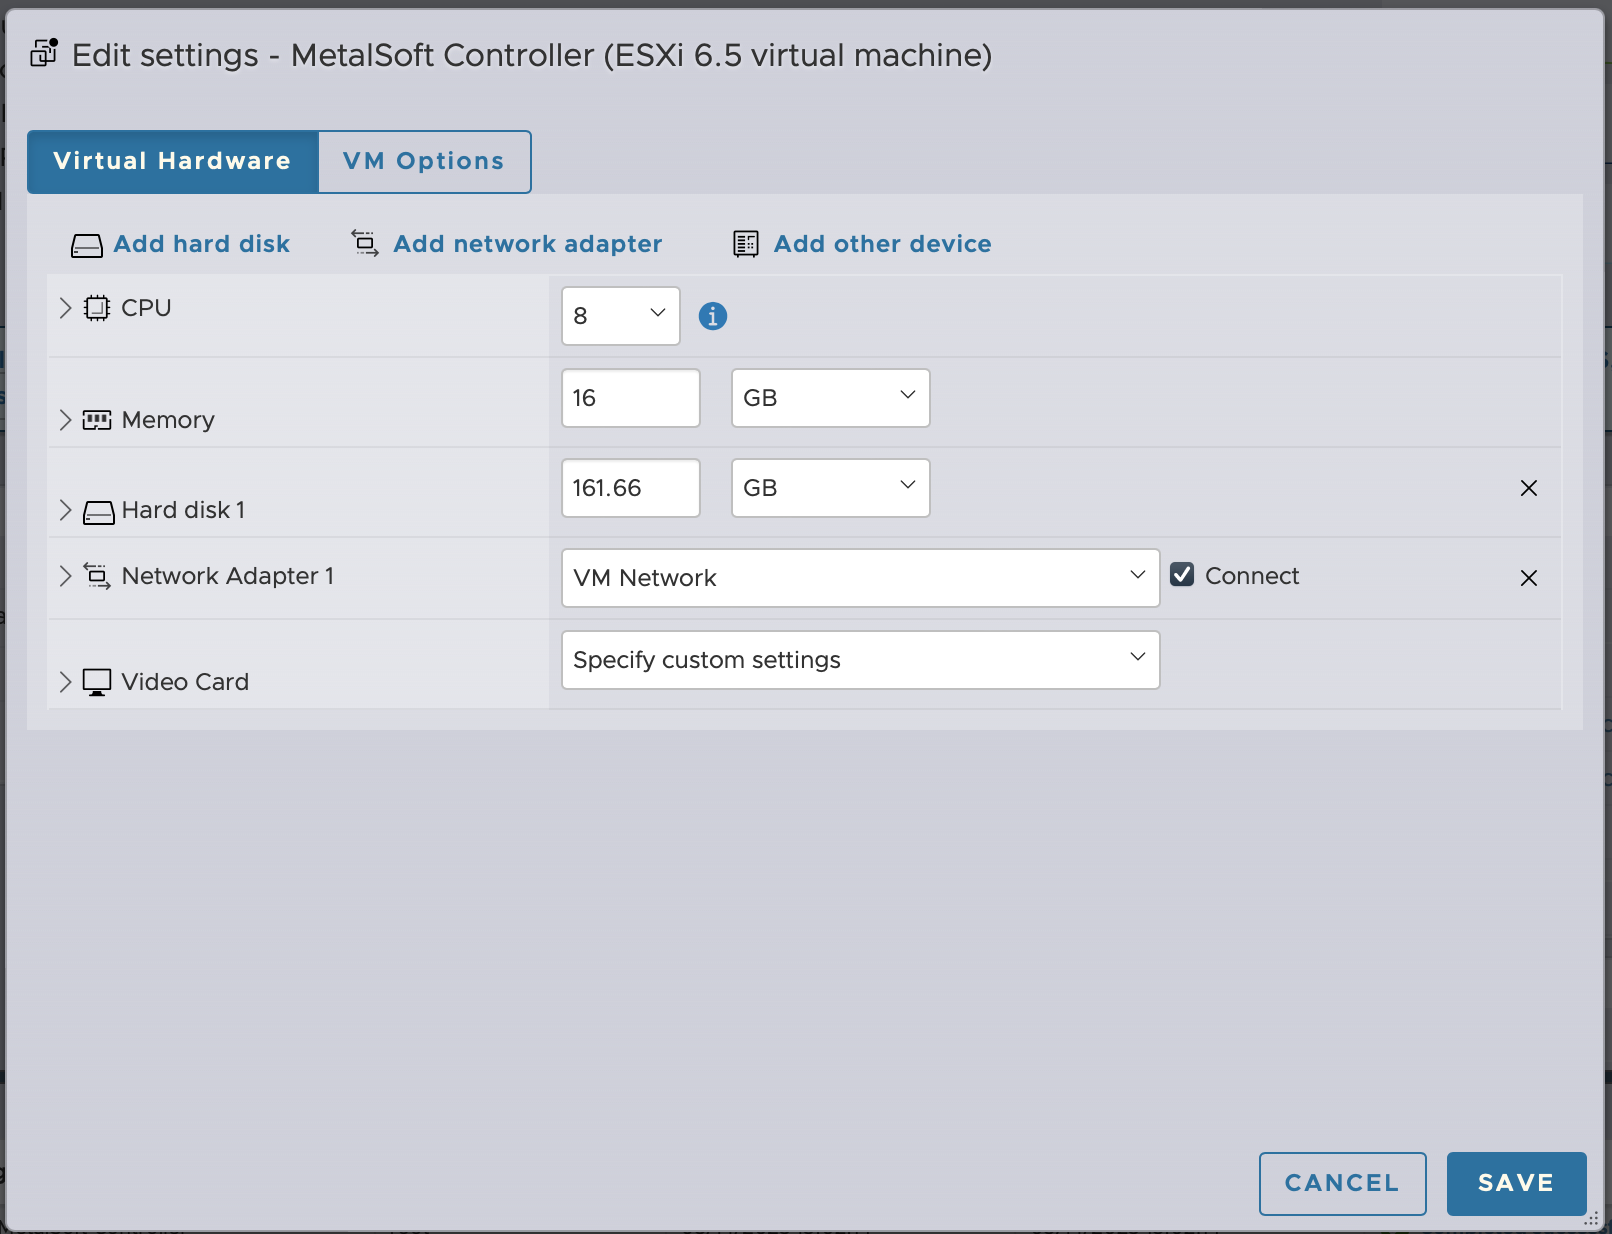
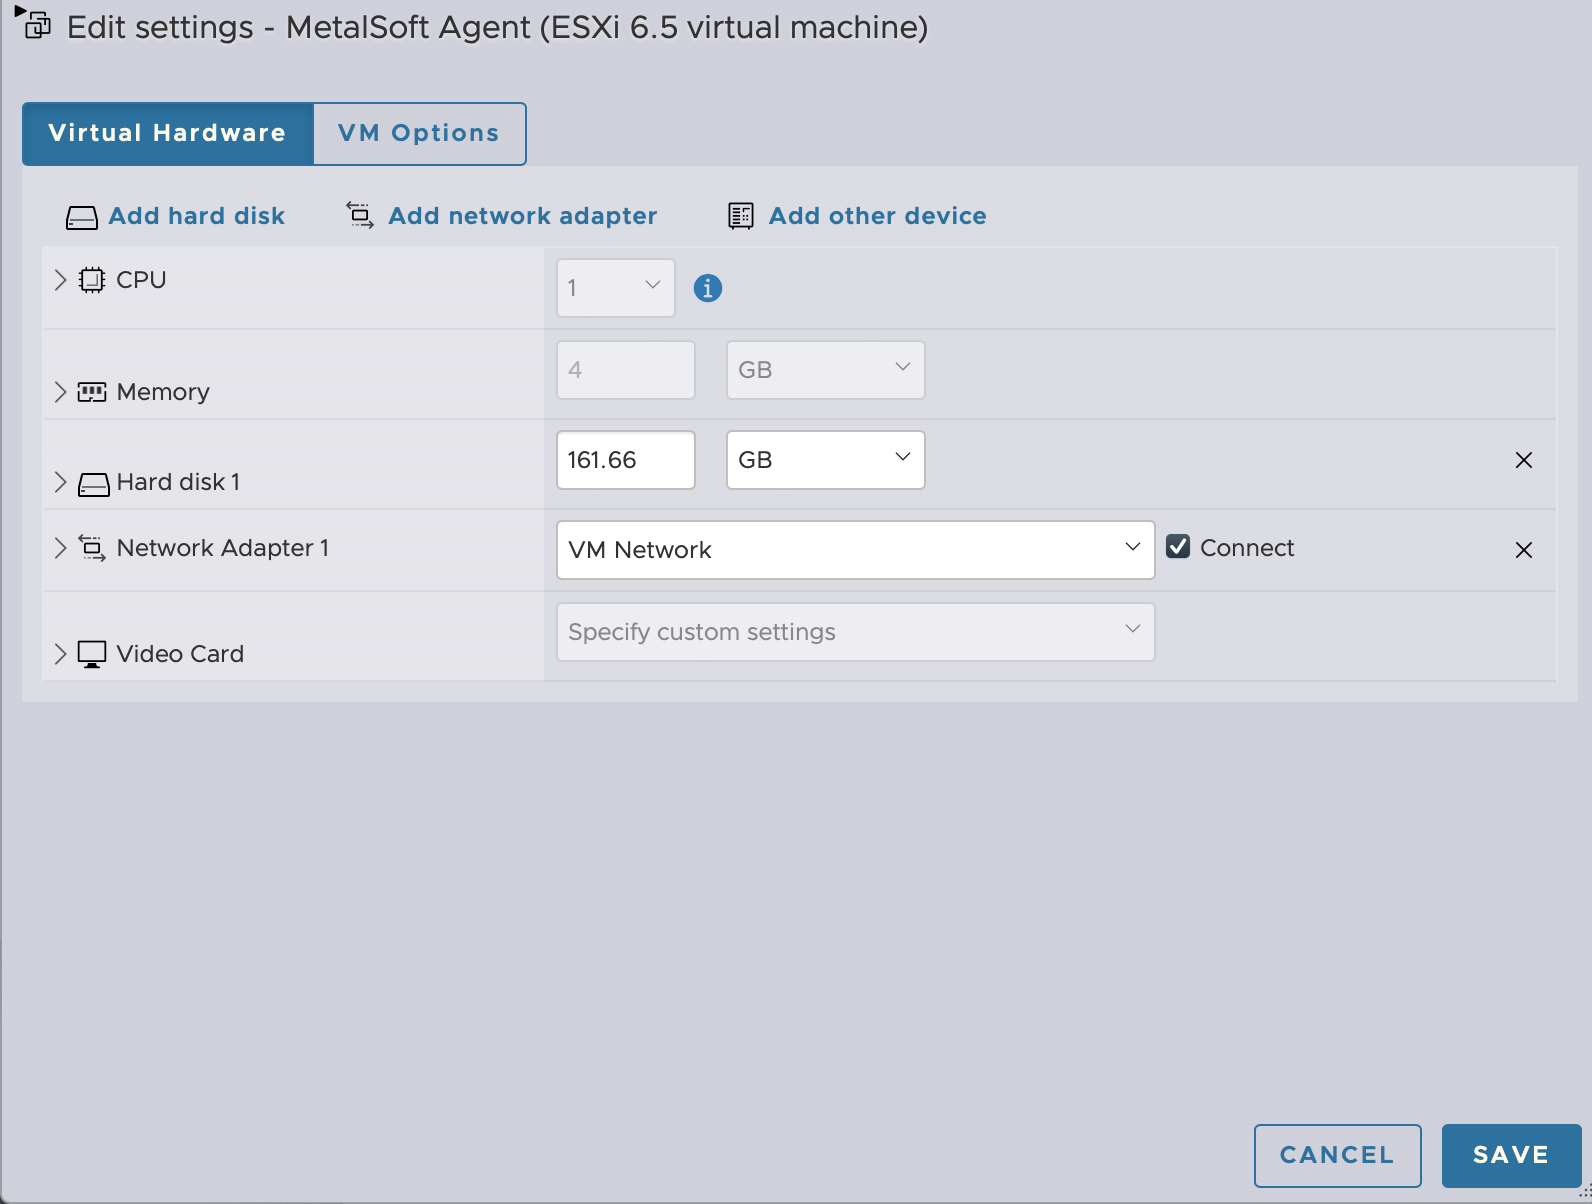
- Ensure that enough resources are provided to the Global Controller (there should be at least: 16 Cores and 32GB RAM):
2. Configure the IP of the Global Controller image
Section titled “2. Configure the IP of the Global Controller image”-
On the ESXi host manager, using the VM console, login into the operating system:
- Username:
root - Password:
MetalsoftR0cks@$@$
- Username:
-
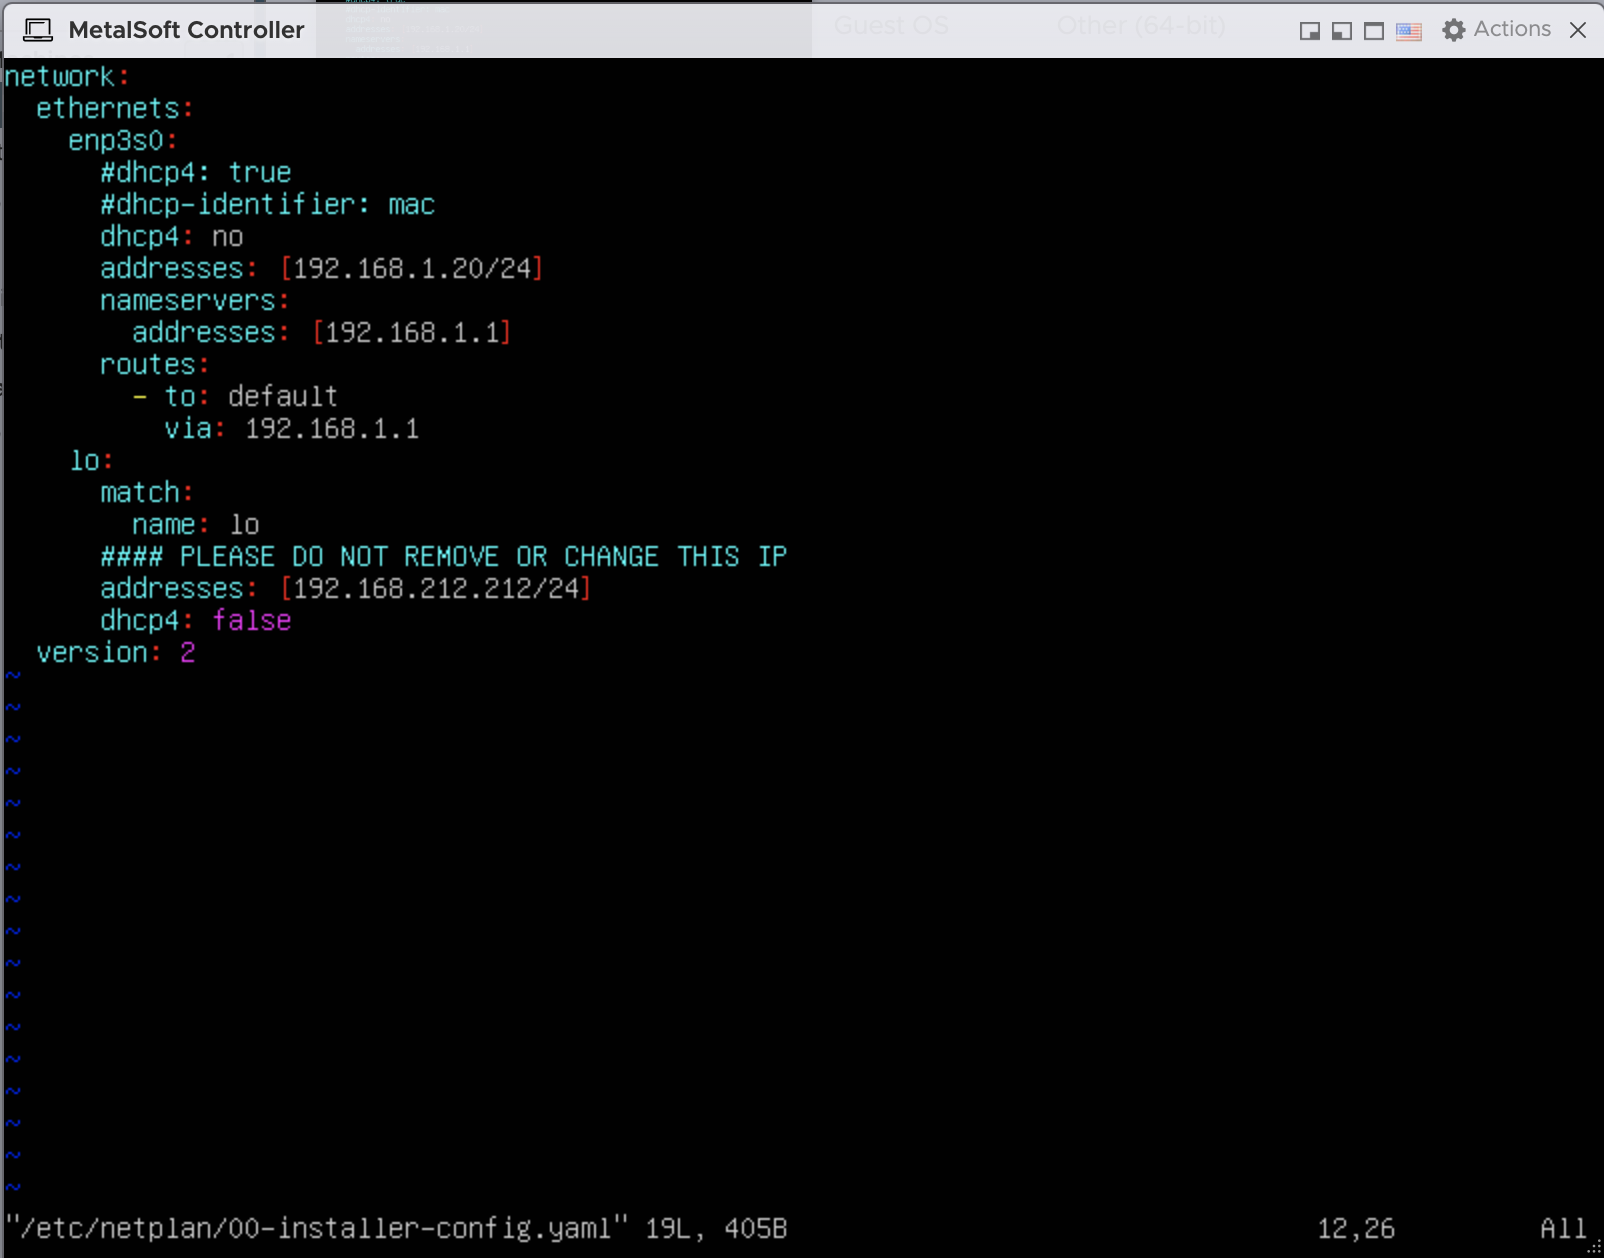
Edit the
/etc/netplan/00-installer-config.yamlfile:- Set the GLOBAL CONTROLLER IP address in the
addressesfield (in this case this is192.168.1.20/24). - Set the gateway into the
routesfield. In my case this is192.168.1.1(careful not to include the/24) - Set the nameserver in the
nameservers/addressesfield. In this case this is192.168.1.1(careful not to include the/24)
- Keep as is the
192.168.212.212IP on the second interface (or a loopback interface) as it is used for internal communication within the controller. - Apply the network configuration with
netplan apply --debug
- Set the GLOBAL CONTROLLER IP address in the
-
Verify that the network stack is correctly configured:
- ping the gateway
ping 192.168.1.1PING 192.168.1.1 (192.168.1.1) 56(84) bytes of data.64 bytes from 192.168.1.1: imp_seq=1 tt1=64 time=0.674 ms
- ping the MetalSoft repo
% ping repo.metalsoft.ioPING repo.metalsoft.io (176.223.248.10) 56(84) bytes of data.64 bytes from 176.223.248.10 (176.223.248.10): imp_seq=1 tt1=62 time=0.621 m
- ping the internal IP
ping 192.168.212.212PING 192.168.212.212 (192.168.212.212) 56(84) bytes of data. 64 bytes from 192.168.212.212: imp_seq=1 tt1=64 time=0.095 ms
If any of the three tests above fail, check your settings, update and try again.
Until the network is correctly configured the kubernetes pods will be down and running
kubectl -n <namespace> get podswould return an error. That is expected. A common error is not having the correct default gateway configured. - ping the gateway
-
Update the IP configuration of the MetalSoft Global Controller
Check if traefik is already configured to use the Main IP:
# kubectl -n <namespace> get svc|grep traefiktraefik-demo-metalsoft LoadBalancer 10.43.231.143 <MainIp> 9091:30464/TCP,80:32757/TCP,443:32109/TCP 4h30mtraefik-demo-metalsoft-udp LoadBalancer 10.43.25.140 <MainIp> 67:30459/UDP,53:31557/UDP 4h30mIf instead of the MainIP you see
<pending>, run the below script (metalsoft-update-k8s-ips) with the appropriate parameters to reconfigure traefik. If you see the MainIP correctly, but you need to reconfigure the agent_ip or proxy, run the below script (metalsoft-update-k8s-ips) again with the appropriate parameters.Run the following command to set the IP of the appliance and that of the Site Controller (
<agent_ip>):metalsoft-update-k8s-ips <controllerip> <agent_ip> [proxyurl]This command also gets an optional proxyurl param at the end if you are accessing the internet via a proxy.
metalsoft-update-k8s-ips 192.168.1.20 192.168.1.10The above command expects kubernetes to be already running. If it fails with an error, please rerun the same command again once all kubernetes pods are running.
-
Update the
hostnameof the MetalSoft Global Controller (Optional, but if you don’t update it, demo.metalsoft.io will be used):
Before changing the hostname, you must first create a certificate for the new hostname.  Here's an example for creating a self signed certificate:
openssl req -x509 -nodes -days 365 -newkey rsa:2048 \-keyout ssl_key.pem -out ssl_crt.pem \-subj "/C=US/ST=State/L=City/O=Organization/OU=Unit/CN=example.com"
# metalsoft-update-k8s-hostnameUsage: metalsoft-update-k8s-hostname newHostname.com [path_to_ssl_key.pem path_to_ssl_crt.pem] [path_to_ca_ssl_crt.pem]MS_SSL_KEY & MS_SSL_CRT env variables can be used instead of PEM files to provide base64 encoded key and crtMS_MANIFESTS_FOLDER env variable can optionally be used to specify the manifests folder. Default is: /root/manifests-
Check that all the pods are running (optional):
Depending on the resources allocated to the Controller VM, kubernetes will need some time to start all the pods.
kubectl -n <namespace> get podsNote: The Global Controller tries to self-heal when it sees pods in a non-Running state for a long time. If you need to disable it, create an empty file:
/etc/.ms_no_selfhealK8S ng-metal root@k8s01: /opt/metalsoft/manifests/ng-qa $ kubectl -n <namespace> get podsNAME READY STATUS RESTARTS AGEauth-7f86d9555-ltnwp 1/1 Running 0 41hcouchdb-76549b7fb9-4mtjh 1/1 Running 0 39heli-67ff8dcd7f-ldt9l 1/1 Running 0 6d20hextensions-d4696cc46-9fncx 1/1 Running 0 3d22hgateway-api-9694f6c49-f4hf5 1/1 Running 0 39himage-builder-67bb6cb565-zw92w 1/1 Running 0 41hinventory-58f9d6cbf-dm9ng 1/1 Running 0 41hipam-5d694c5c7-z5lmg 1/1 Running 0 6d20hkafka-76b5f88f97-tr89p 1/1 Running 0 6d20hlicense-6756cccbf9-jn7zb 1/1 Running 0 2d19hmetalsoft-docs-6ff6575f87-8kzw8 1/1 Running 0 39hms-tunnel-6fff874d7c-qdk5z 1/1 Running 0 3d15hmysql-869897f8f4-k52sd 2/2 Running 0 38hnetwork-microservice-6cd5f54649-2d8sq 1/1 Running 1 6d20hnotification-microservice-6d85cb7ddf-tfz6p 1/1 Running 0 39horchestrator-765657cb7b-5pjx4 1/1 Running 0 38hpdns-678f8fbd78-pbq8n 1/1 Running 0 6d20hredis-74d7b74cdf-9rmbp 1/1 Running 0 6d20hrepo-7cd6b4595f-qfqnj 1/1 Running 0 6d20hservers-6d9789d46b-rqqtx 1/1 Running 0 38hstorage-b698c4fb5-vrt7f 1/1 Running 0 41hswitch-6864d57896-9584r 1/1 Running 0 25htemplate-7555884ff6-8tfv5 1/1 Running 0 41htraefik-eveng-qa02-metalcloud-79cd85fc-glmrp 1/1 Running 0 38hui-admin-8b84d7857-f9j6j 1/1 Running 0 2d20hui-customer-5ff6bc6b4b-499x6 1/1 Running 0 10hvm-microservice-6b5c8b544d-ptcjv 1/1 Running 0 41hzookeeper-dbd4c566f-9nwzm 1/1 Running 0 6d20h
3. Setup a hosts file entry or a DNS record
Section titled “3. Setup a hosts file entry or a DNS record”To access the Global Controller add an entry into your host ‘hosts’ file:
- Linux & MAC:
/etc/hosts - Windows:
%WINDIR%\System32\Drivers\etc\hosts
Add an entry:
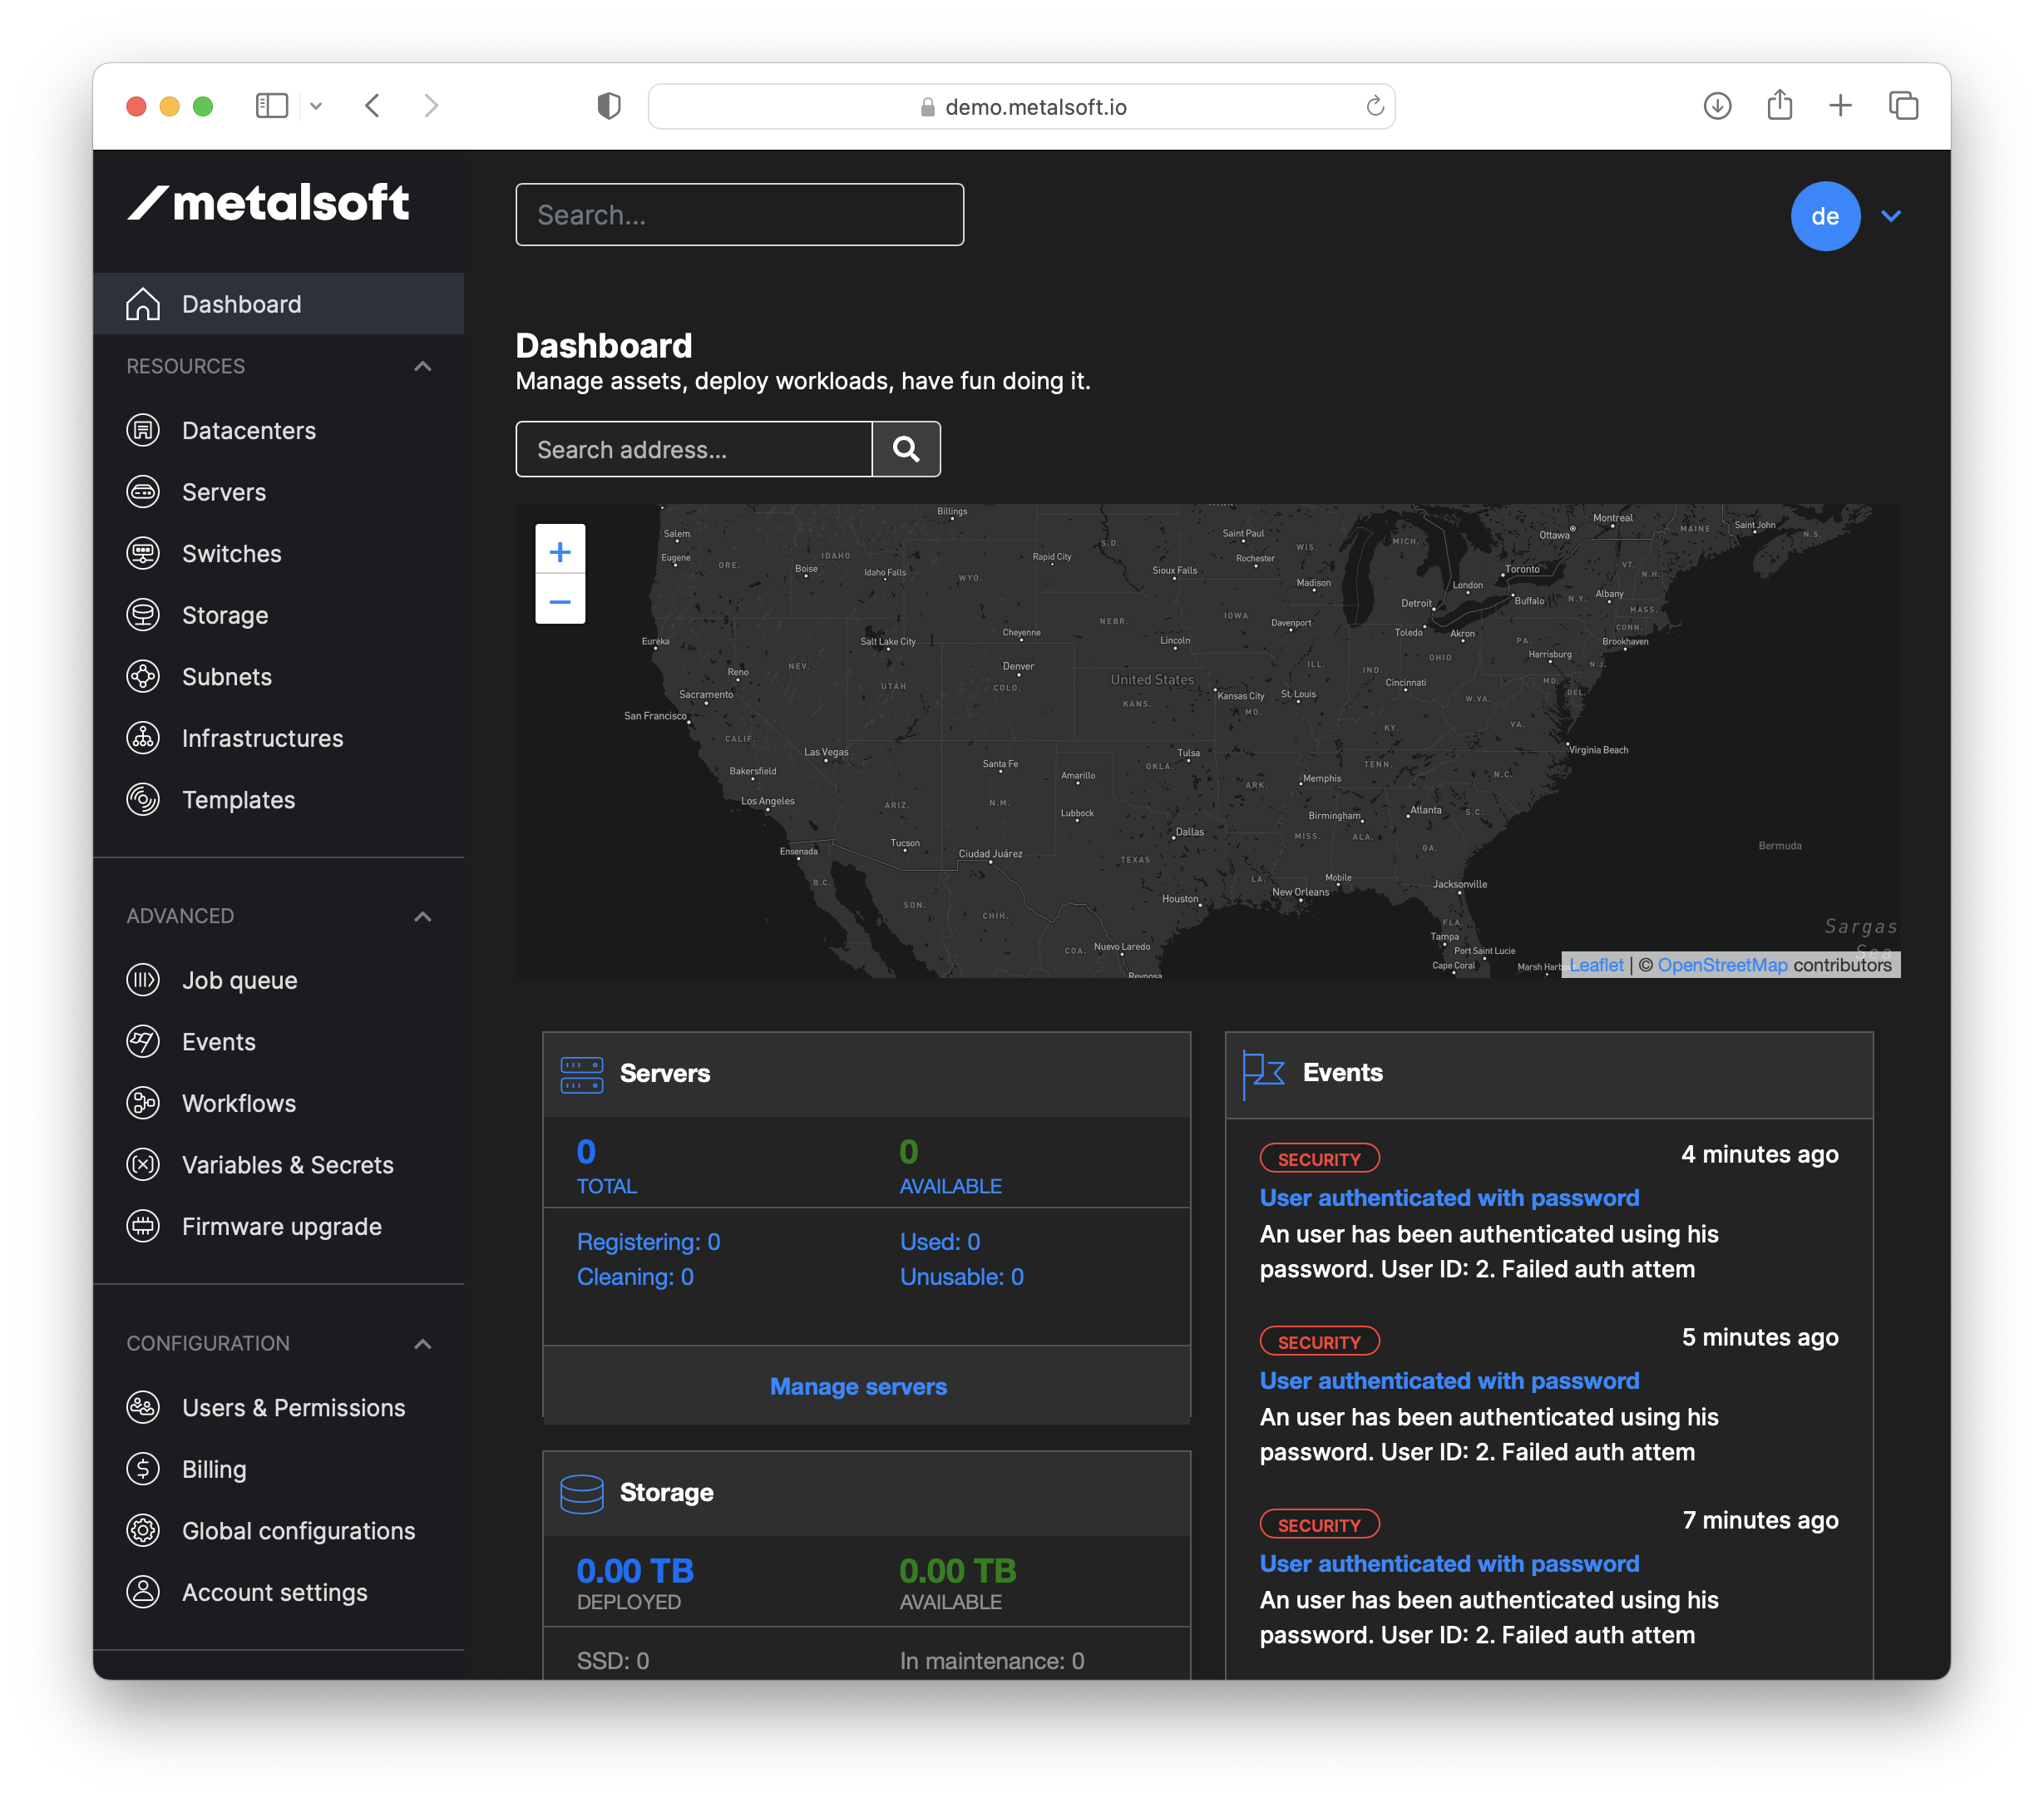
192.168.1.20 demo.metalsoft.io4. Access the Global Controller
Section titled “4. Access the Global Controller”The Global Controller is now available at:
- URL: https://demo.metalsoft.io
- username:
admin@local.host(This initial admin username can be found inmanifests/license-deployment.yaml) - password:
ui-admin-initial-password(This initial admin password can be found inmanifests/license-deployment.yaml)
Installing & configuring the Site Controller VM
Section titled “Installing & configuring the Site Controller VM”- Use the Create VM button:
- Create a VM from an OVF for the Site Controller:
- Wait until it is uploaded and the image created:

- Ensure that enough resources are provided to the Site Controller (there should be at least: 4 Cores and 8GB RAM):
Configure the IP of the Site Controller
Section titled “Configure the IP of the Site Controller”-
On the ESXi host, using the Site Controller VM console, login using the following credentials:
- Username:
root - Password:
MetalsoftR0cks@$@$
- Username:
-
Edit the
/etc/netplan/00-installer-config.yamlfile:- Set the SITE CONTROLLER IP address in the
addressesfield (in my case this is192.168.1.10/24). - Set the gateway into the
routesfield. In my case this is192.168.1.1(careful not to include the/24) - Set the nameserver in the
nameservers/addressesfield. In my case this is192.168.1.1(careful not to include the/24). This should point to the internal nameserver for air-gapped env. - Apply the network configuration with
netplan apply --debug
- Set the SITE CONTROLLER IP address in the
**If the hostname of the Global Controller was changed, skip step 1 below for connecting to the Global Controller, instead follow the instructions here to re-configure the site controller:
Connecting the Site Controller to the Global Controller
Section titled “Connecting the Site Controller to the Global Controller”The Site Controller is now ready to connect to the Global Controller. Follow the following steps to connect it:
-
On the Site Controller VM set the CONTROLLER IP to which the Site Controller will connect to:
metalsoft-update-controller-ip 192.168.1.20 #note the Global Controller IP not the Site Controller ip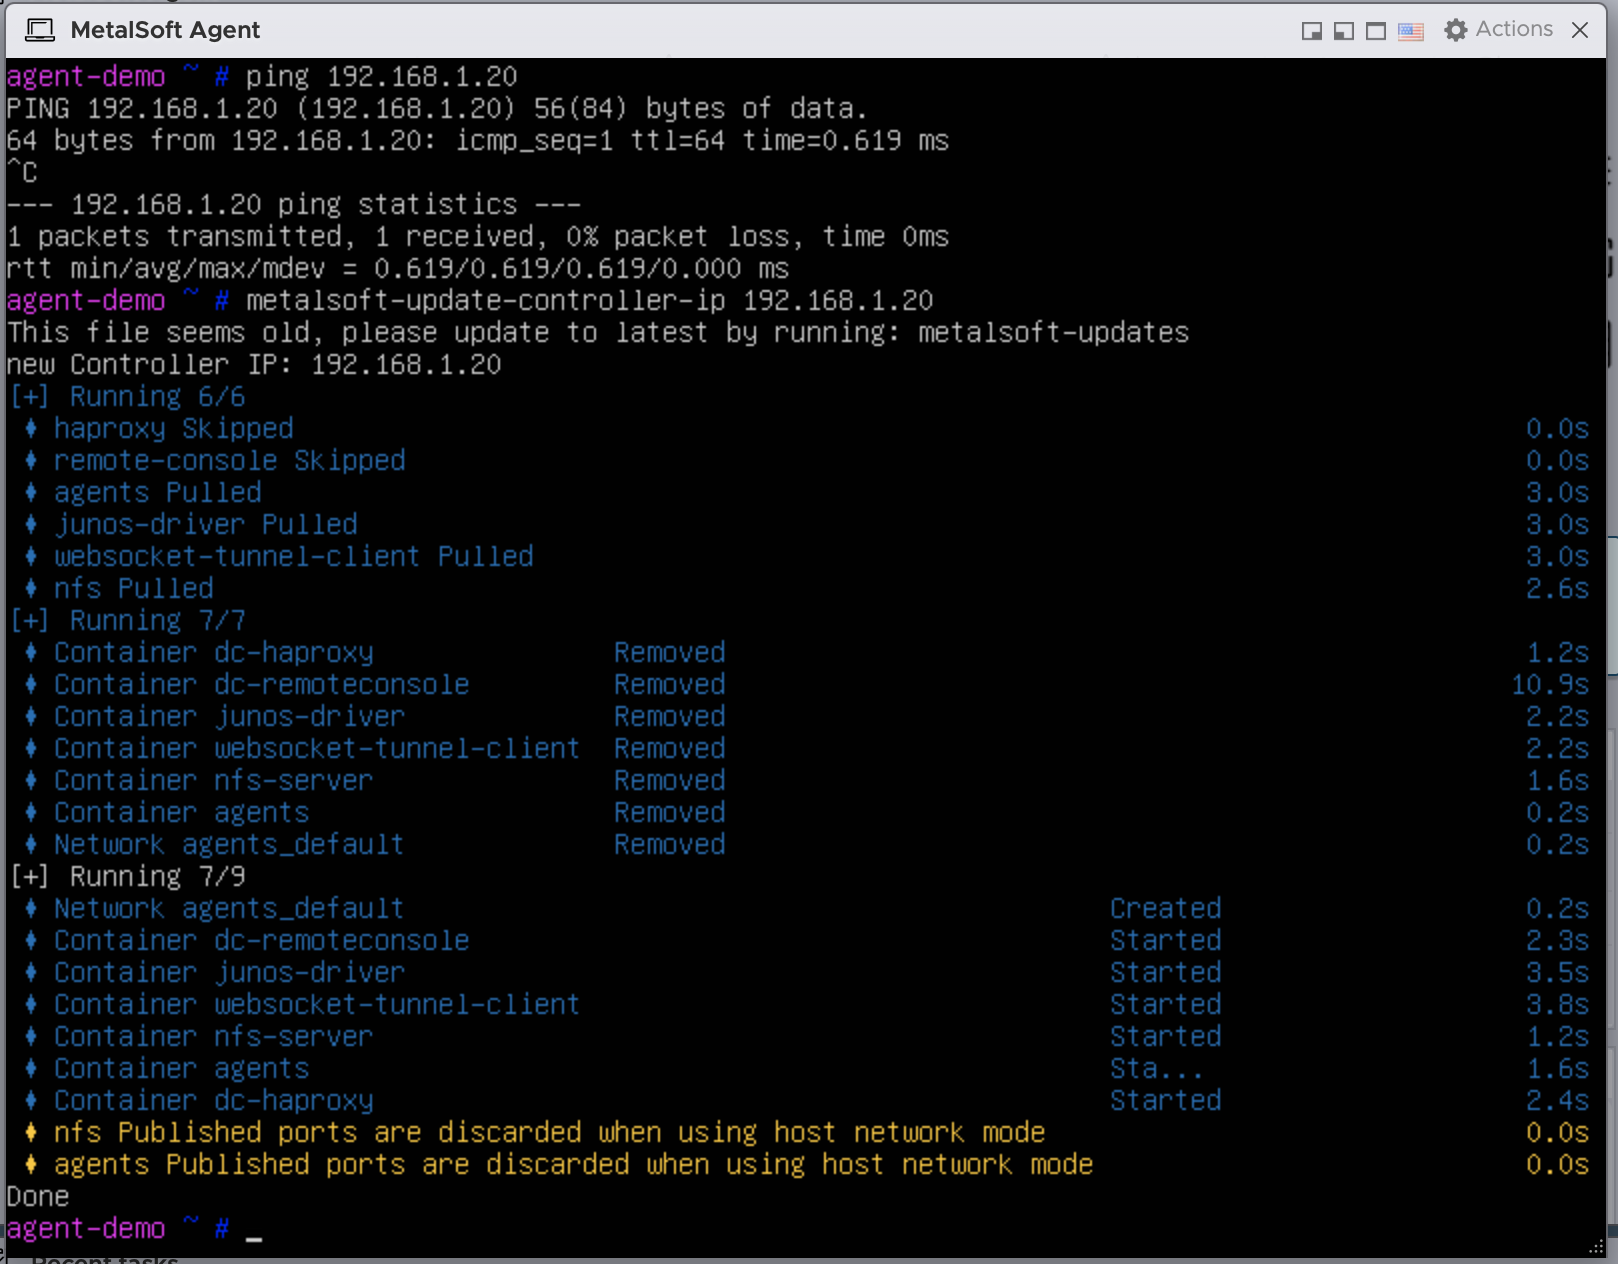
-
Check that the Site Controller is connected to the Global Controller
-
In the Global Controller navigate to the Sites section and click on the first site:
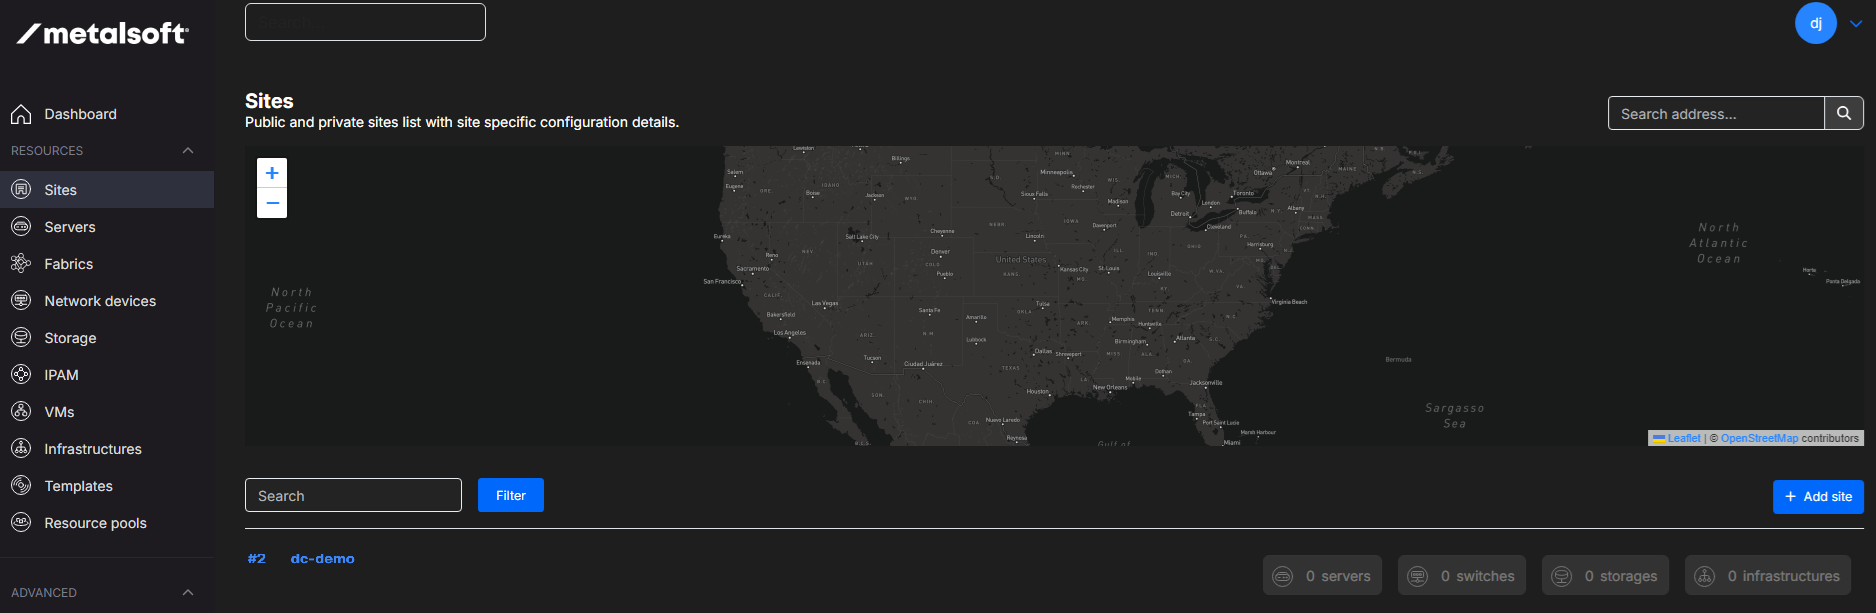
-
In the site details page go to the Site controllers tab and check if the agents are connected:
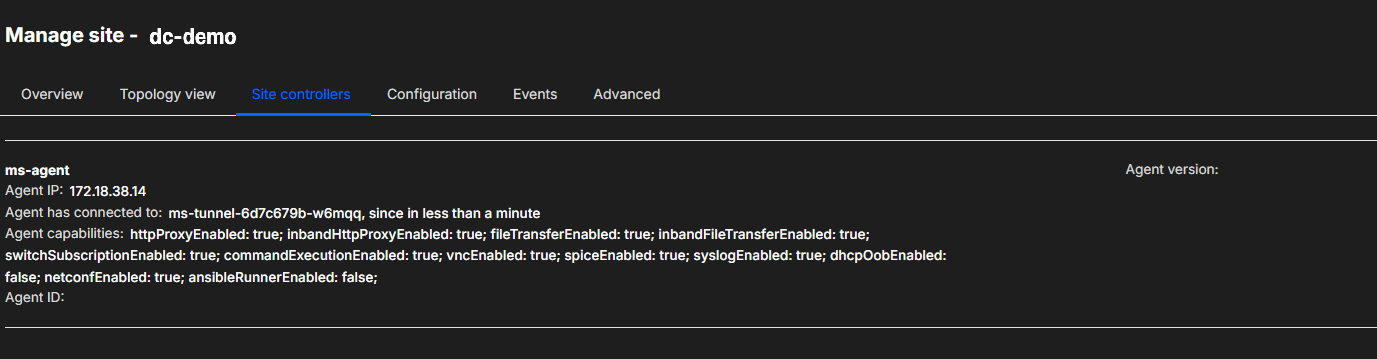
If you see the correct agent microservices connected you are ready to start registering switches and servers.
-
Next steps
Section titled “Next steps”For more information consult: Consult the following for more information:
Restricted internet access
Section titled “Restricted internet access”The Global Controller needs access to the MetalSoft repository as well as the official Kubernetes repositories to pull updates. If restricted access to the internet is required follow the following guides for details:
Restarting the agents
Section titled “Restarting the agents”If you need to restart the agents for any reason you can do so by logging into the agent vm and going to:
cd /opt/metalsoft/agentsdocker compose downdocker compose up -d
# or use the following alias:dcrestart
To see the logs of the agents run:
tail -f /opt/metalsoft/logs/*