Switch replace
To replace a failed switch use the following procedure:
Switch with ZTP support
Available since 6.3.2 Currently only supported on Dell Enterprise SONiC switches.
Go to the failed switch page Network devices > failed switch > Advanced.
Set the failed switch in failed mode by clicking the “Available” button on the top right and select “Failed”.
Remove the existing switch from the rack
Add the new switch in and reconnect all cables
The new switch will be registered using the ZTP process or via the UI/CLI like any other switch. Make a note of the new switch ID.
Go to the failed switch page Network devices > failed switch > Advanced.
Select the new switch from the dropdown.
Click the Switch replace button
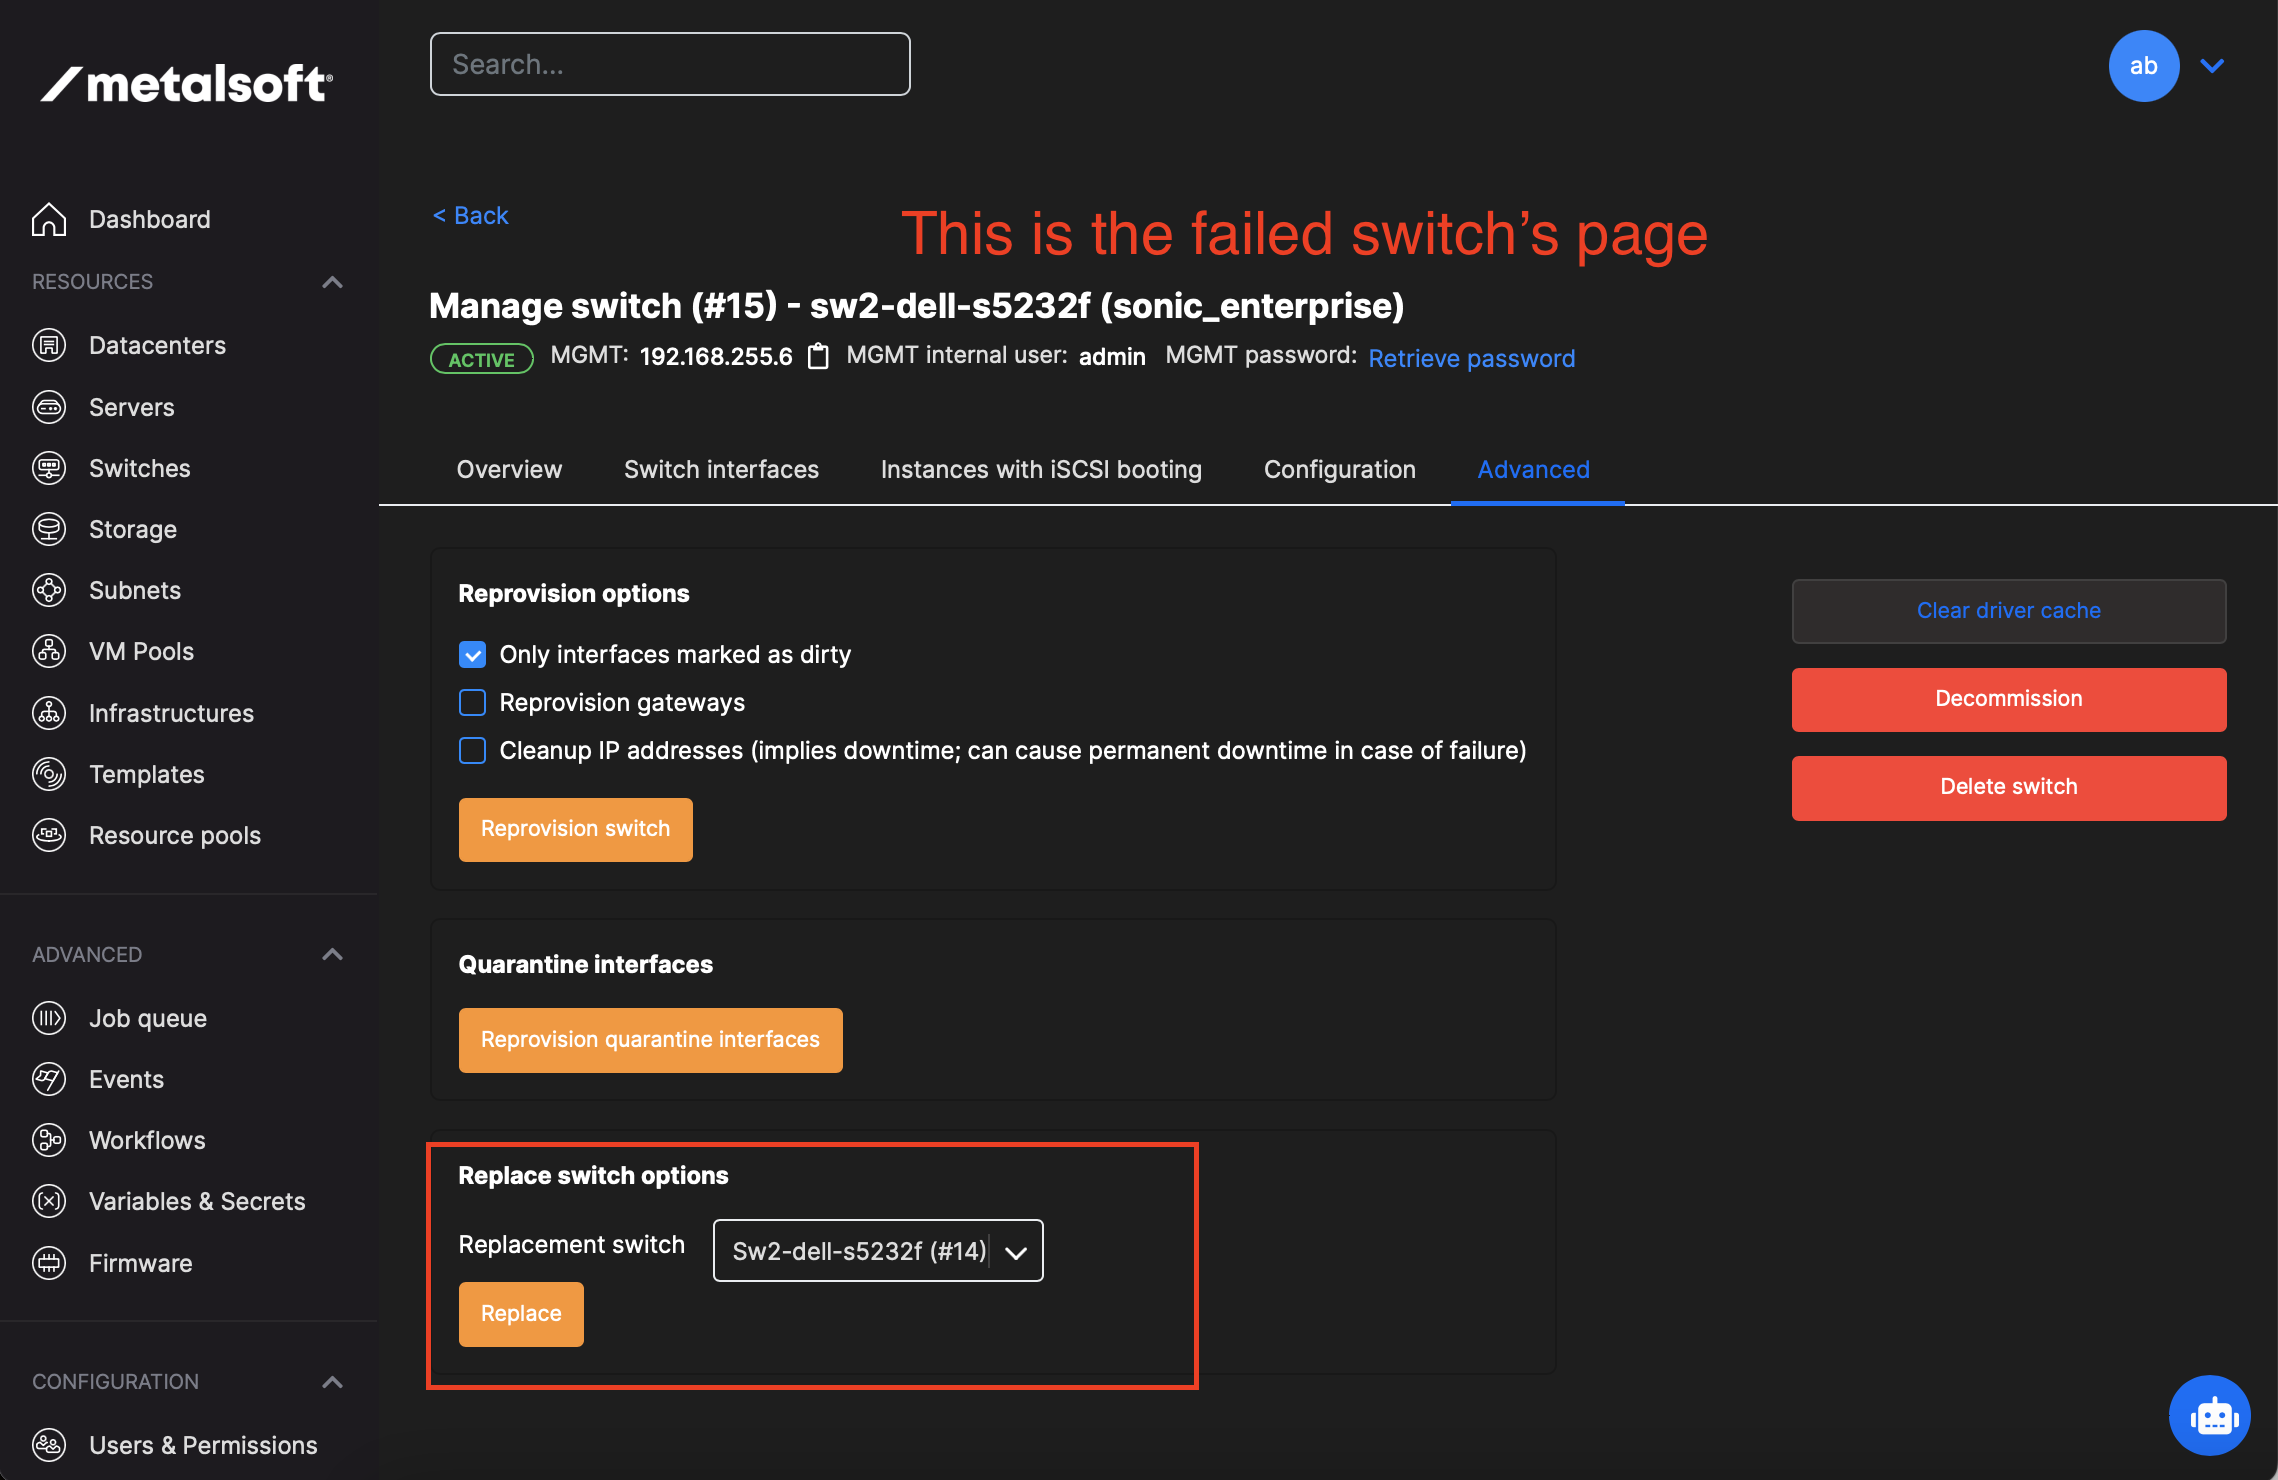
The process verifies the new switch has the same parameters as the failed one and then moves all connections from the failed switch to the new switch.
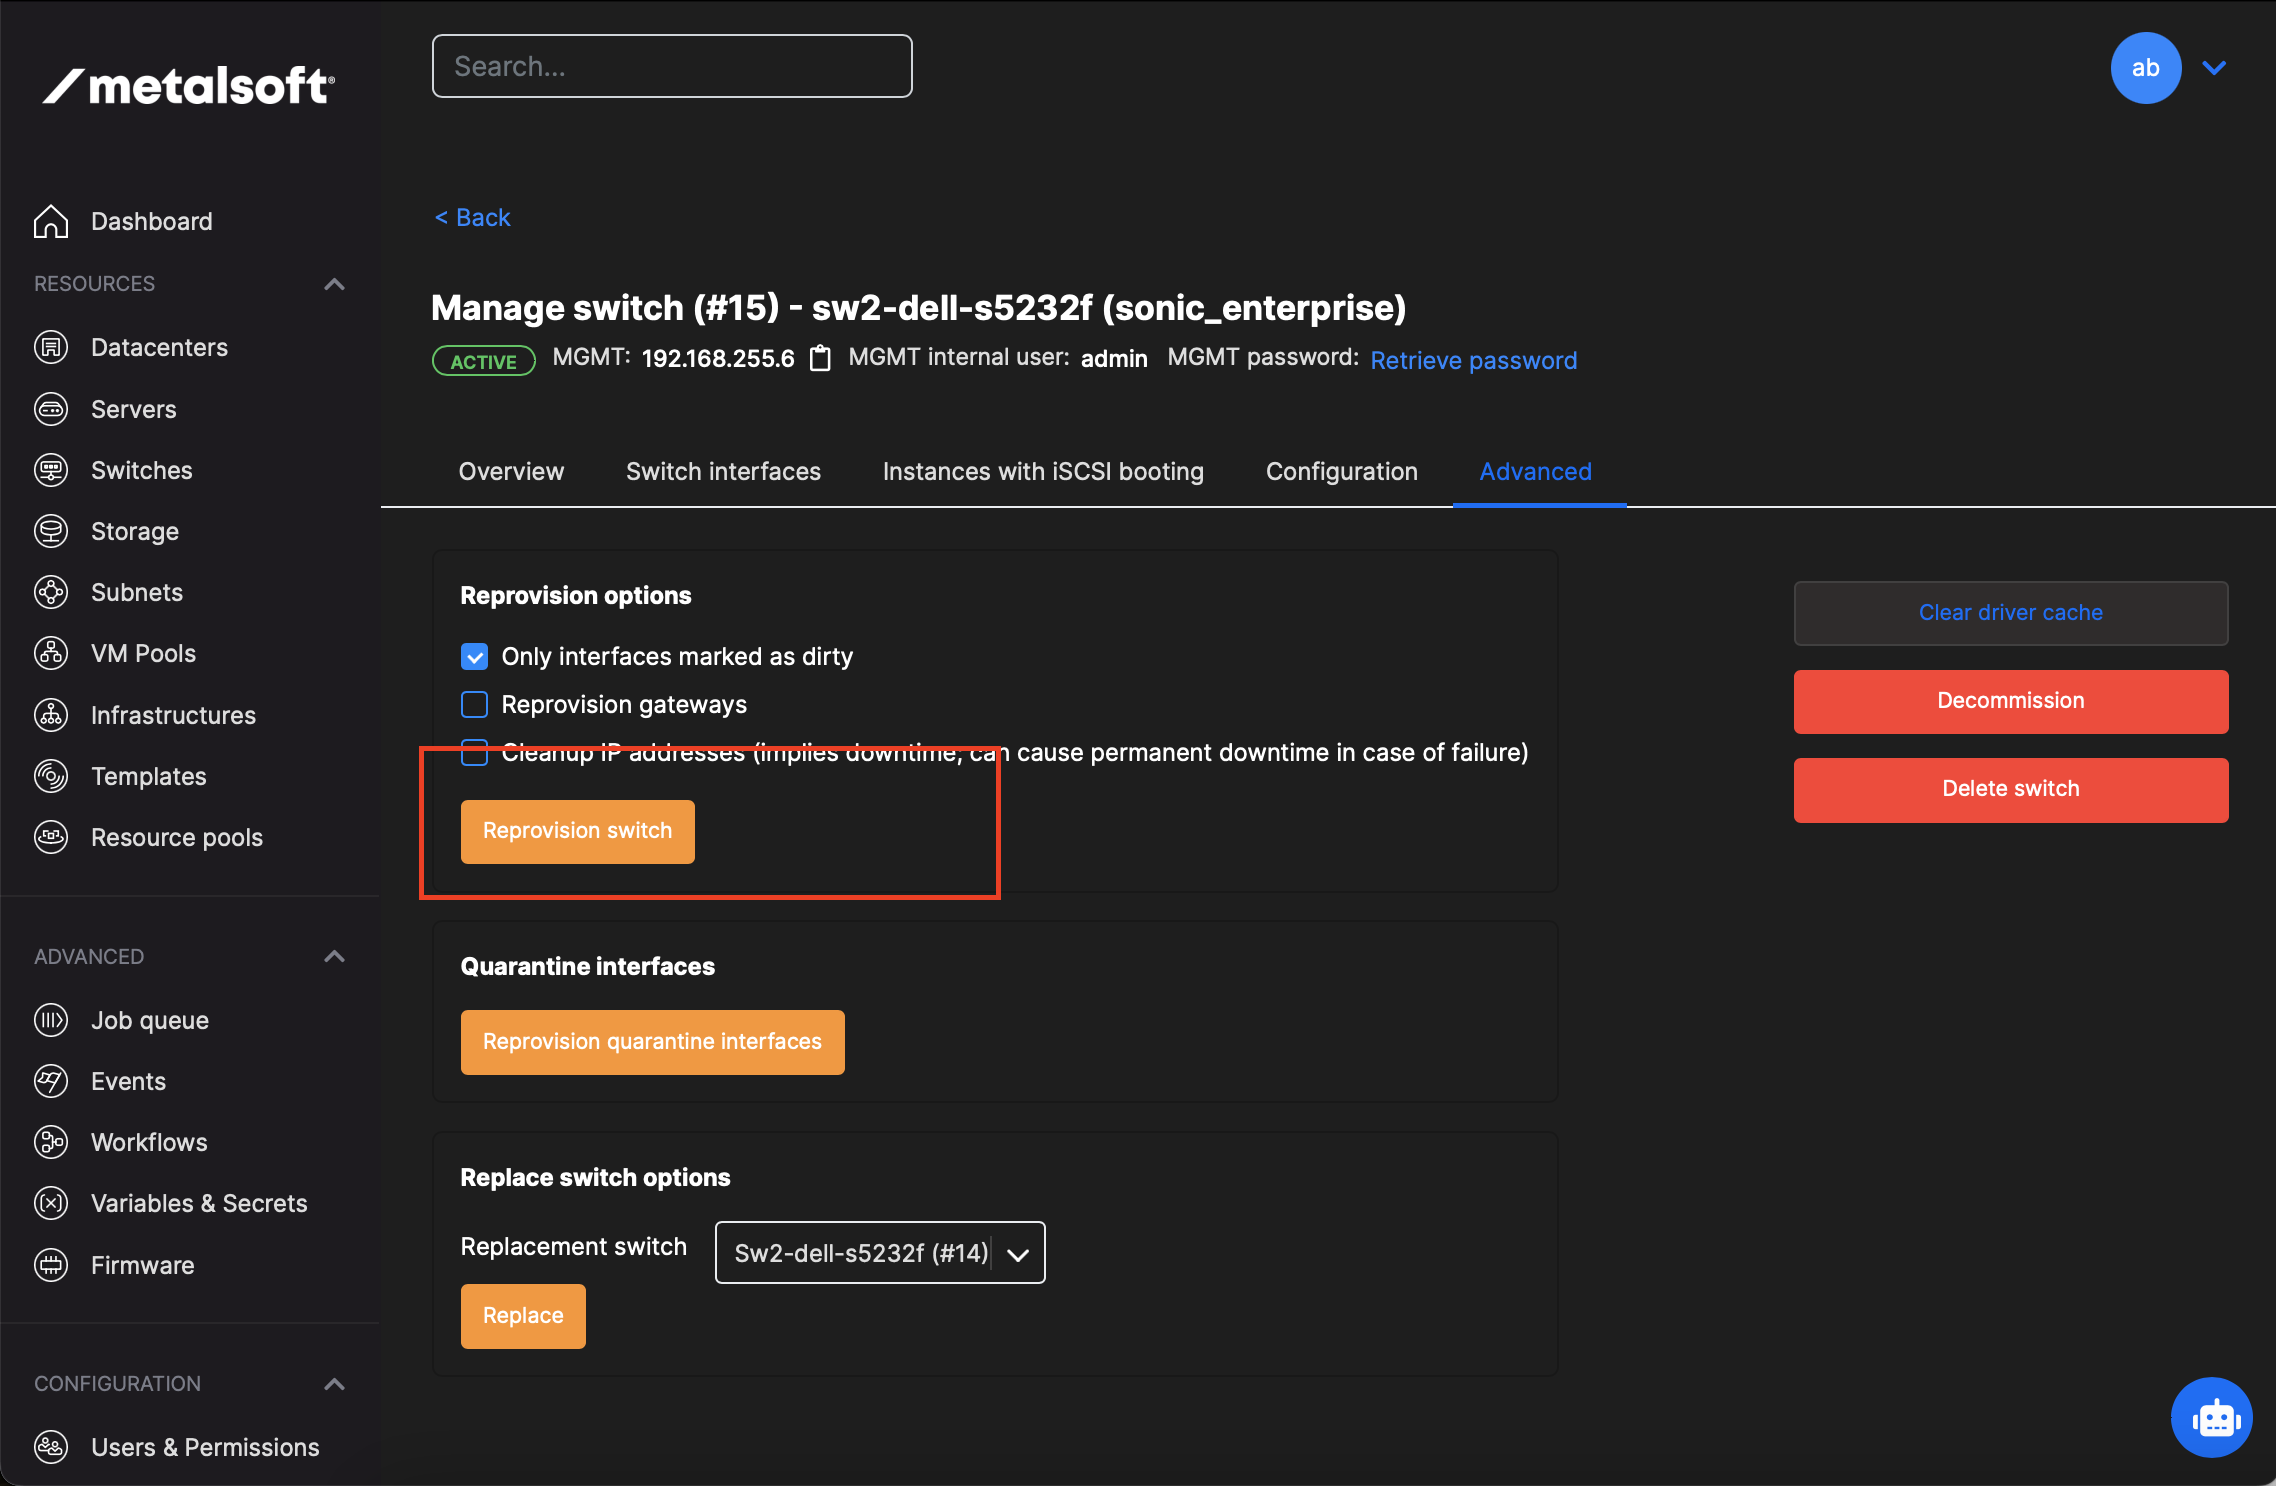
Click the “reprovision switch” function on the page of the new switch to recreate the configuration on the new switch.
The new switch is now fully functional and registered in MetalSoft. The old switch record remains in failed state and can be decommissioned or deleted.
Switch without ZTP support
Go to the failed switch page Network devices > failed switch > Advanced.
Retrieve the credentials
Remove the existing switch from the rack
Add the new switch in and reconnect all cables
Manually configure the new switch using the console so it uses the failed switch credentials
Upload a backup of a running config or configure the minimum configuration required (BGP sessions etc)
Click the switch reprovision button
The new switch is now fully functional and registered in MetalSoft.