Adding a new Endpoint
Endpoints allow network provisioning without touching the endpoint devices and are also useful in other “brownfield” situations where existing devices must be “imported” while in operation.
These endpoint records will be used by end-users to represent the endpoints under their control and allow them to define the desired network configuration.
Adding a new endpoint using the UI
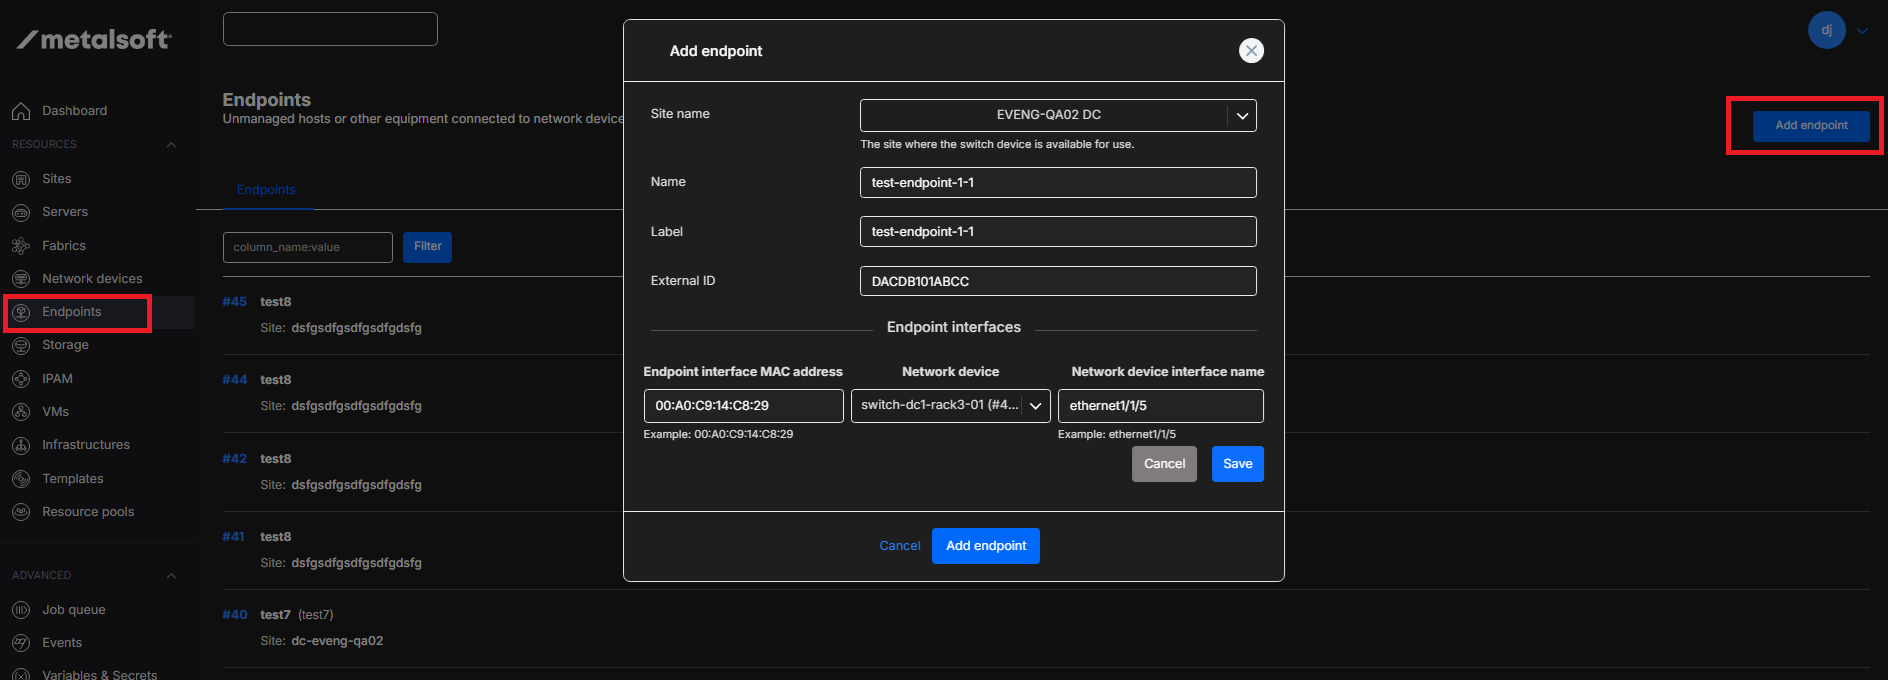
Navigate to the Endpoints section > Add Endpoint.
Select the Site
Chose a name for the Endpoint.
Chose a label for the Endpoint.
Fill in the External ID. This must be unique within a site (for example, if a server, you can enter the serial number)
Click on
New interfaceand fill out the Endpoint MAC address, select theNetwork devicefrom the dropdown and enter thenetwork device interface nameand click onSave. Repeat to add more interfaces. A dummy, (but correct) MAC can be used if the MAC address is not important.Click on
Add endpointonce complete.
The endpoint is now in “available” mode. To use it in an infrastructure use the regular instance array create form and select the Server Type that was used when creating the endpoint. This will allow the user to specify which endpoint they want to use.
Adding a new endpoint via the CLI
Adding a new endpoint to an infrastructure using the UI
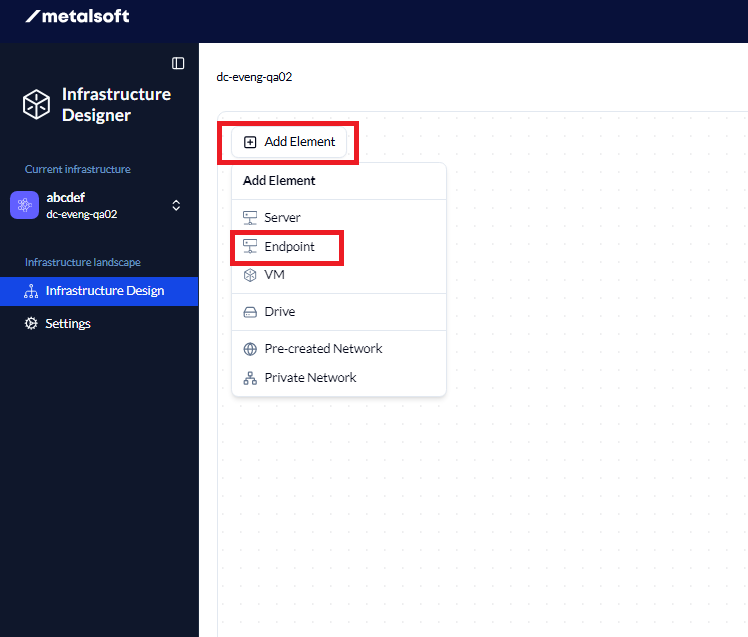
Open the Infrastructure Designer and click on Add Element and click on Endpoint
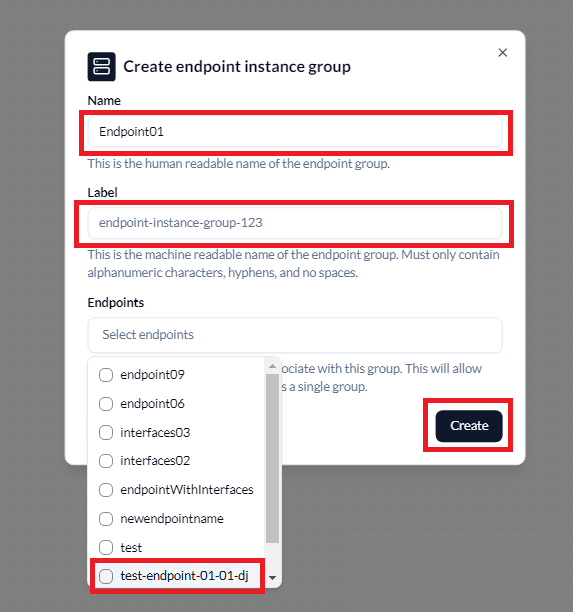
 Fill in the Name and Label (Label needs to be unique) if required and click on
 Endpoints to show the endpoints.
Click on the required Endpoint and click on Create
Add either a Pre-created Network or Private Network and drag the connection from the Endpoint to the network and fill in the network connection information and click Connect
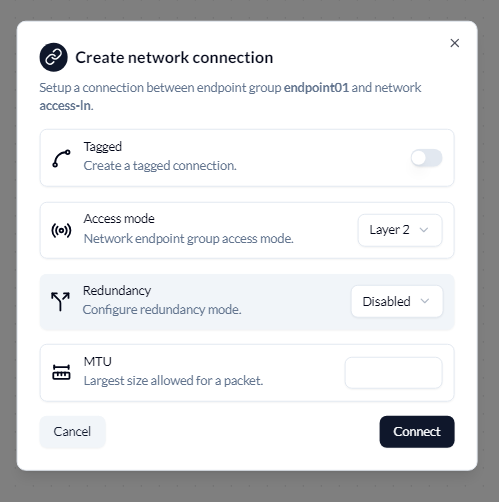
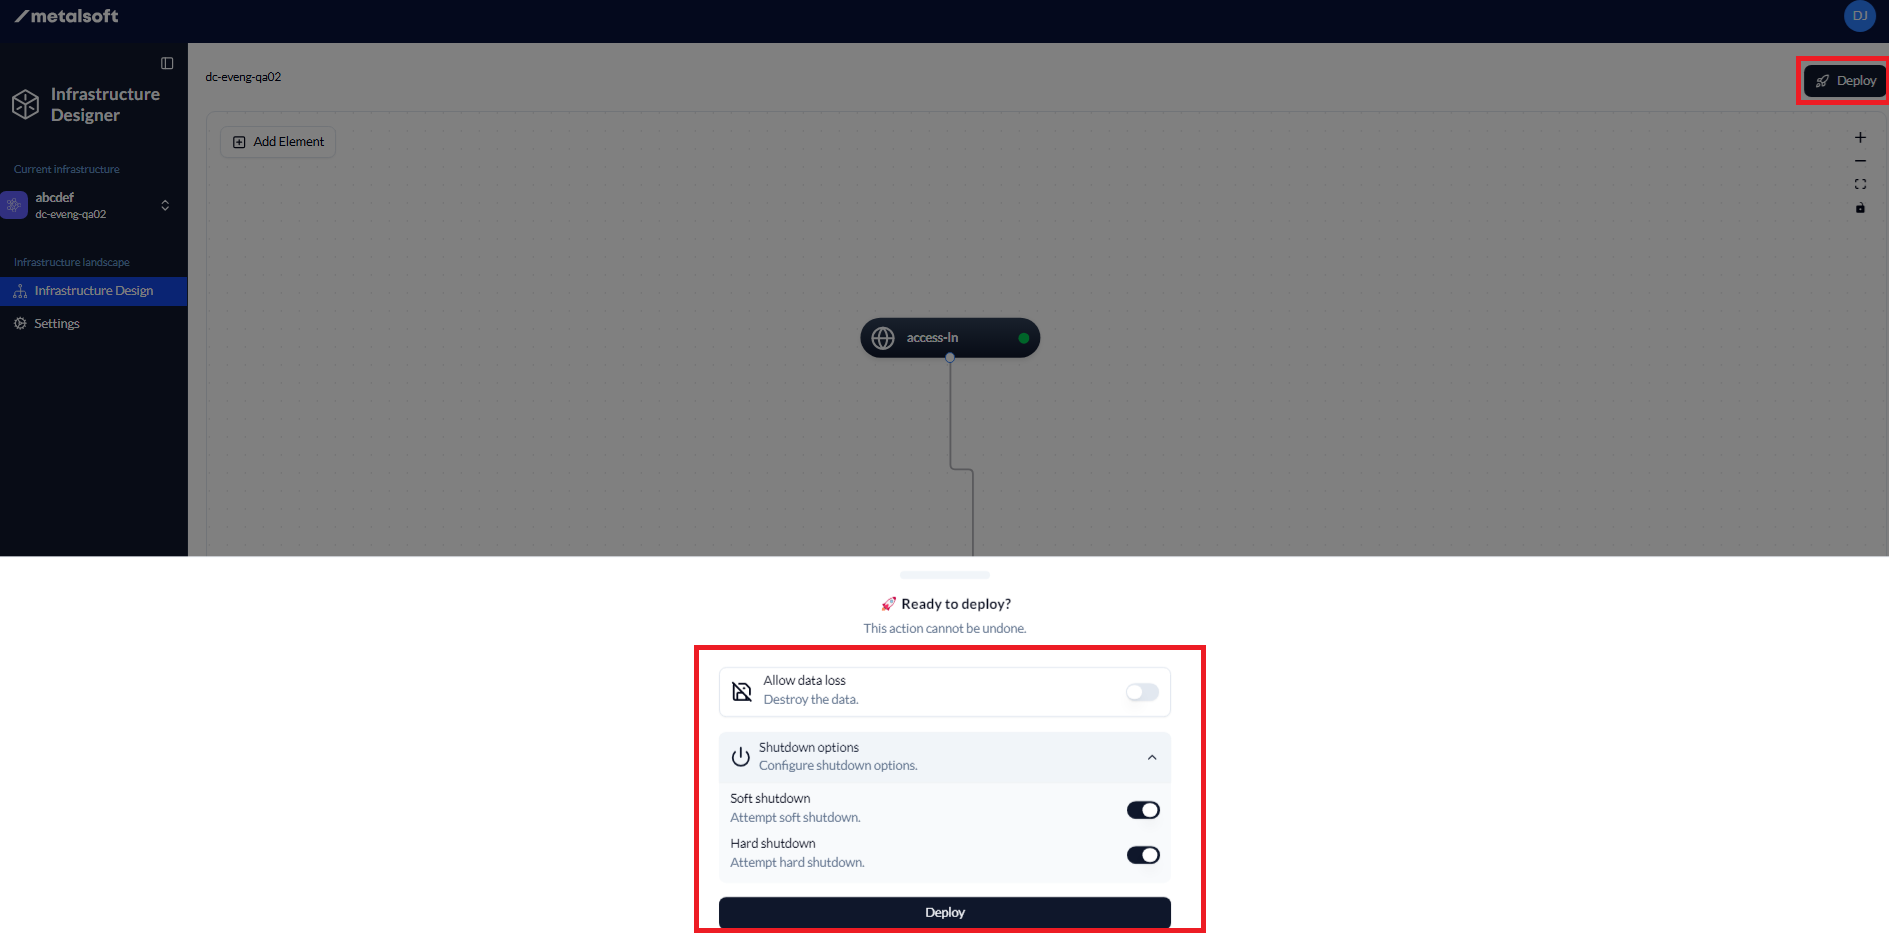
This will create the connection from the endpoint to the network. Click on Deploy, then select the options from the pop up box at the bottom and click Deploy once complete
To add Access Control Lists, please follow these instructions these instructions