Tutorial: Switch only operation with Dell Enterprise SONiC in GNS3
This tutorial will walk you through the steps needed to build up a topology in GNS3 and use MetalSoft to control the fabric.
Prerequisites
For this tutorial you will need a working CLI setup.
The tutorial doesn’t use ZTP due to complications with L2 setups on laptops thus the switch needs to be already configured with:
Management interface
In addition, if EVPN is used the following must be configured:
A VTEP interface
A ASN
A Loopback interface
And provided below to the switch as configuration.
Download and install the Site Controller OVA
Site Controller OVA: 4 cores, 8GB RAM
click import in VMWare fusion
Click Finish
Wait until the VM booted up and login to the VM
Username:
rootPassword:
MetalsoftR0cks@$@$
DHCP is enabled by default. If necessary edit the netplan /etc/netplan/00-installer-config.yaml file (OS is Ubuntu) to suit your needs.
Configure the Site Controller
create a file such as
local-dc.yaml. Most of the settings can be left as they are. Modify just theBSIMachinesSubnetIPv4CIDR,BSIVRRPListenIPv4andBSIMachineListenIPv4Listto match your Site Controller’s IP.BSIMachinesSubnetIPv4CIDR: 192.168.1.11/24 BSIVRRPListenIPv4: 192.168.1.11 BSIMachineListenIPv4List: - 192.168.1.11 BSIExternallyVisibleIPv4: 209.43.59.203 repoURLRoot: http://<repo> repoURLRootQuarantineNetwork: http://<repo> SANRoutedSubnet: 100.96.0.0/16 NTPServers: - 45.55.58.103 DNSServers: - 1.1.1.1 - 8.8.8.8 KMS: 84.40.58.70:1688 TFTPServerWANVRRPListenIPv4: 10.73.252.10 dataLakeEnabled: false latitude: 41.8426112 longitude: 87.6695329 serverRegisterUsingGeneratedIPMICredentialsEnabled: false serverRegisterUsingProvidedIPMICredentialsEnabled: true switchProvisioner: LAGRanges: - 5-25 LANVLANRange: 400-450 MLAGRanges: - 26-27 SANVLANRange: 300-399 WANVLANRange: 100-199 allocateDefaultLANVLAN: true allocateDefaultSANVLAN: false allocateDefaultWANVLAN: true leafSwitchesHaveMLAGPairs: false preventCleanupForVLANs: - 301 - 1602 preventCleanupForVLANsFromExternalConnectionUplinks: - 301 - 1602 preventUsageOfVLANs: - 301 - 1602 quarantineVLANID: 5 storageHasSeparateFabric: false type: EVPNVXLANL2Provisioner zeroTouchRegistrationEnabled: true enableTenantAccessToIPMI: false allowVLANOverrides: true allowNetworkProfiles: true enableServerRegistrationStartedByInBandDHCP: false extraInternalIPsPerSubnet: 0 extraInternalIPsPerSANSubnet: 0 serverRAIDConfigurationEnabled: true webProxy: ip: 10.73.252.10 port: 3128 isKubernetesDeployment: false allowInstanceArrayFirmwarePolicies: false provisionUsingTheQuarantineNetwork: true enableDHCPRelaySecurityForQuarantineNetwork: false enableDHCPRelaySecurityForClientNetworks: false enableDHCPBMCMACAddressWhitelist: true dhcpBMCMACAddressWhitelist: - 6C:2B:59:7C:0F:D3 - CC:48:3A:09:EB:97 defaultServerCleanupPolicyID: 0 defaultDeploymentMechanism: virtual_media defaultCleanupAndRegistrationMechanism: bmc NFSServer: 172.18.38.38 Option82ToIPMapping: {} flags: ""
Run
datacenter create:% metalcloud-cli datacenter create --config local-dc.yaml --format yaml --id local-dc-1 --title "Local DC 1"
Get the datacenter auth URL
metalcloud-cli datacenter get --id local-dc-1 --return-config-url
https://us05.metalsoft.io/api/url?rqi=br._mJHHCUMW7I1kwwNjYNh3HWcpwwvfwVo7RKlQVLGn9PbElV_hxvDq4CE79bFrw70MYmANJmtorHvwupXZG2OWTNm5Eszg84QVq5z8Cm19qU&v=YojW5IXpEARy6VA4_EUHNw&filename=datacenter.json&datacenter_name=local-dc-1
SSH into the Site Controller using the following username and pass:
Username:
metalsoftPassword:
MetalsoftR0cks@$@$
ssh -l metalsoft <IP>
Check if the Site Controller agents are now connected

Import MetalSoft VM into GNS3
This example uses GNS3 version 2.2.33.1 but should apply to all GNS3 versions
Create a GNS3 project
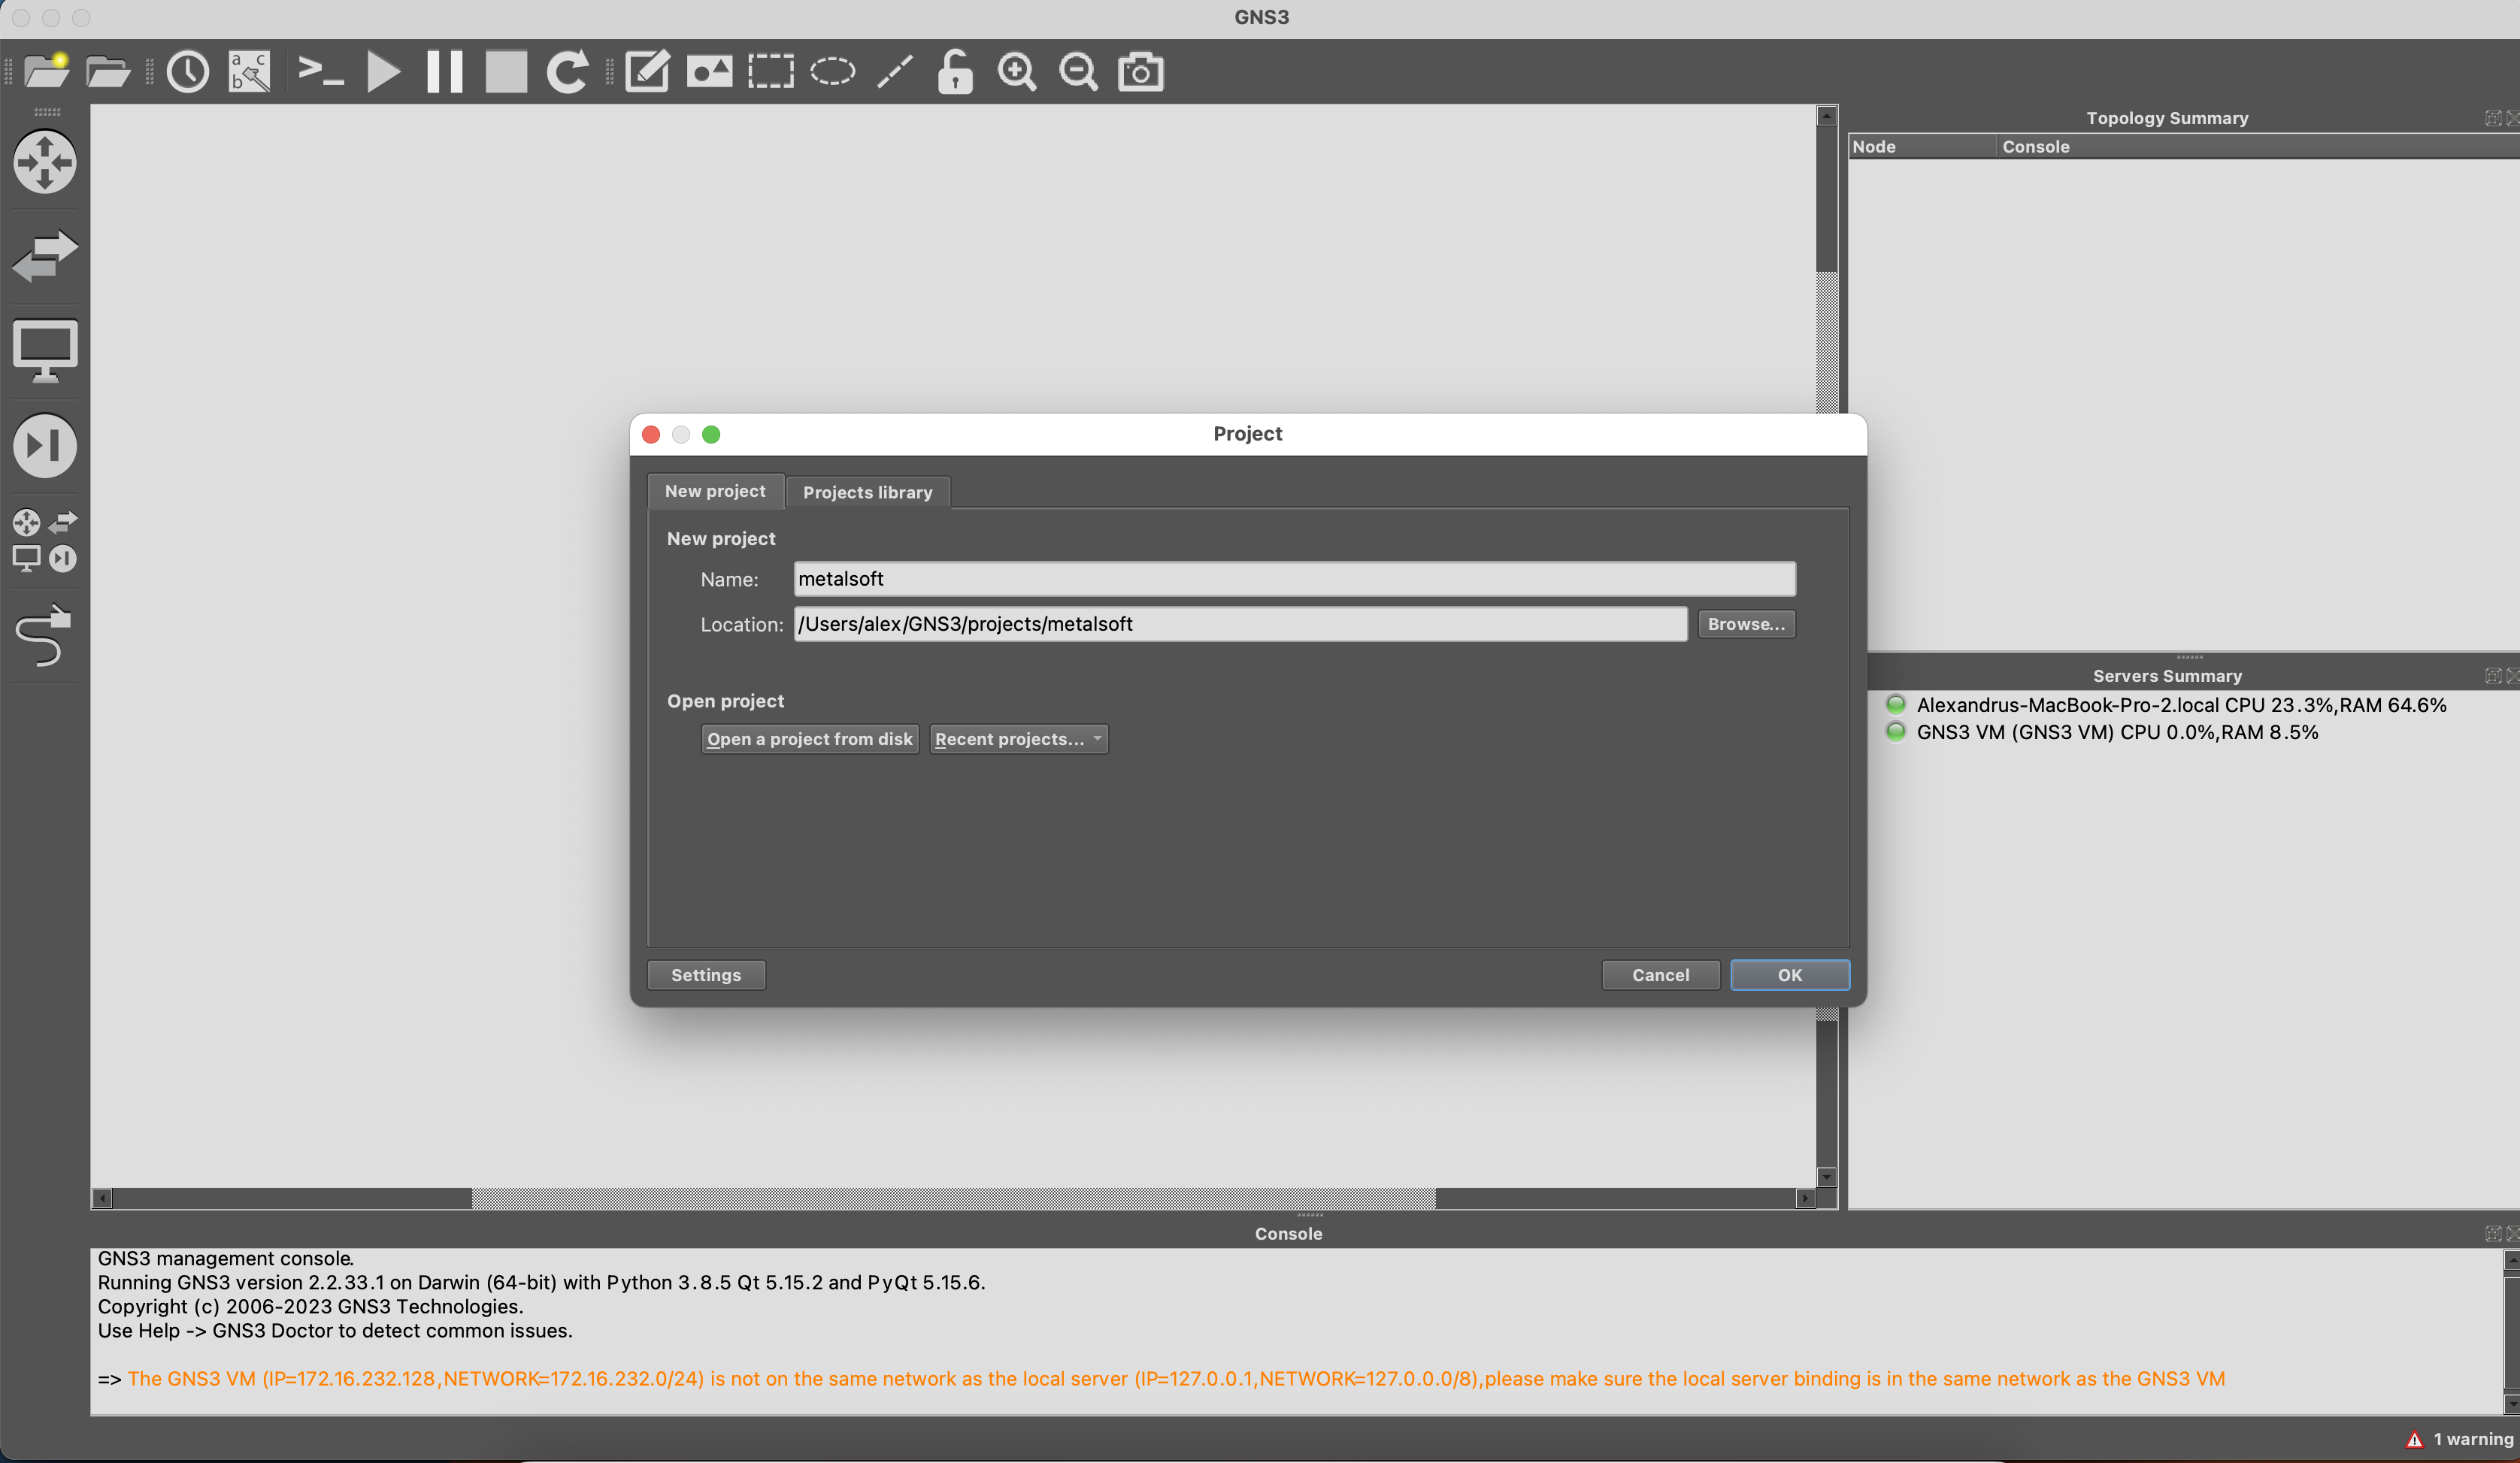
Import Site Controller appliance by following these steps:
Go to on File > New Template > Manually create a new template
VMWare Fusion > New Select the
Site ControllerVM from the list: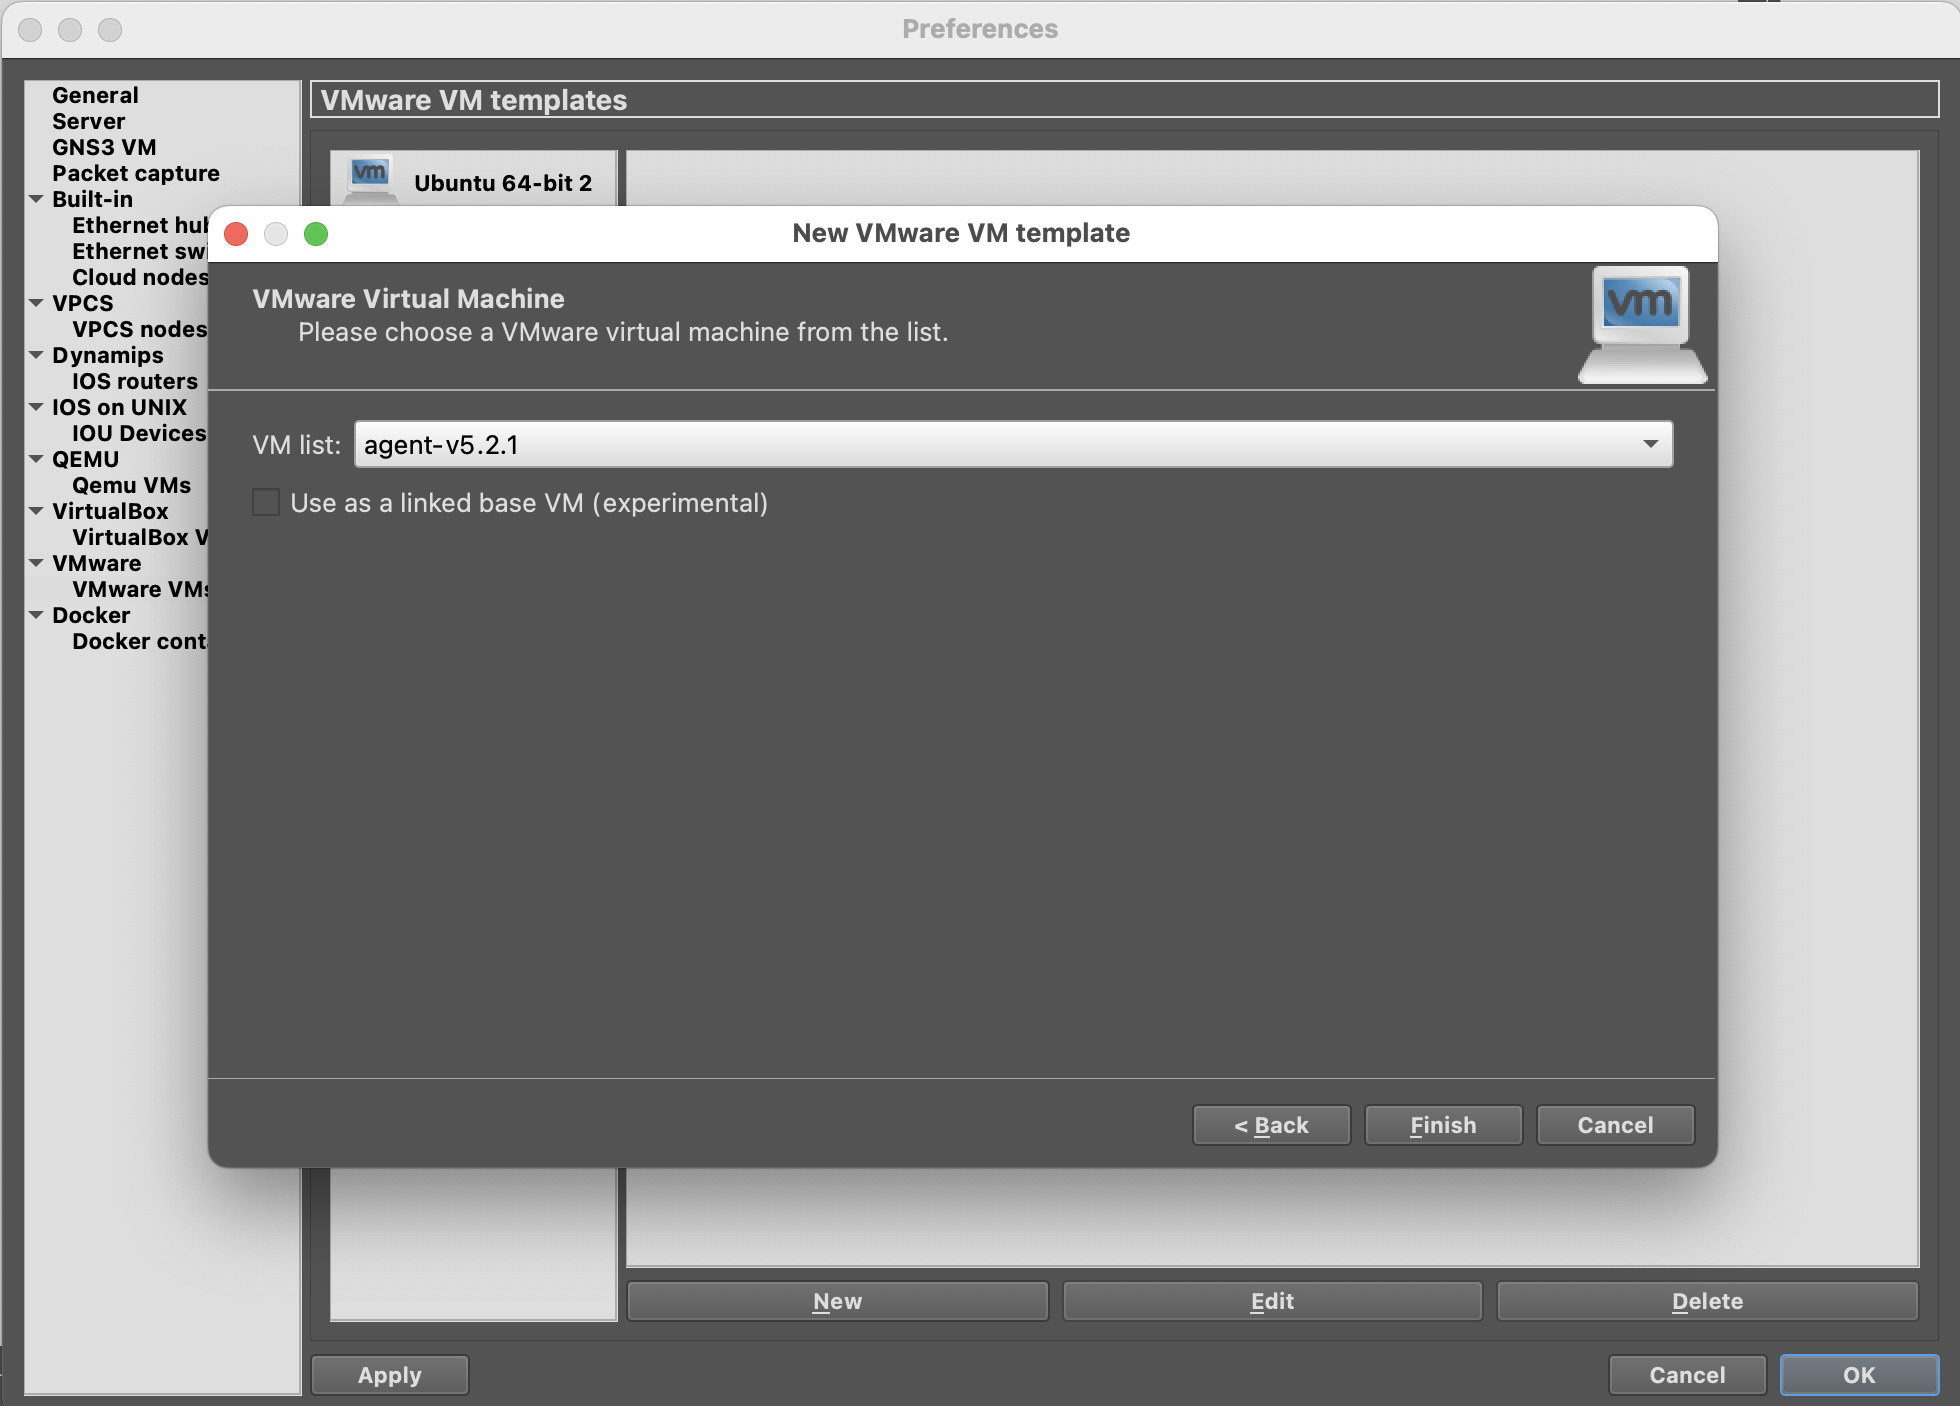
Click finish
Build the topology in GNS3
Add the Site Controller vm, a switch and two hosts.
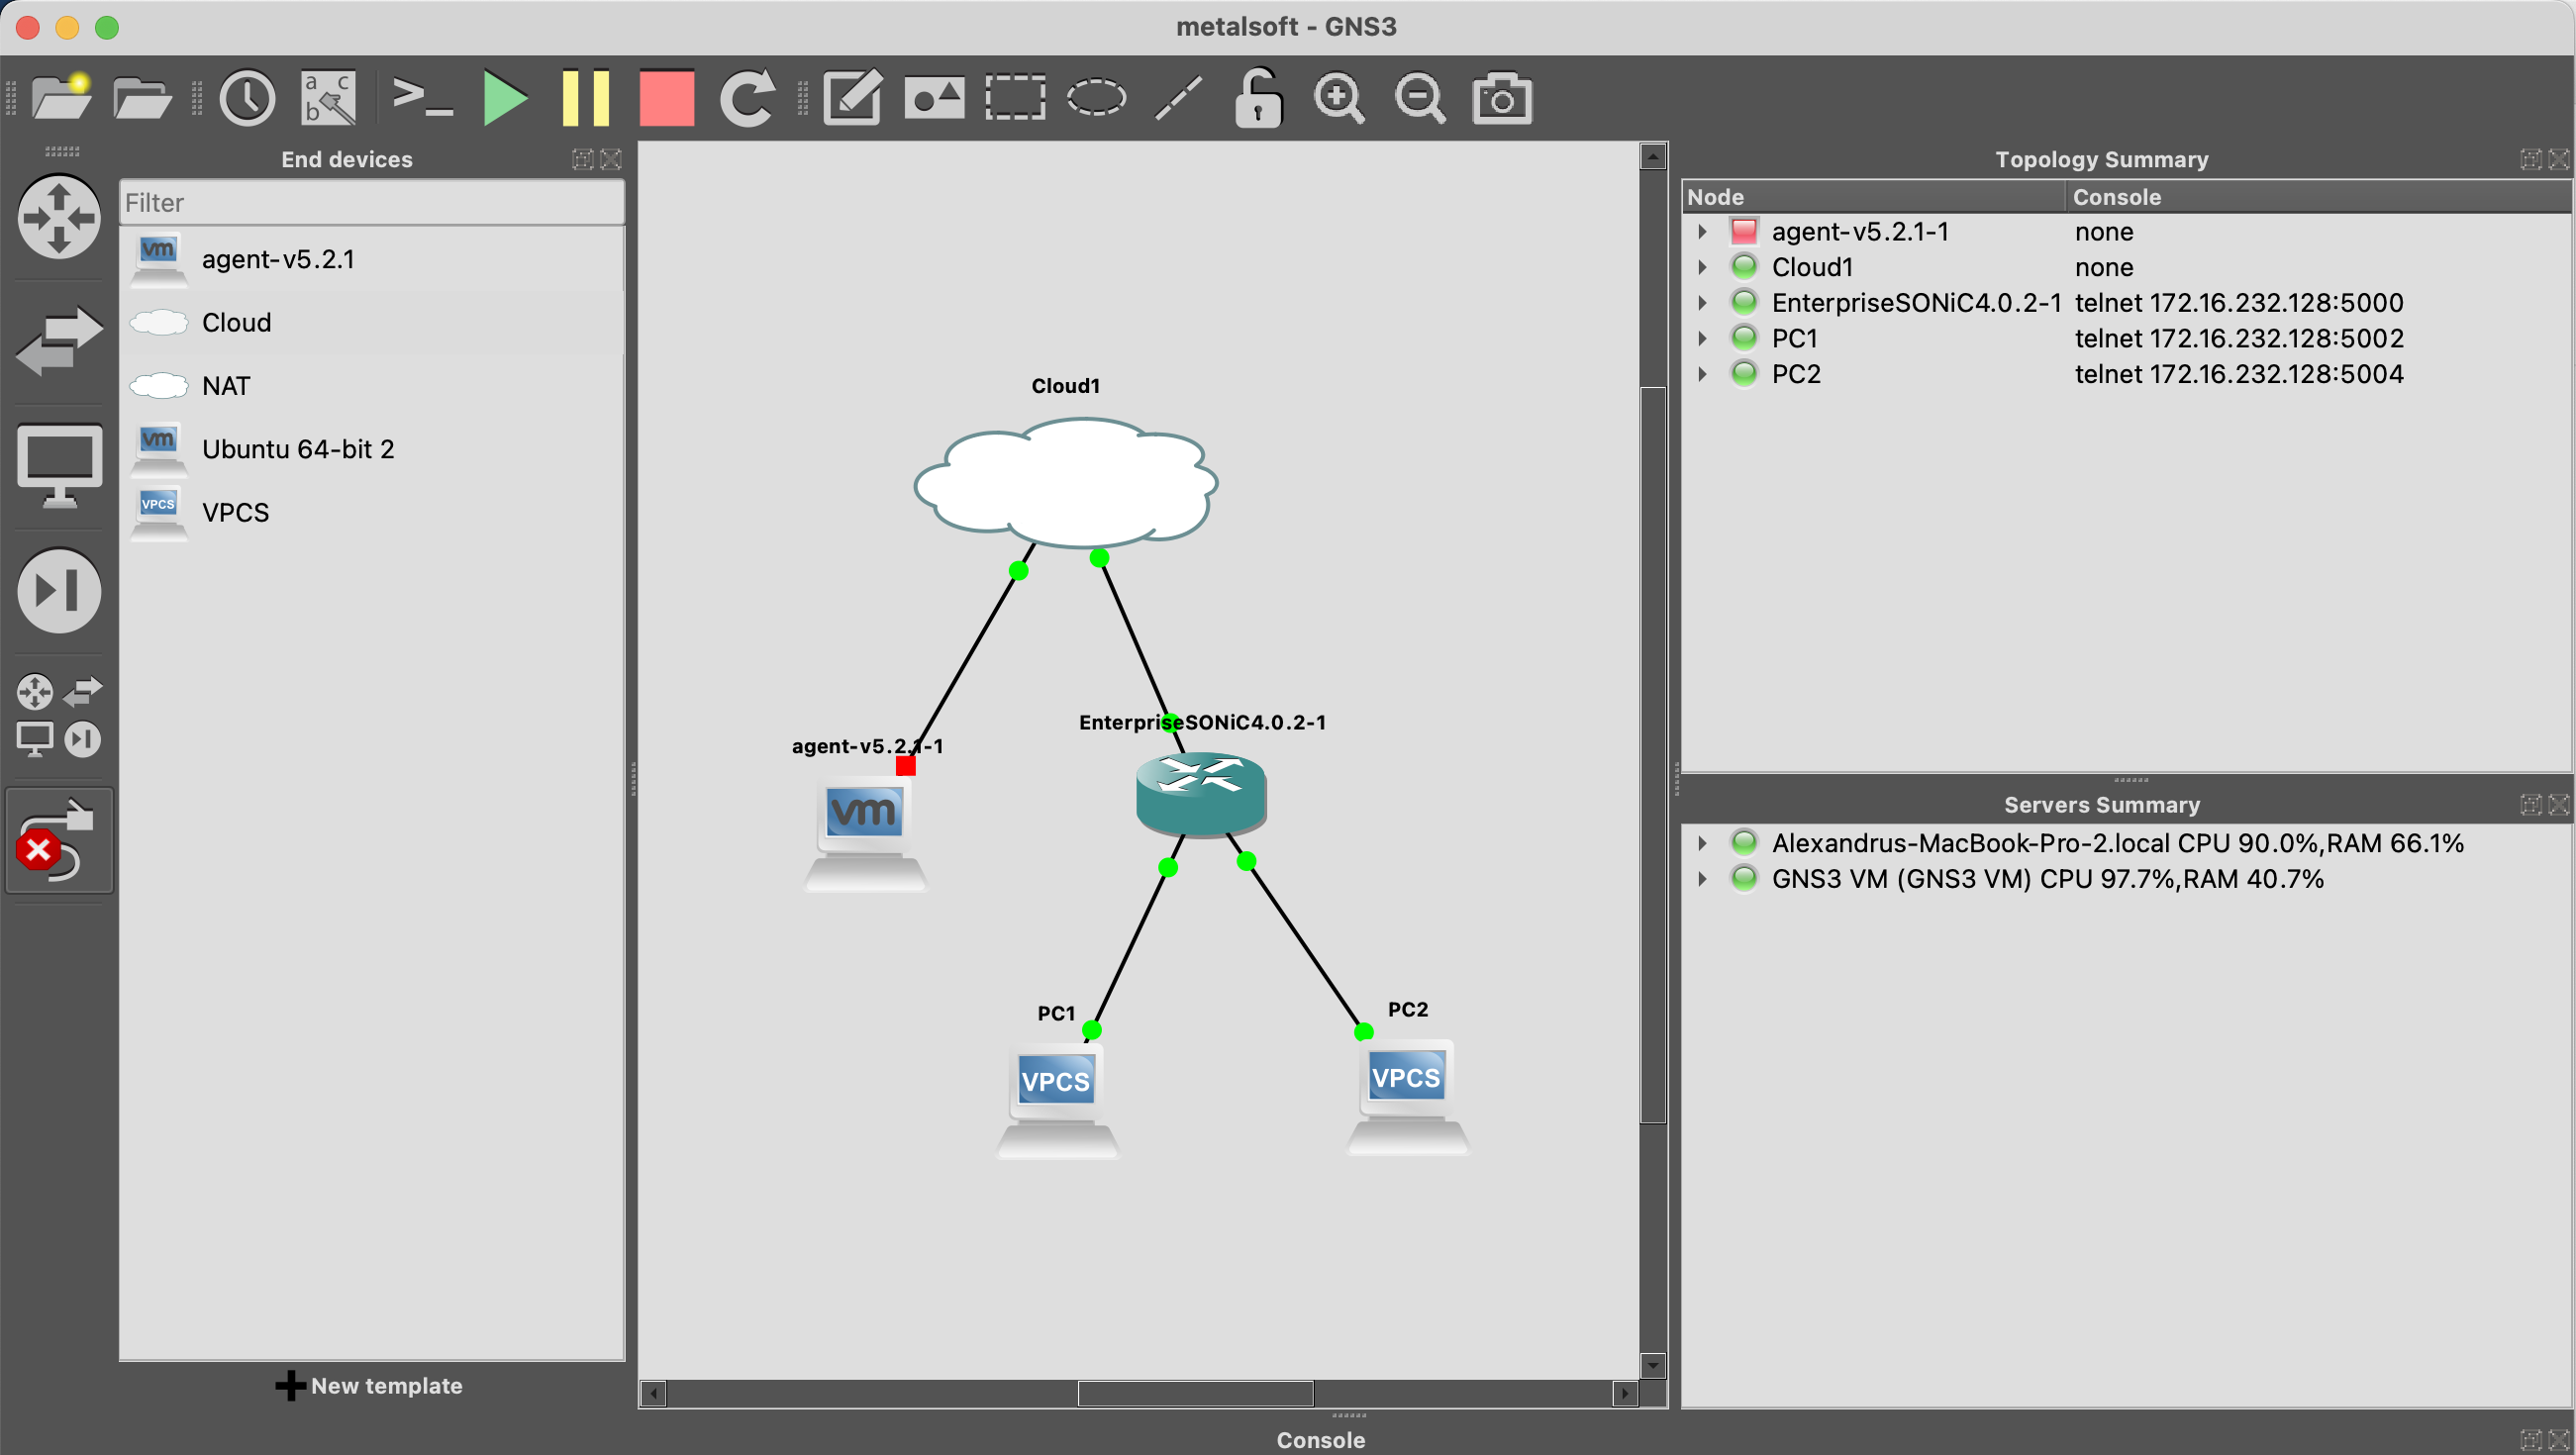
Note that connecting the Site Controller to the “Cloud” is not strictly required. If the virtual machine is connected to the host’s NAT the effect would be the same. However zero touch provisioning might not work.
Register the switch in MetalSoft using the CLI
Create a file called
sw.yaml. Most of the settings can be left to the defaults, you can alter just themanagementAddressfield and themanagementPasswordfield. Note also the VTEP, ASN and Loopback fields that need to be set if EVPN is used.identifierString: sonic01 datacenterName: local-dc-1 provisionerType: evpnvxlanl2 provisionerPosition: leaf driver: sonic_enterprise managementUsername: admin managementPassword: YourPaSsWoRd managementAddress: 192.168.1.25 managementAddressMask: 255.255.255.248 managementAddressGateway: 192.168.255.1 managementMACAddress: 8c:04:ba:ea:60:c0 primaryWANIPv4SubnetPool: 10.0.0.1 primaryWANIPv4SubnetPrefixSize: 24 primarySANSubnetPrefixSize: 24 quarantineSubnetStart: 192.168.67.1 quarantineSubnetEnd: 192.168.67.254 quarantineSubnetPrefixSize: 24 quarantineSubnetGateway: 192.168.67.1 tags: - tag requiresOSInstall: false isBorderDevice: false isStorageSwitch: false networkTypesAllowed: - wan - san - lan - quarantine LoopbackAddress: 10.0.90.3 VTEPAddress: 10.0.91.2 ASN: 65102
Run
switch create
./metalcloud-cli switch create --raw-config sw.yaml --format yaml
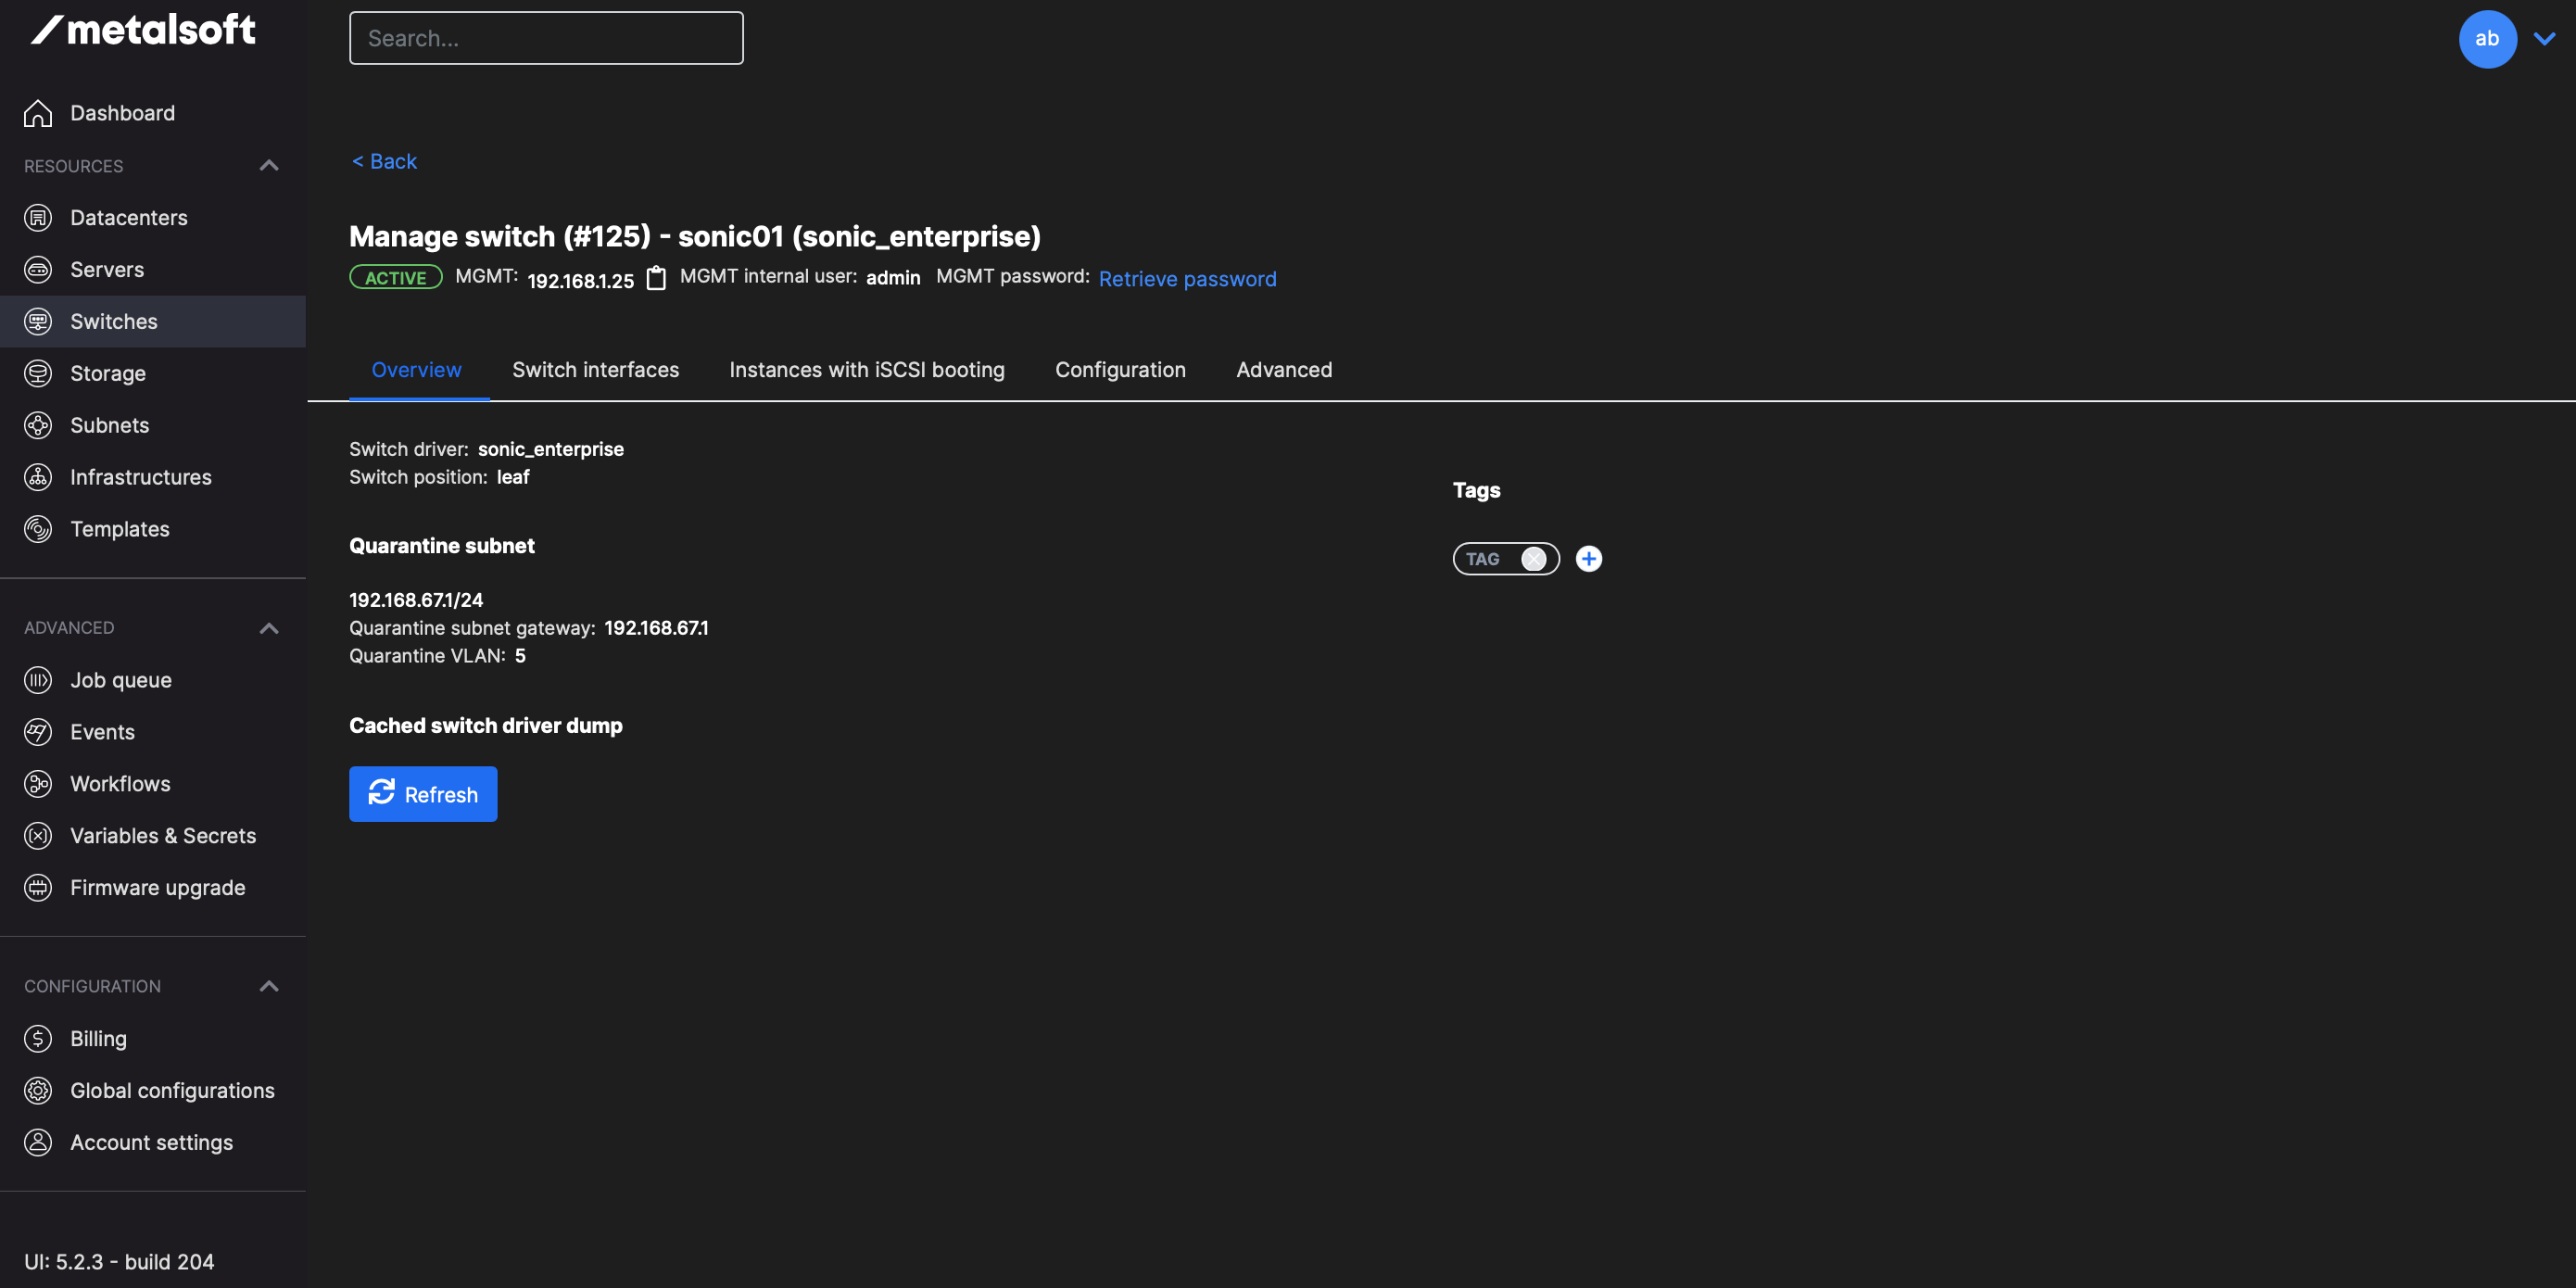
This command might take up to 30 seconds.
The switch should now be in active state:
Create a network profile
This is not strictly required but if you decided not to use EVPN this is how you would disable it:
If you are reusing an existing datacenter rather than creating a new one using the configuration above, make sure to enable network profiles and automatic VLAN allocation by navigating to the Datacenters > select datacenter > Configuration >Show more and: a. Check the “Allow Network Profiles” checkbox b. Check the “Allocate default WAN VLAN” checkbox
Create a file called
network-profile.yaml:label: internet01 dc: local-dc-1 networkType: wan vlans: - vlanID: null #auto-allocated portMode: native provisionSubnetGateways: false # do not provision a gateway SVI provisionVXLAN: false # set this to false to disable EVPN extConnectionIDs: []
Create the network profile
metalcloud-cli network-profile create --raw-config ~/Desktop/network-profile1.yaml --datacenter local-dc-1 --format yaml
Adding the GNS3 PCs as un-managed servers
We will now add the two PCs as un-managed servers. Note: By default MetalSoft does not allow servers with a single interface to be added. Go to Global Configuration > Advanced and enable “Allow servers with one interface” option then click save.
If you do not already have one, create a new “unmanaged” server type: Navigate to Servers > Server types tab > Add server type. a. Provide a name and a random SKU b. Check the “Unmanaged” checkbox at the bottom of the form.
Create a file called
servers.yamldatacenter: local-dc-1 serialNumber: PC1 serverType: M.15.15.1 interfaces: - mac: 00:B0:D0:63:C2:26 switch: sonic01 switchInterface: Ethernet1 --- datacenter: local-dc-1 serialNumber: PC2 serverType: M.15.15.1 interfaces: - mac: 00:B0:D0:63:C2:26 switch: sonic01 switchInterface: Ethernet2
Import the servers
metalcloud-cli server import-batch --file servers.yaml --format yaml
The servers should now show up in the Servers section:

We are now ready to start deploying network configurations.
Provisioning a network using the self-service interface
This is how end-users will be consuming the network profile that you configured. In this case the same user will be performing both the definition of the service and the consumption part, but in a real setting the end-user and the admin will be different. End-users will receive access to their ‘infrastructure’ with the servers already added.
Access the Infrastructure editor from the upper right corner menu with the user’s initials.
If a single datacenter exists then the default infrastructure will be created. If not, create an infrastructure in the local datacenter you just created.
Click “Create your first instance array”
Select the unmanaged server type used.
Select one of the servers you just added in the dropdown below.
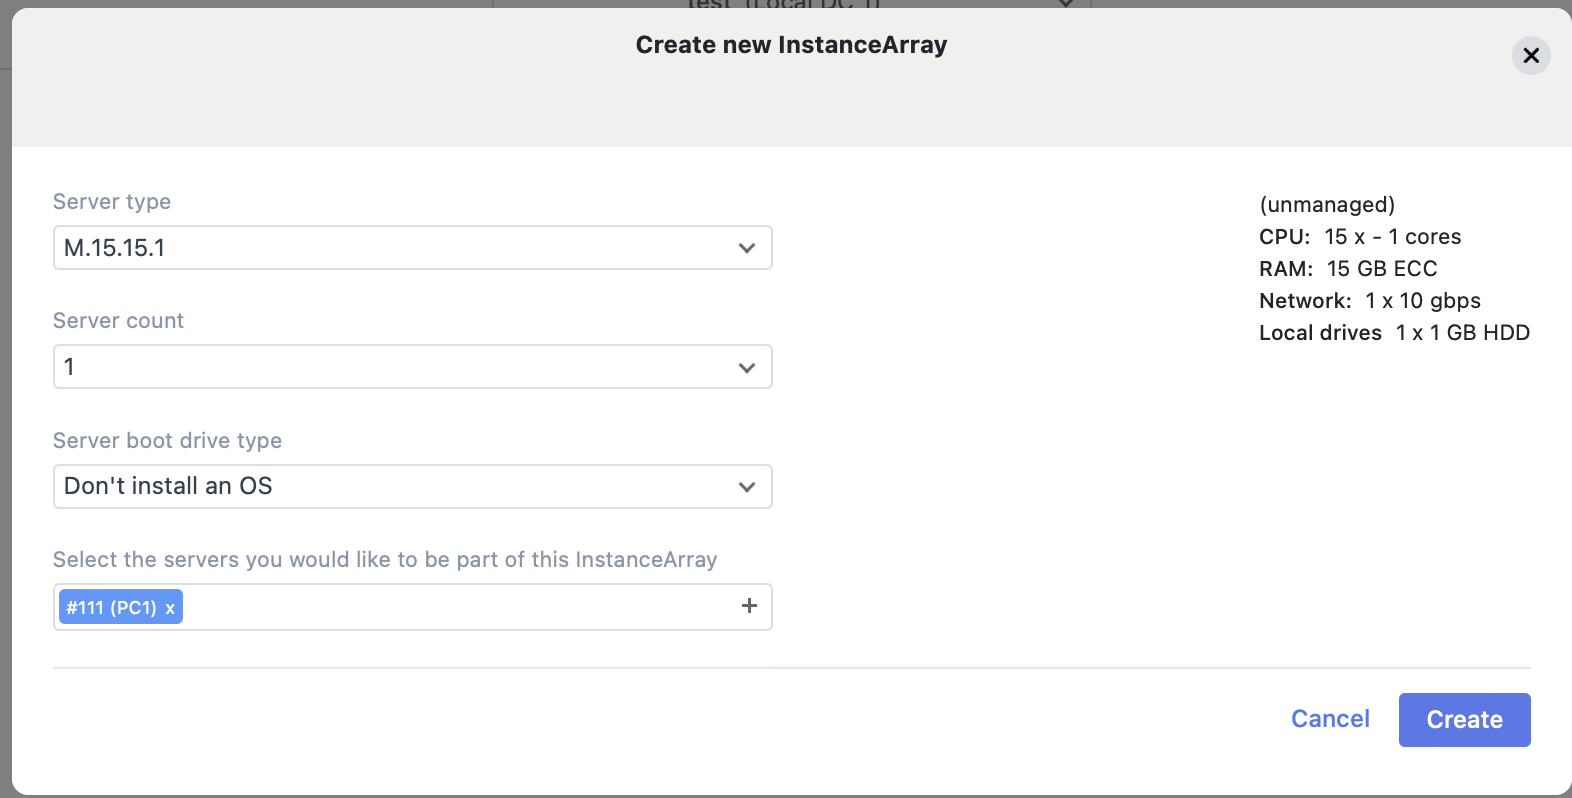
Select the network profile ‘internet01’. Alternatively use the Advanced tab to select it on both servers.
Click save.
Repeat the process for the other server
The two servers are now connected to the default “WAN” network.
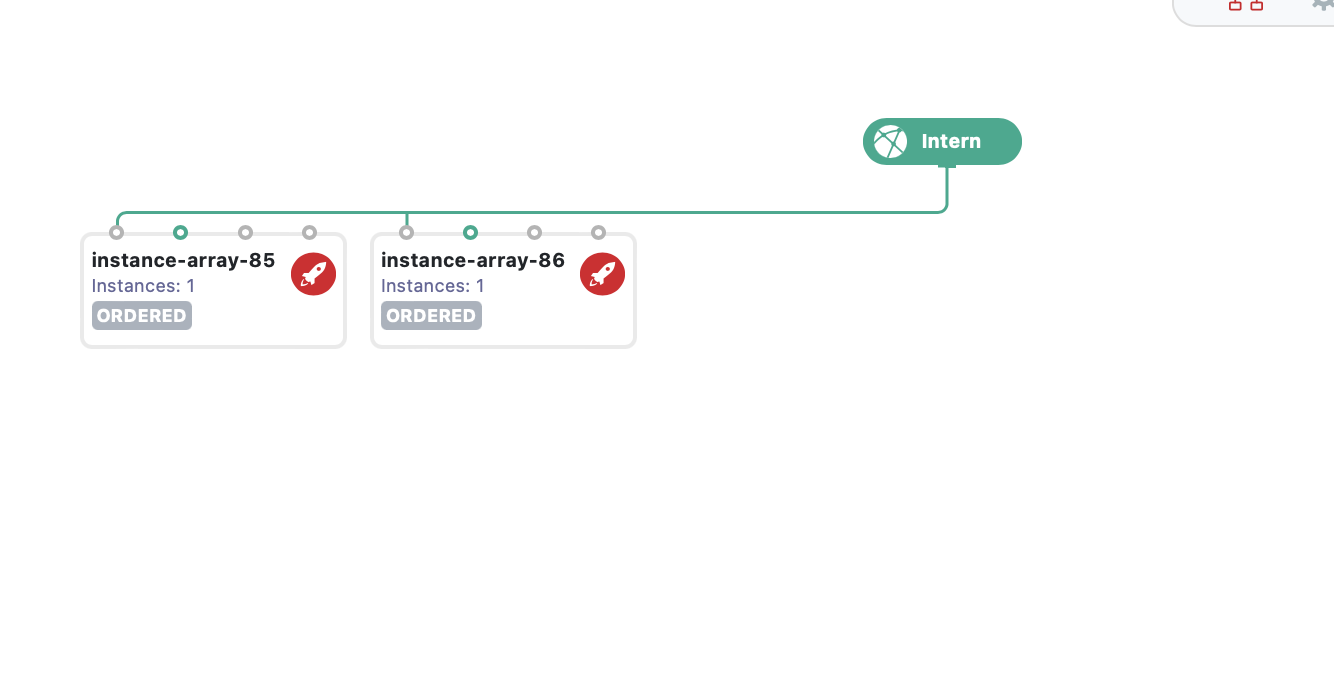
Click the Deploy button on the bottom.
At the end of the deploy both servers will show as ‘Active’.
You have now successfully provisioned a network “as a Service”.
Next steps
Learn more about networks and network profiles Networking Overview