Sample test plan
Base Testing
Section titled “Base Testing”Test 1 Discovery of server including CPU/Core count, RAM size, Local Storage (size), NICs (type/speed) and FW/BIOS information
Section titled “Test 1 Discovery of server including CPU/Core count, RAM size, Local Storage (size), NICs (type/speed) and FW/BIOS information”- Procedure
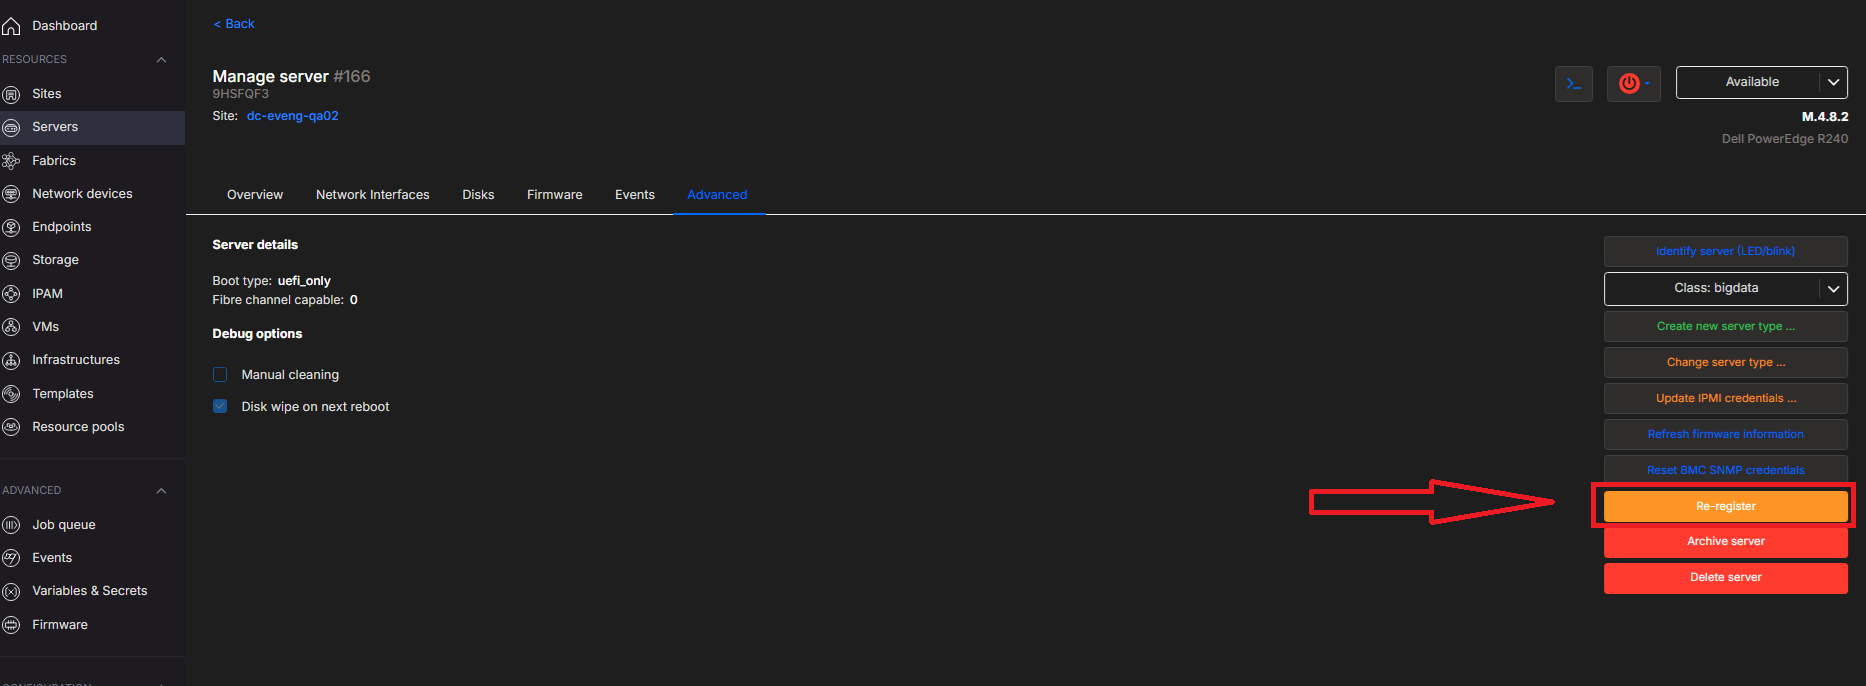
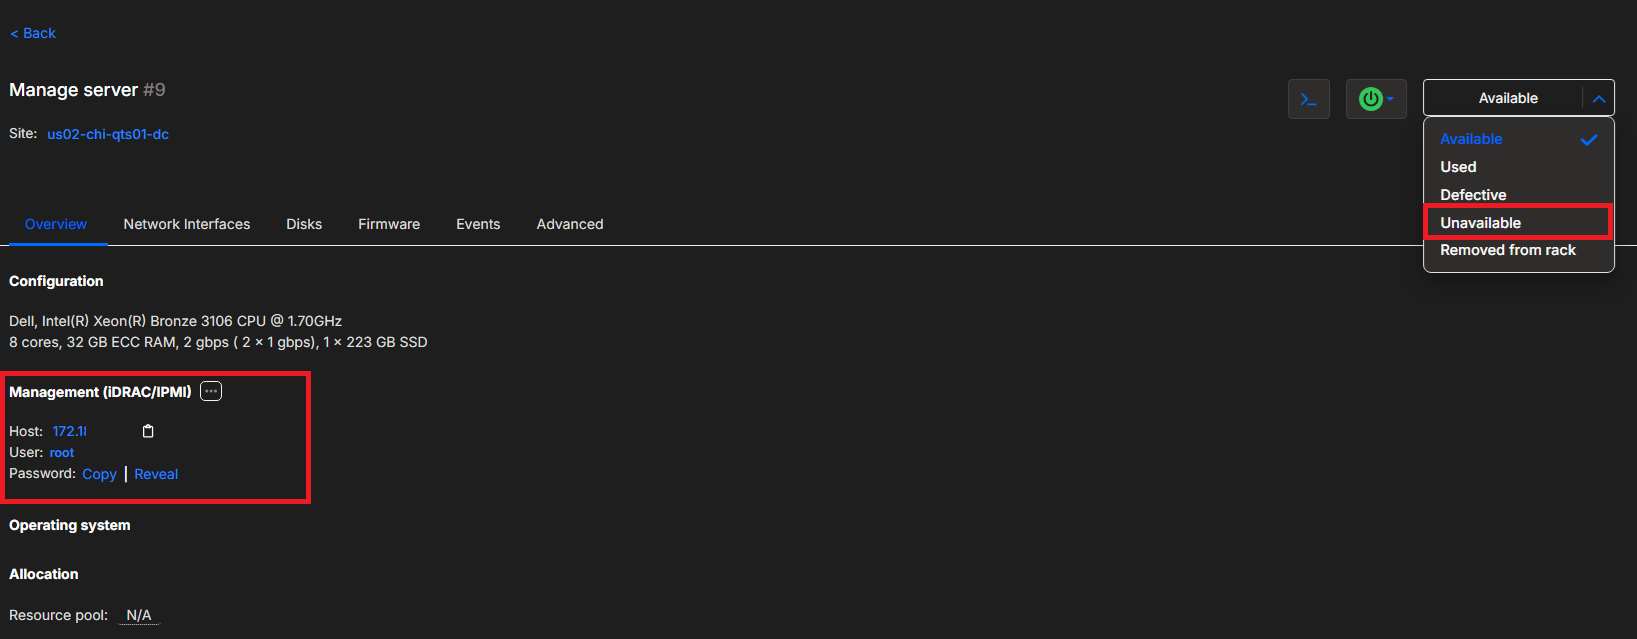
In the Admin UI, go to Servers > Select a server> observe the following tabs: Overview, Network Interfaces, Disks, Firmware
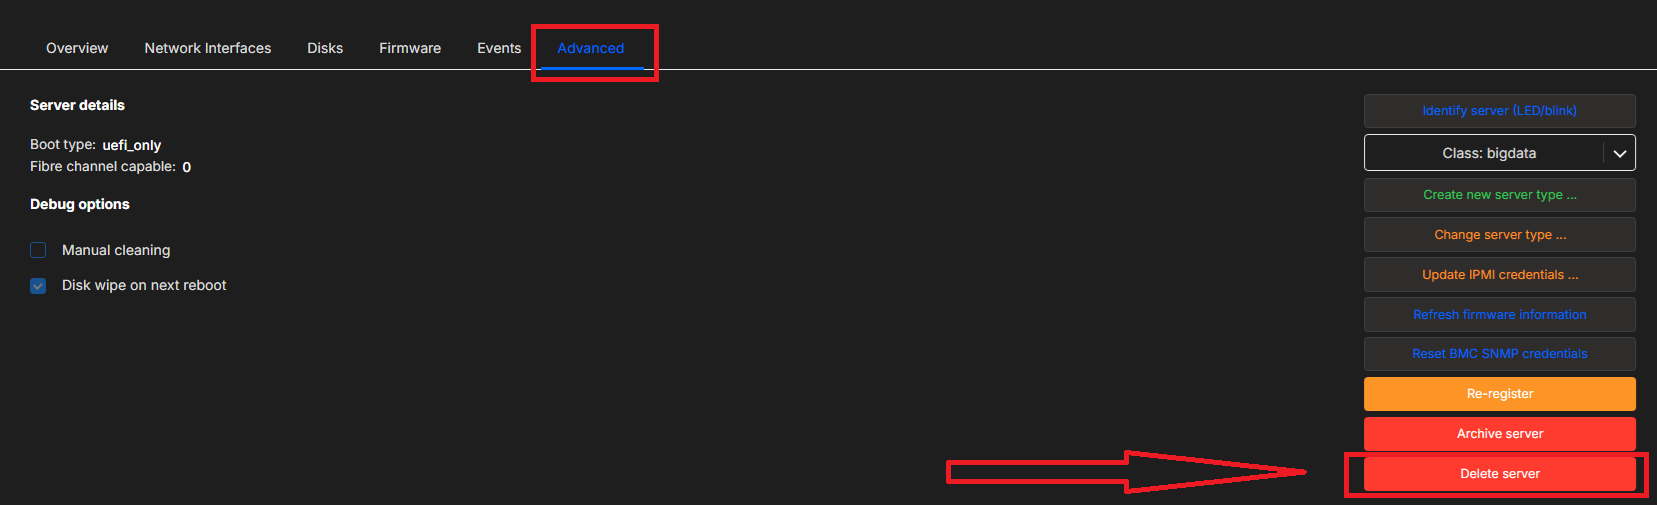
To re-register a server (to re-discover hardware information) -> Server -> Advanced -> Re-register
Test 2 Discovery of Network device including port count, port status and port configuration
Section titled “Test 2 Discovery of Network device including port count, port status and port configuration”- Procedure
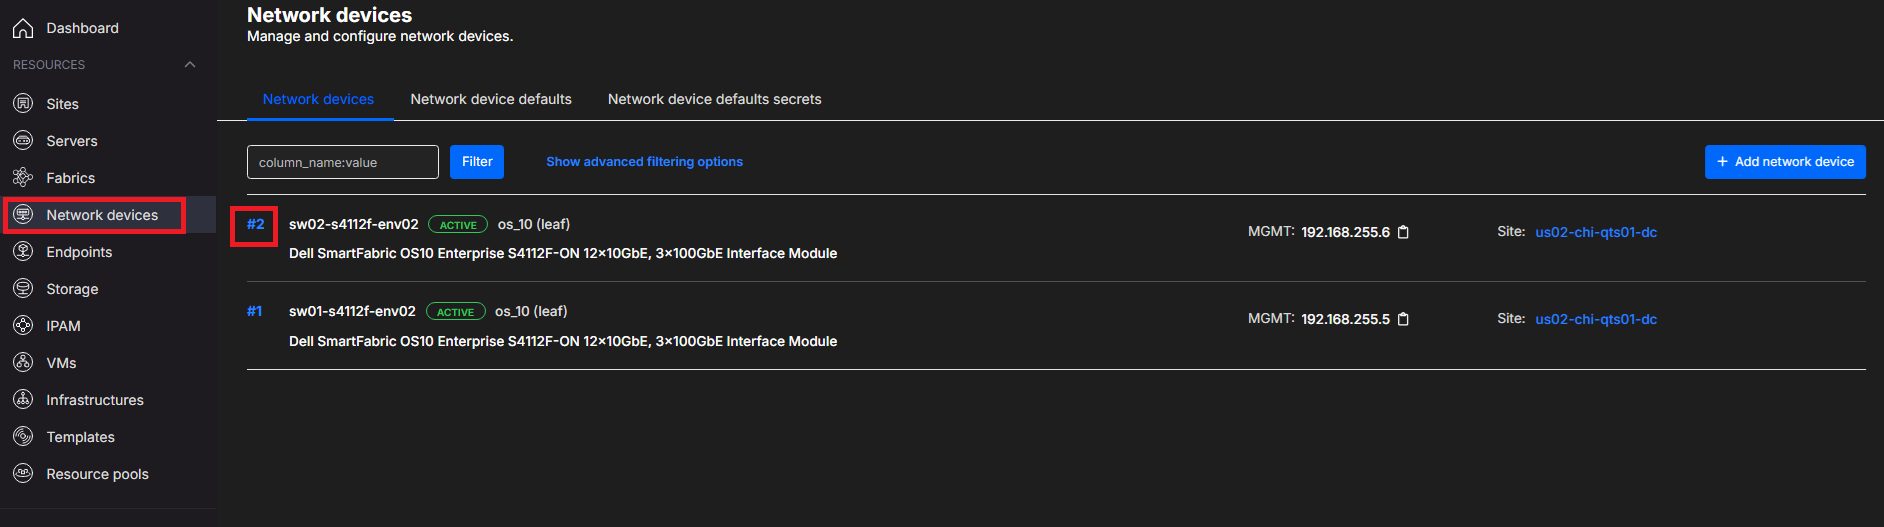
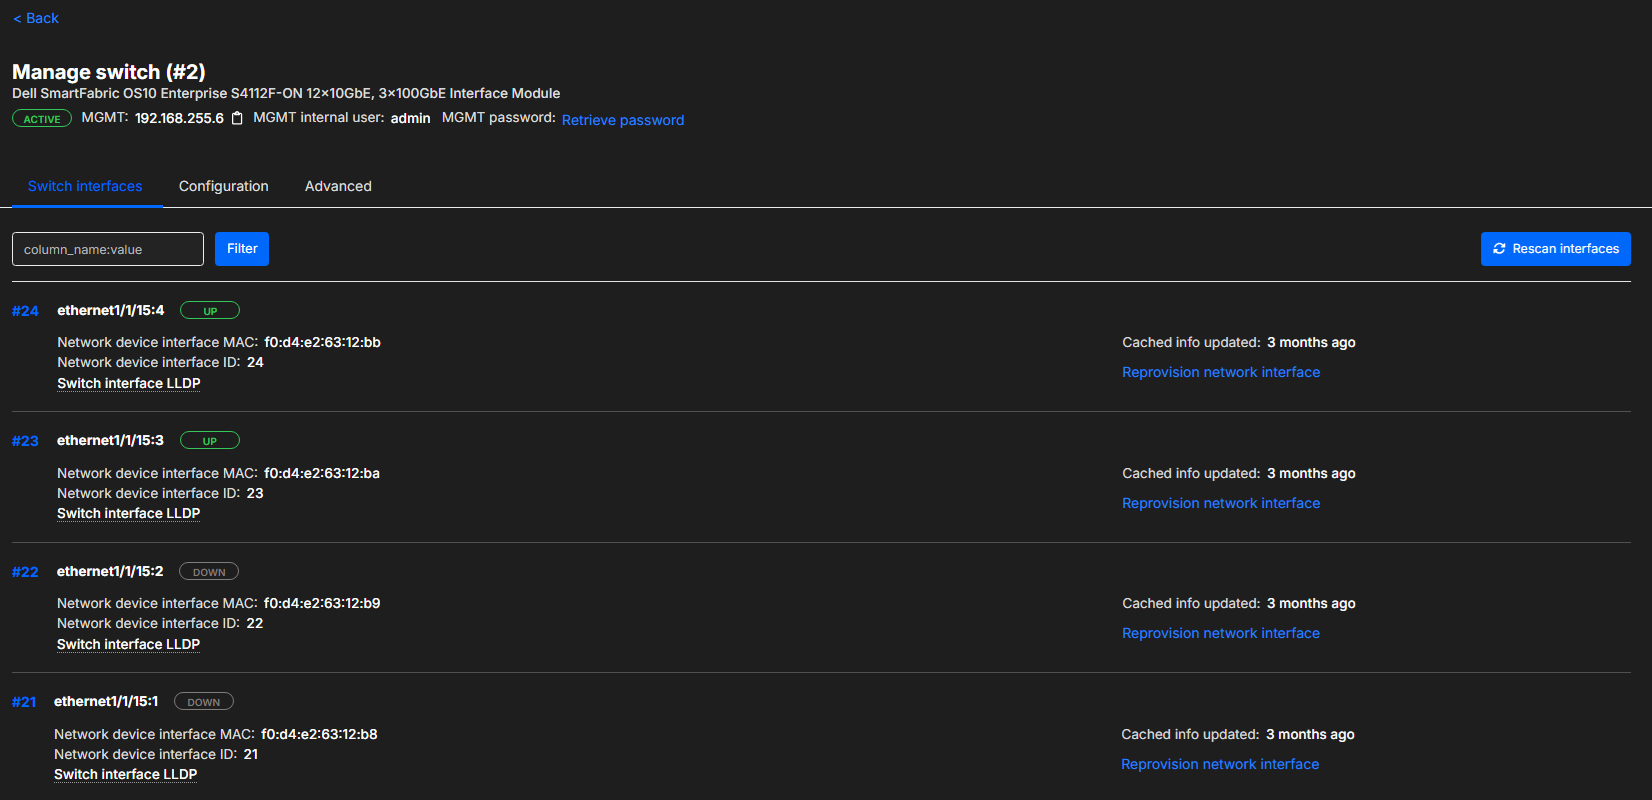
In the Admin UI, go to Network devices > Select a network device > Switch interfaces.
You will see the status and LLDP information of the ports.
For ports that are provisioned (have a role in a tenant infrastructure) you will see information regarding the role and the tenant.
Test 3 Deployment of a single server with local storage and a single network interface for windows, esx, linux
Section titled “Test 3 Deployment of a single server with local storage and a single network interface for windows, esx, linux”- Procedure
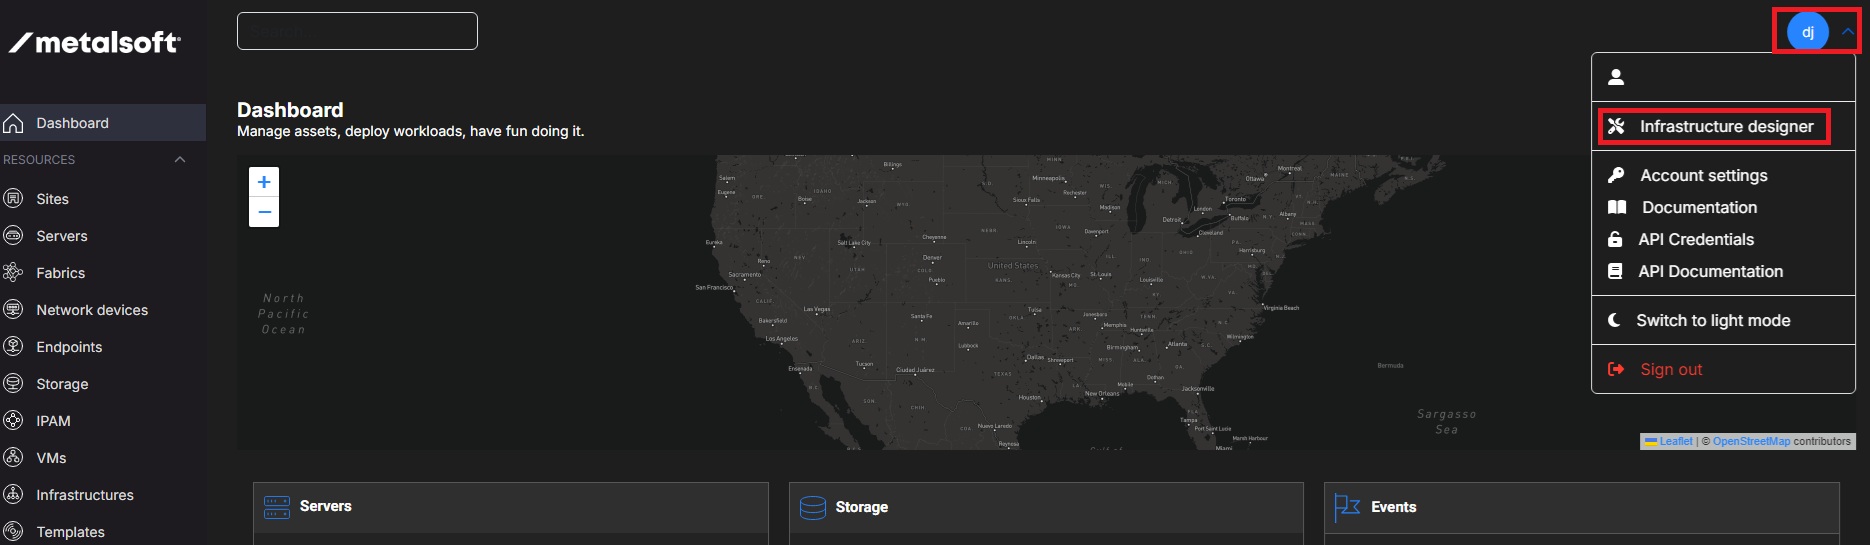
In the upper right menu > infrastructure designer
Click on “Add Element” and select “Pre-created Network” or “Private Network”. If “Pre-created Network”, then it will be added to the infrastructure.
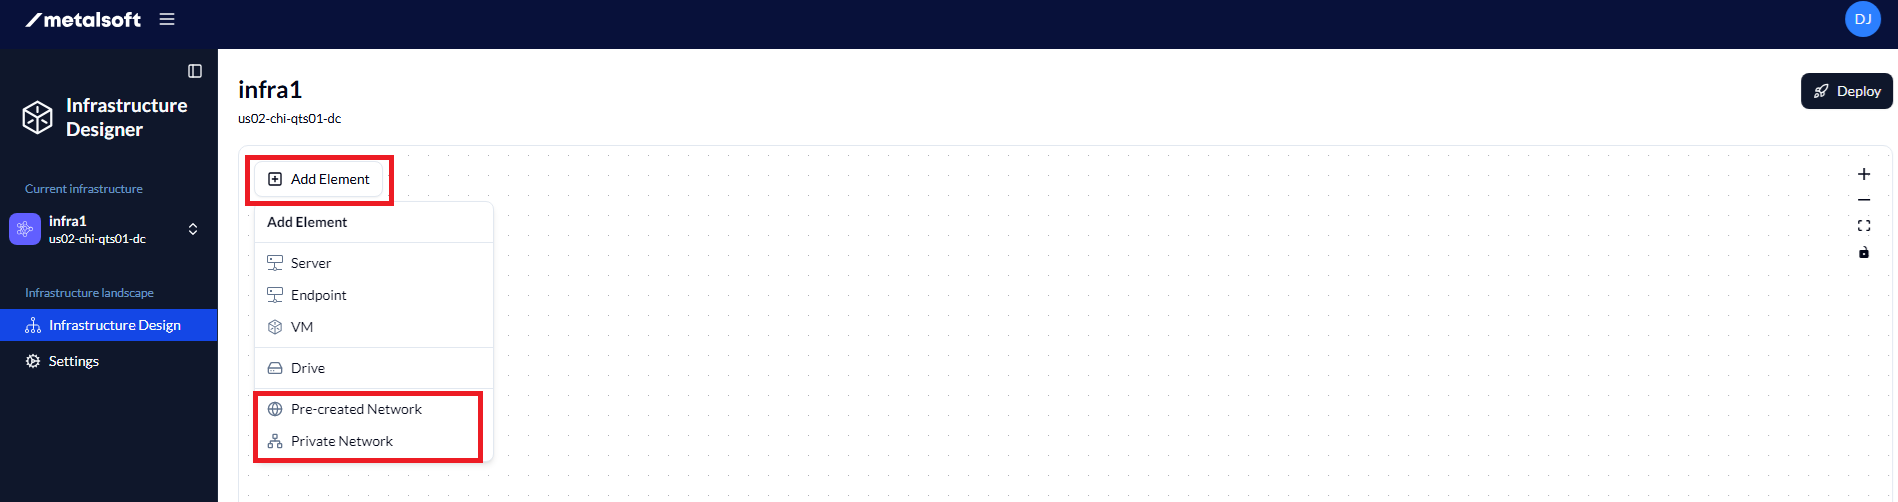
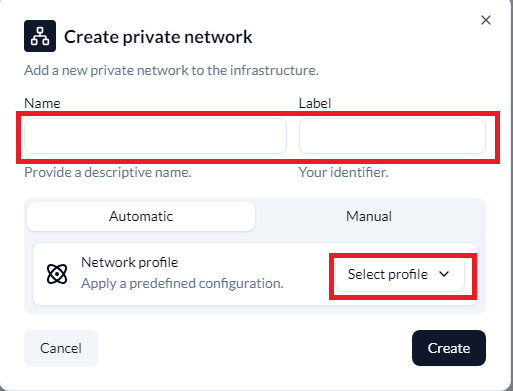
If “Private Network”, then you will need to provide a Name, a Label and the Network Profile.
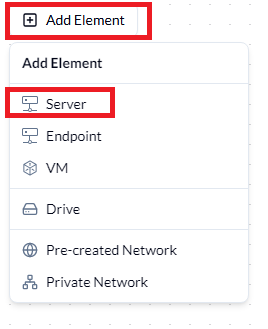
Click on “Add Element” and select “Server”
Select server type and click next
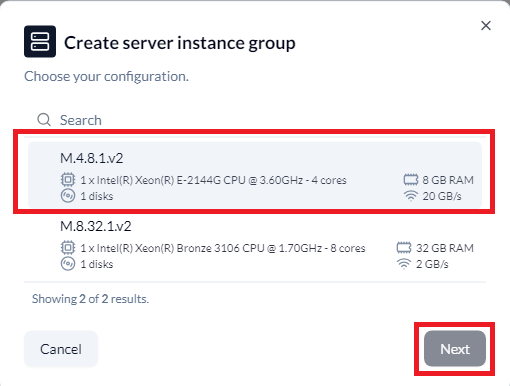
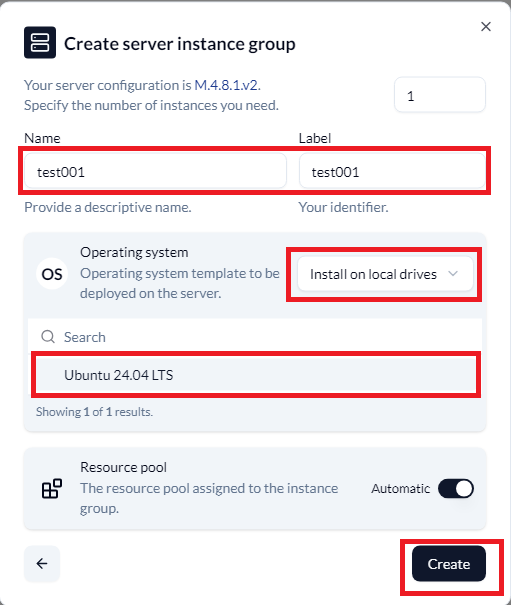
Give the server a name and label, select the drop down next to “Operating system” and select “Install on local drive” and then your operating system and click “Create”
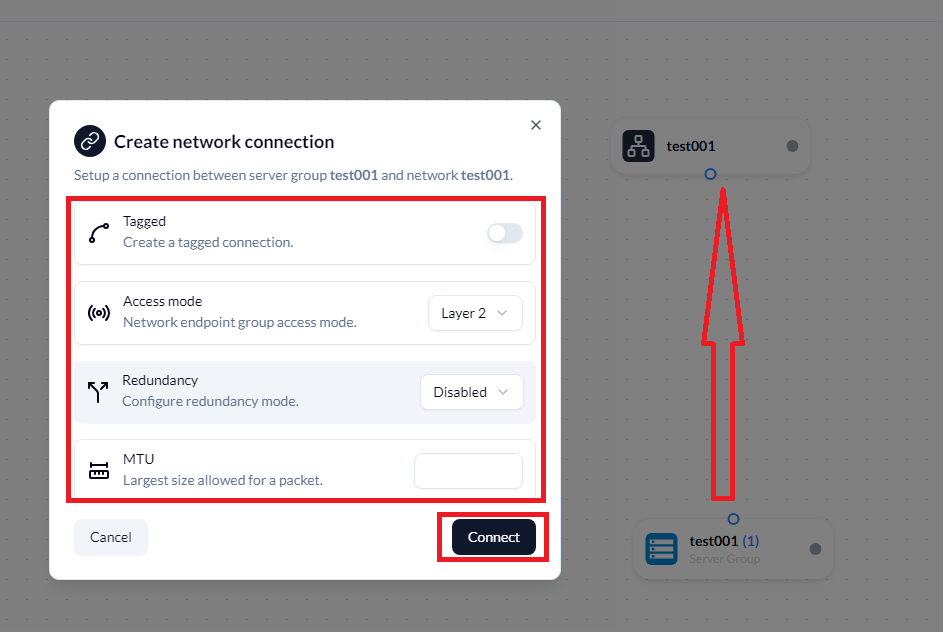
Drag the network from the server group to the network and select your network options and click “Connect”
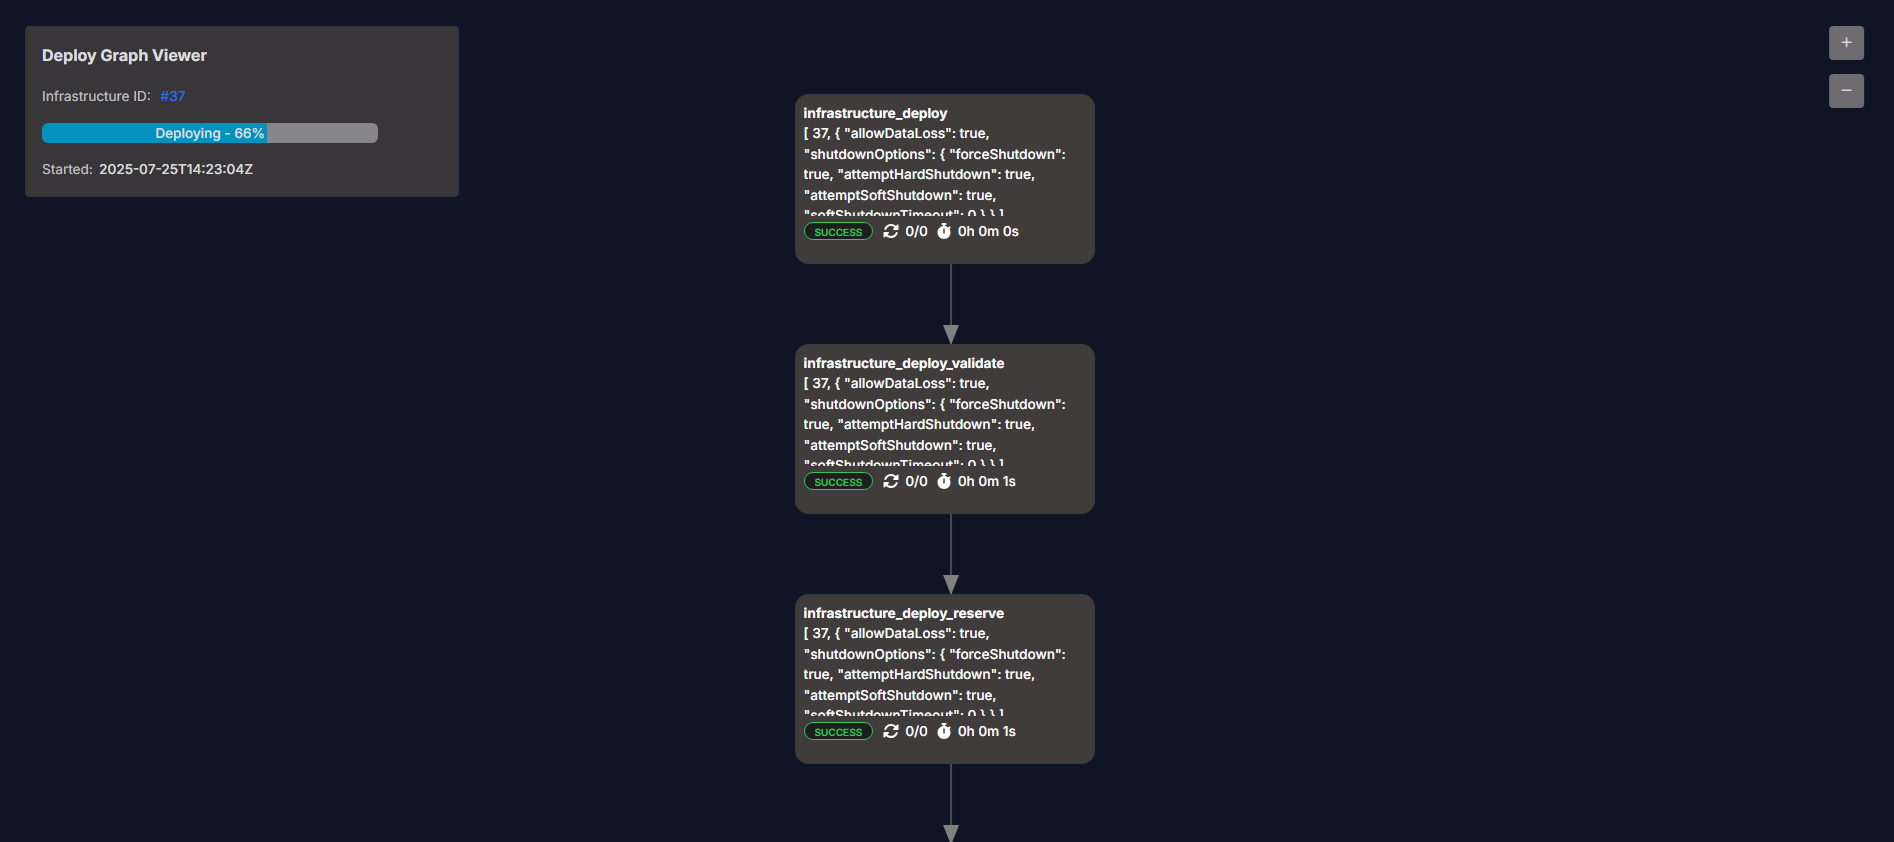
Click Deploy in upper right hand side, Select “Allow data loss” and “Deploy”
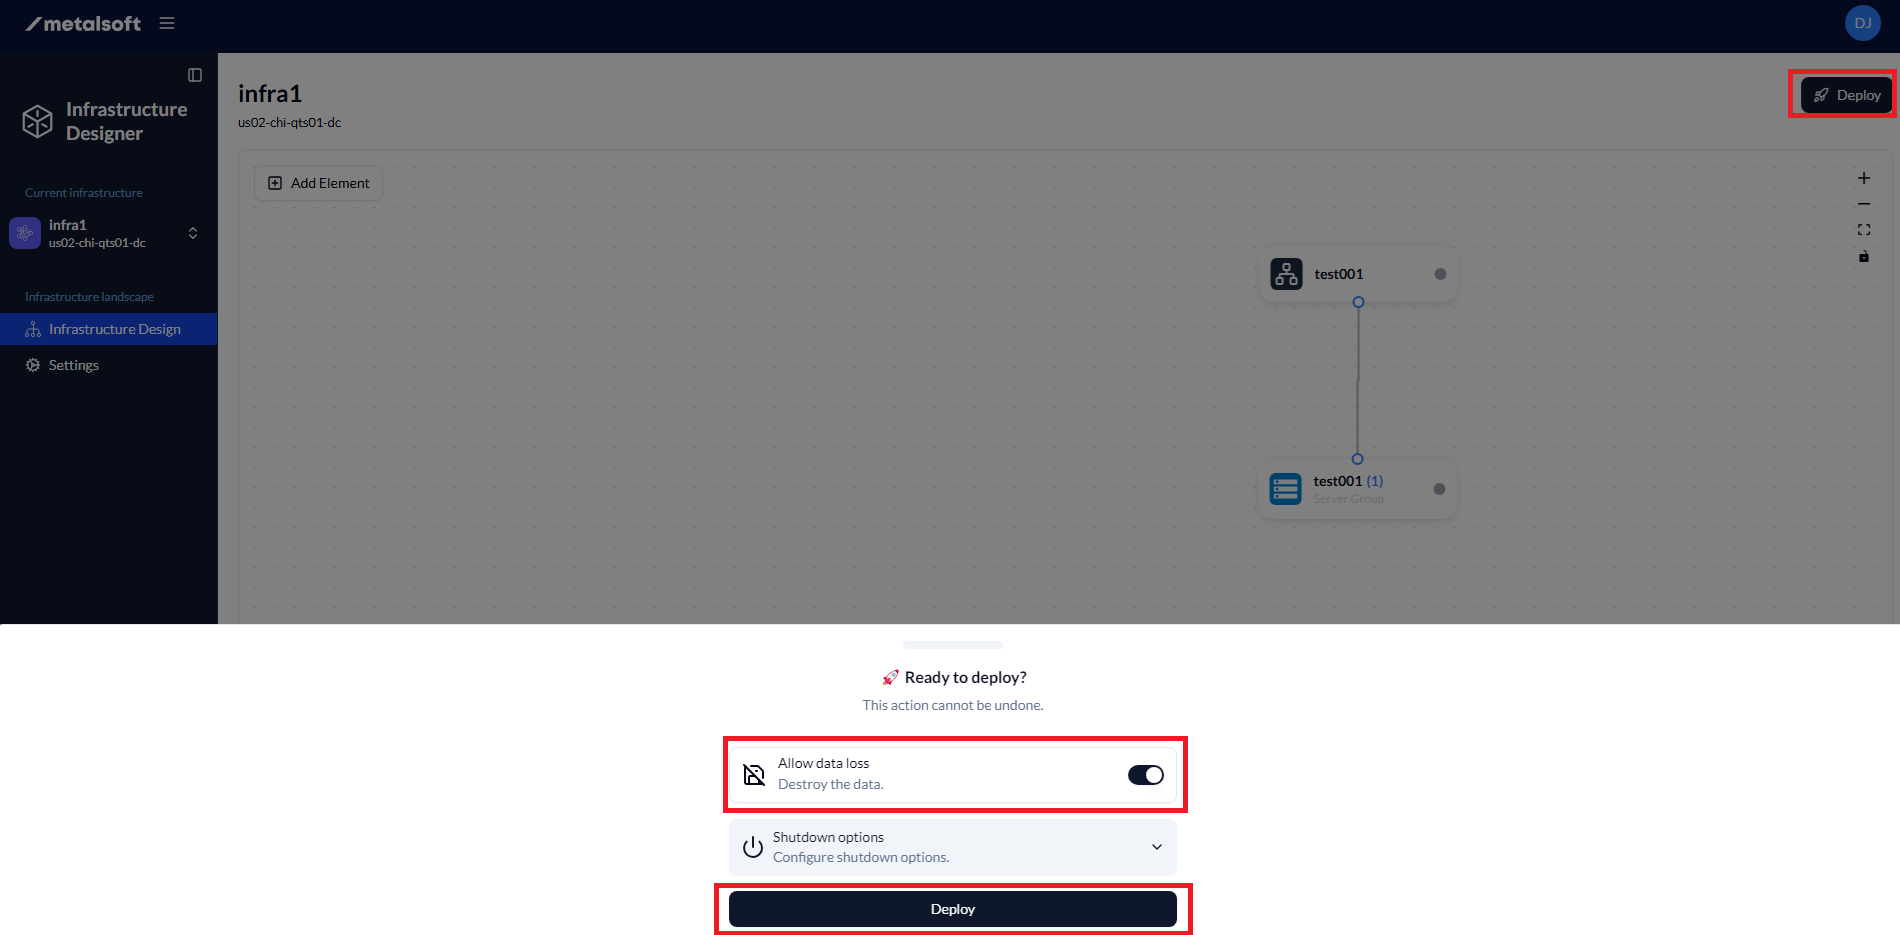
The button will change to “Deploying” and you will have a deploying status bar

Test 4 Validate IP address configuration
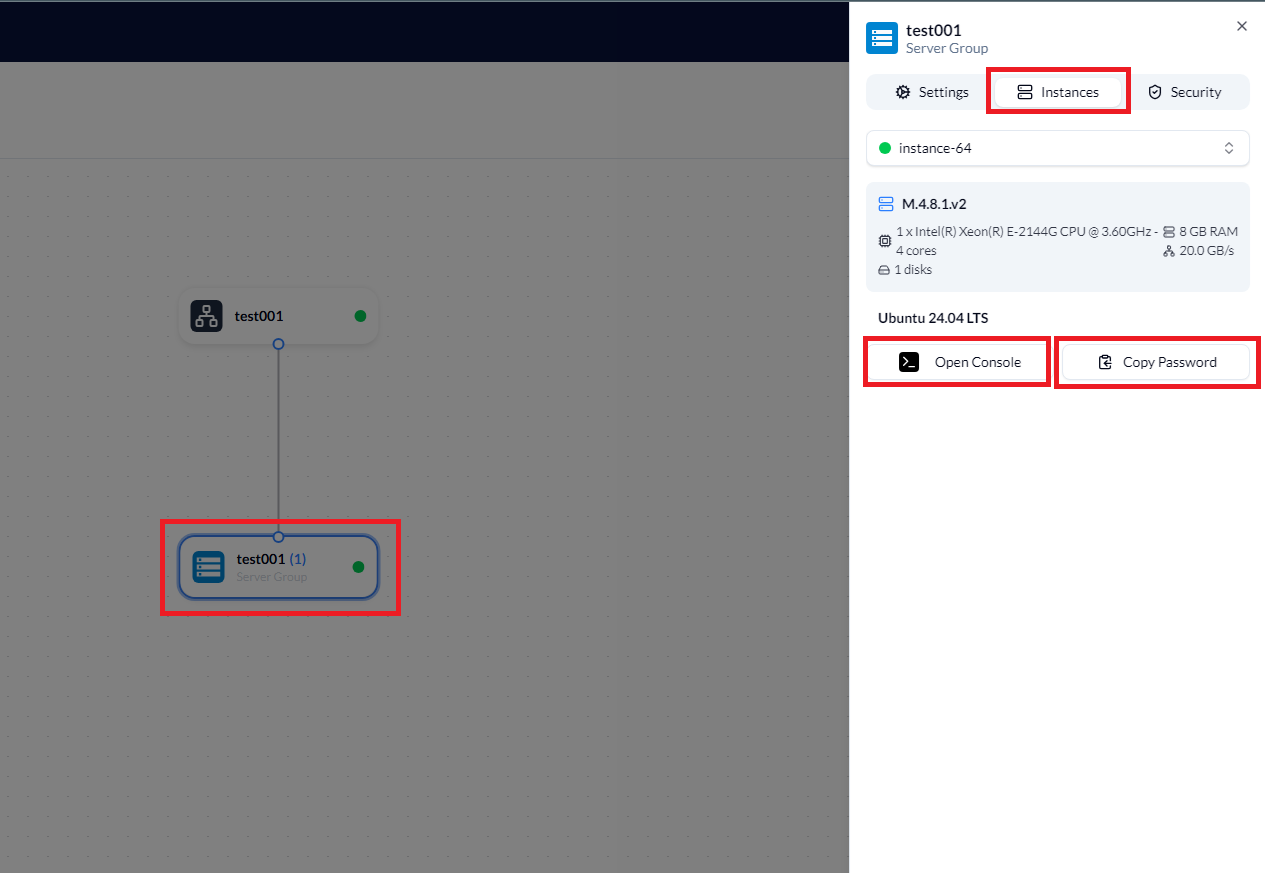
Section titled “Test 4 Validate IP address configuration”After the deploy is finished and the deploy button no longer shows “Deploying”, click the Server Group box, click on “Instances” and click on DJCHANGETHIS NO IP SHOWN CURRENTLY and use the Network Interface tab to get more details on the network configuration
Test 5 Validate access to the network and validate console access
Section titled “Test 5 Validate access to the network and validate console access”- Procedure
After the deploy is finished and the deploy button has changed back from “Deploying” to “Deploy” , click the Server Group box, click on “Instances” and click on DJCHANGETHIS Missing, username, ssh/rdp link.
To test the remote console, click on the “Open Console” button.
Go to the Instances tab Click the access link or copy the url or IP. Use your platform’s SSH client to connect, use username (in this instance ubuntu) and use the Initial password Reveal or Copy to retrieve the password To test the remote console, go to the Instances tab Click the HTML console “Remote console” link This will open up a new tab to the remote console Use Initial password to log in (Above will go when I get the correct image)
Test 6 Validate post install script execution
Section titled “Test 6 Validate post install script execution”- Procedure
DJCHANGETHIS AS NOT SURE IF WE HAVE THIS YET, BUT WON’T BE LIKE THIS:
Test 7 Validate automatic firmware update for servers
Section titled “Test 7 Validate automatic firmware update for servers”- Procedure
Navigate to Servers > select server > Firmware tab and identify component with available upgrade, Click upgrade
Alternatively if there are no available upgrades a downgrade can be performed from iDRAC and re-tried. Another option is to use terraform firmware profile feature to perform the downgrade.
Test 8 Delete and add a server
Section titled “Test 8 Delete and add a server”- Procedure
Navigate to Servers > select server > Save BMC IP, username and password
Mark the server as unavailable
Navigate to the Advanced tab > Click decommission
Once the server is decommissioned, navigate to Servers > Click Add server form, Select the site, vendor, type, input the IP, BMC username and password and click “Add Server”
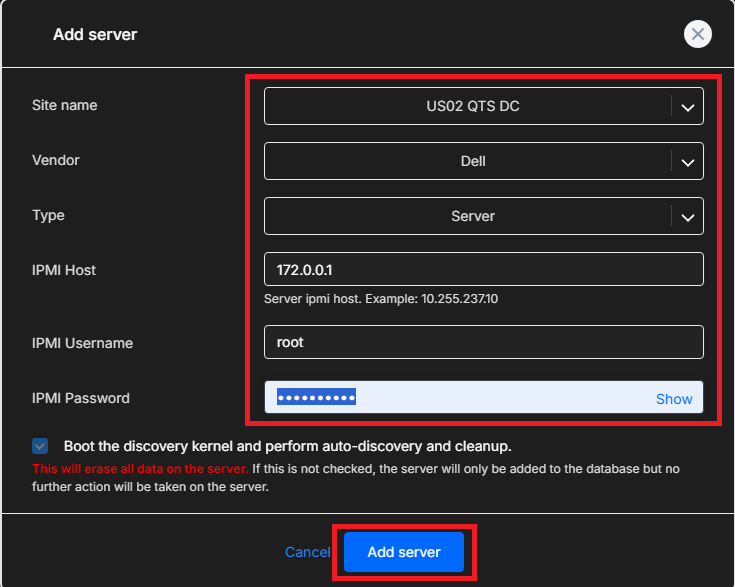
Once the server shows in the UI as unavailable or available, it is ready to be consumed.
Test 9 Validate role-based access control limits access appropriately
Section titled “Test 9 Validate role-based access control limits access appropriately”- Procedure
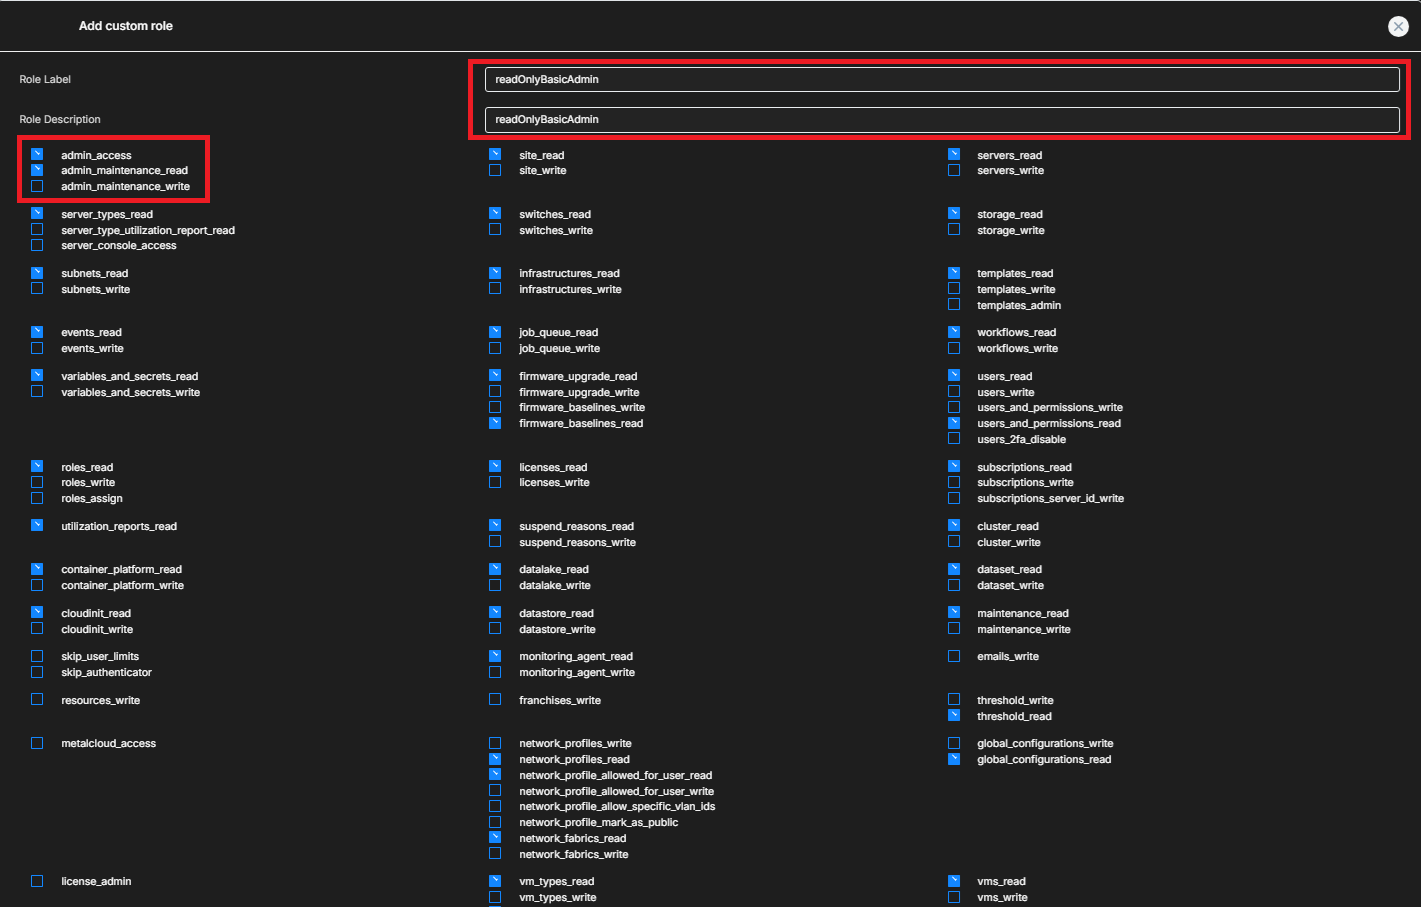
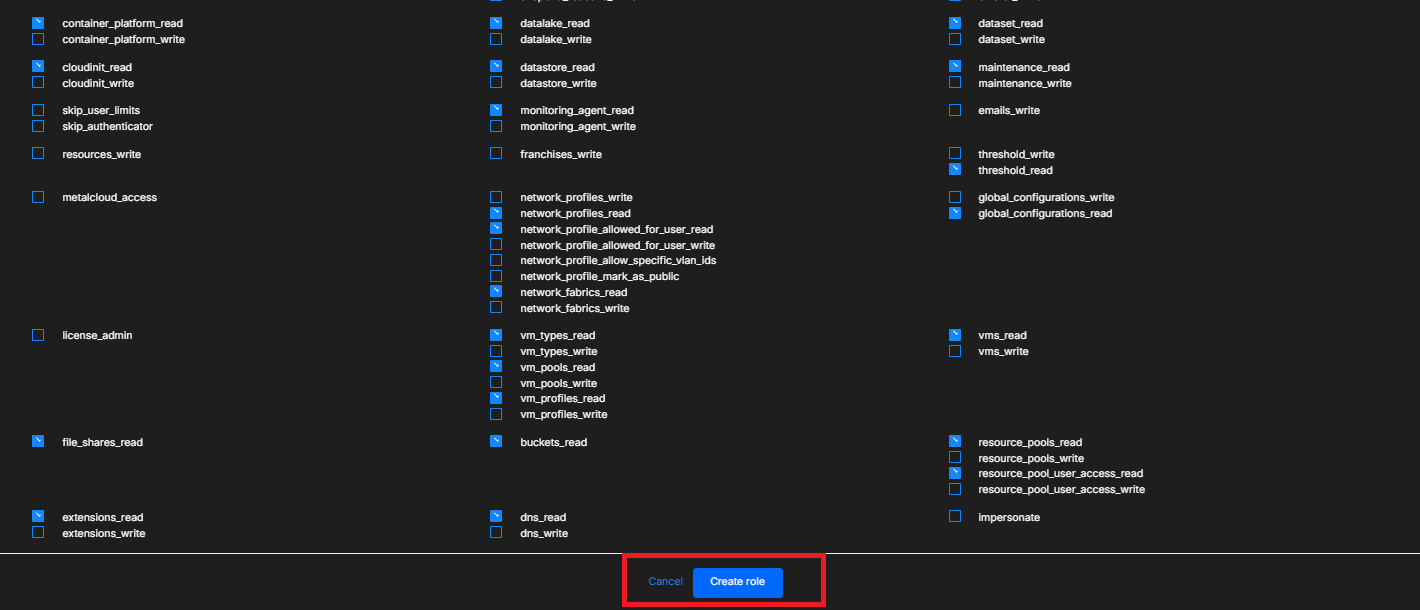
Navigate to Users & Permissions > Roles, click Add custom role
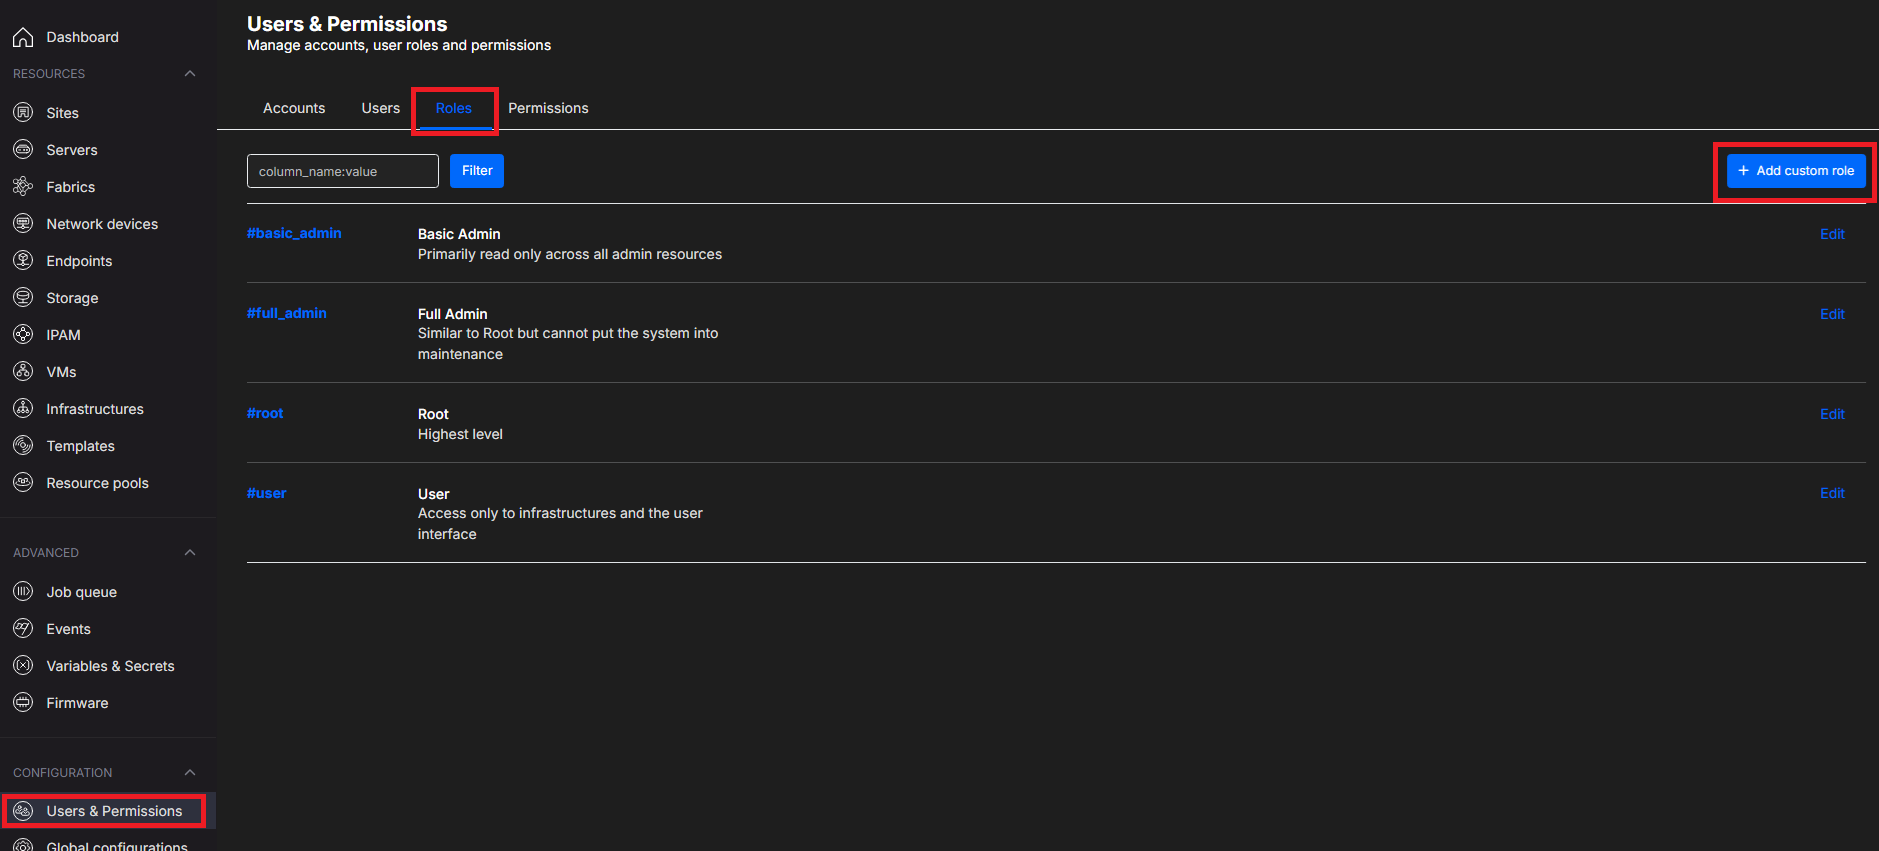
Add a name and a description to the custom role, select the desired permissions, click create role
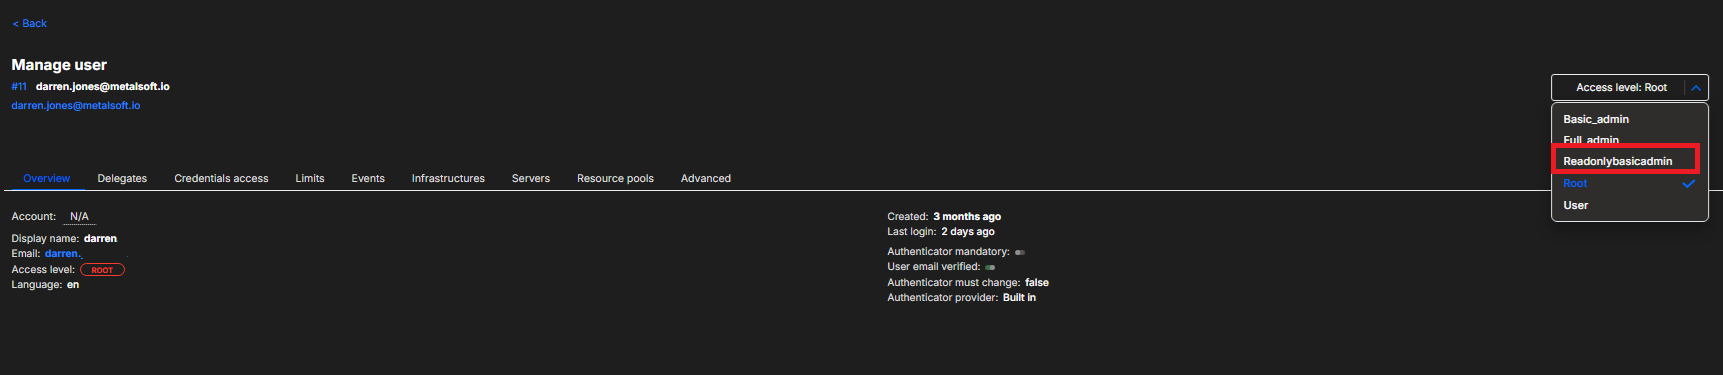
Go to the Users tab, search for a user, go to the Access level dropdown, select the custom role that was created

Test 10 Create an account and add a user to the account
Section titled “Test 10 Create an account and add a user to the account”- Procedure
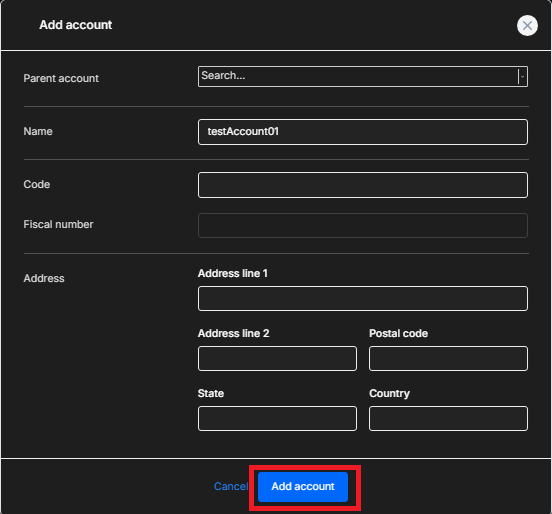
Navigate to Users & Permissions, click on Accounts/Add Account
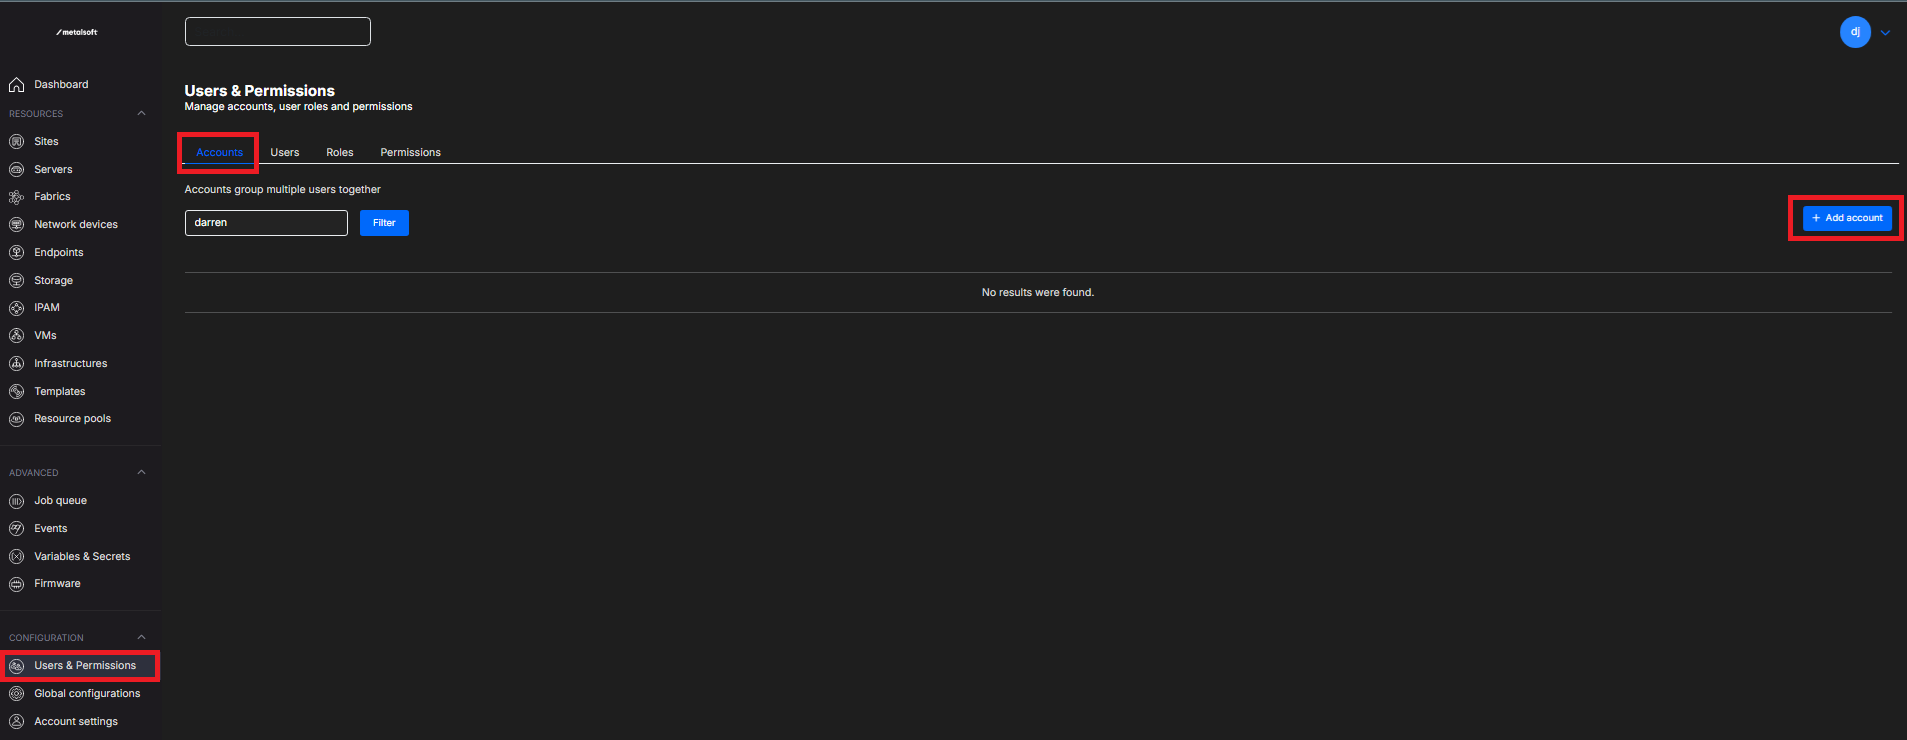
Fill in the Name and (if required)Parent account and click on Add account
Click on Users and select the user
Click on N/A next to “Account” and select the account created above. and click on the tick

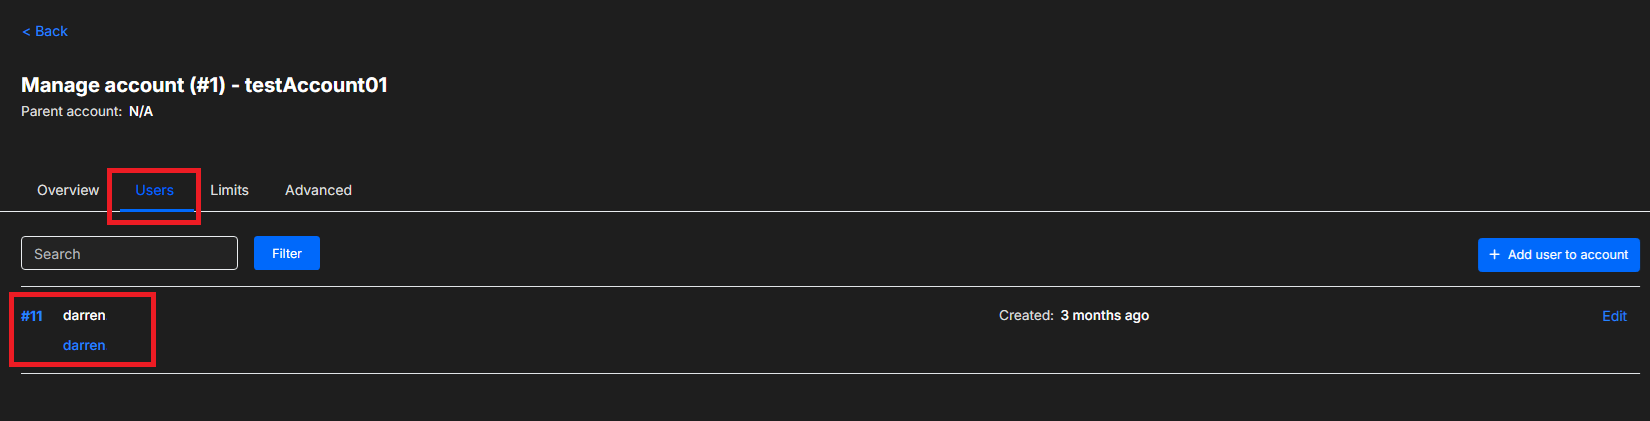
Go back to Accounts/click on the account created and click on Users and confirm the user has been added
Test 11 Create a resource pool and add users and servers to the resource pool
Section titled “Test 11 Create a resource pool and add users and servers to the resource pool”- Procedure
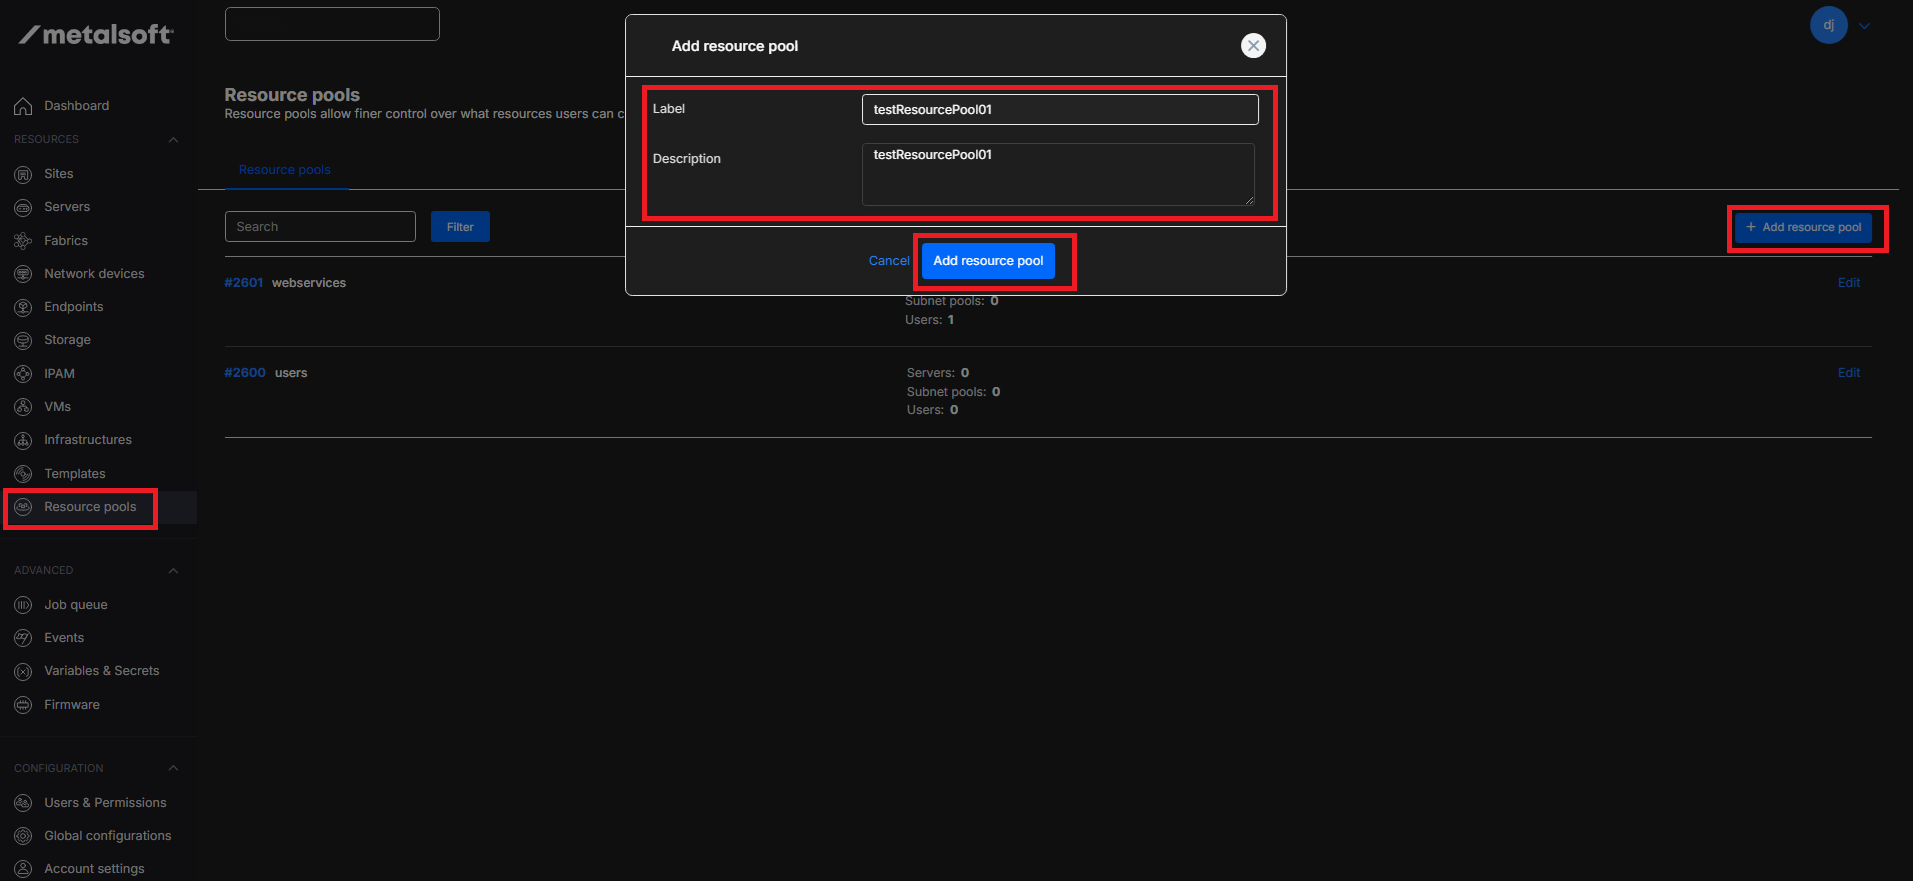
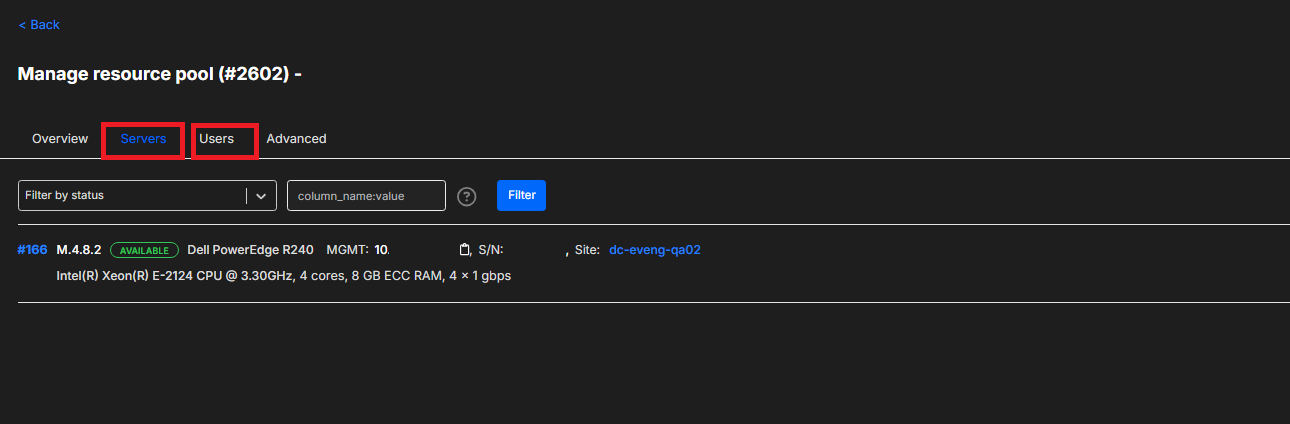
Navigate to Resource Pools and click on “Add resource pool”, fill in Label and Description and click “Add resource pool”
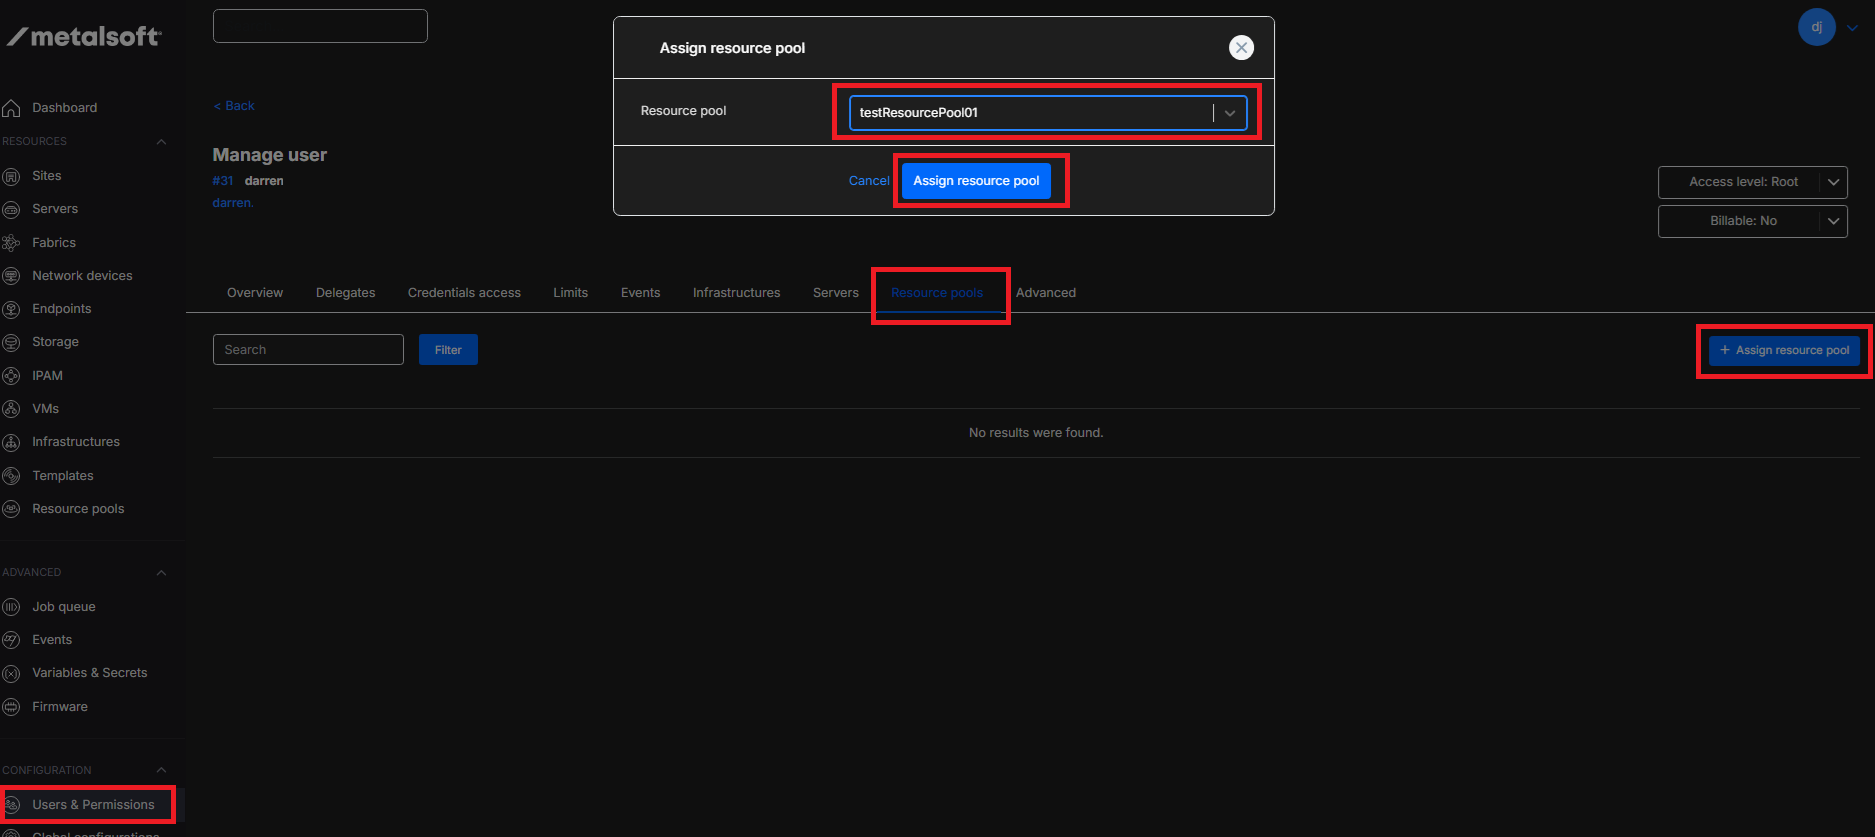
Navigate to to Users & Permissions > Users and select a user
Click on “Assign resource pool” click on Resource pool in the pop up and select the resource pool and click on “Assign resource pool”
Click on Servers and click on an unassigned server, click on Resource pool and select the resource pool and click on the tick
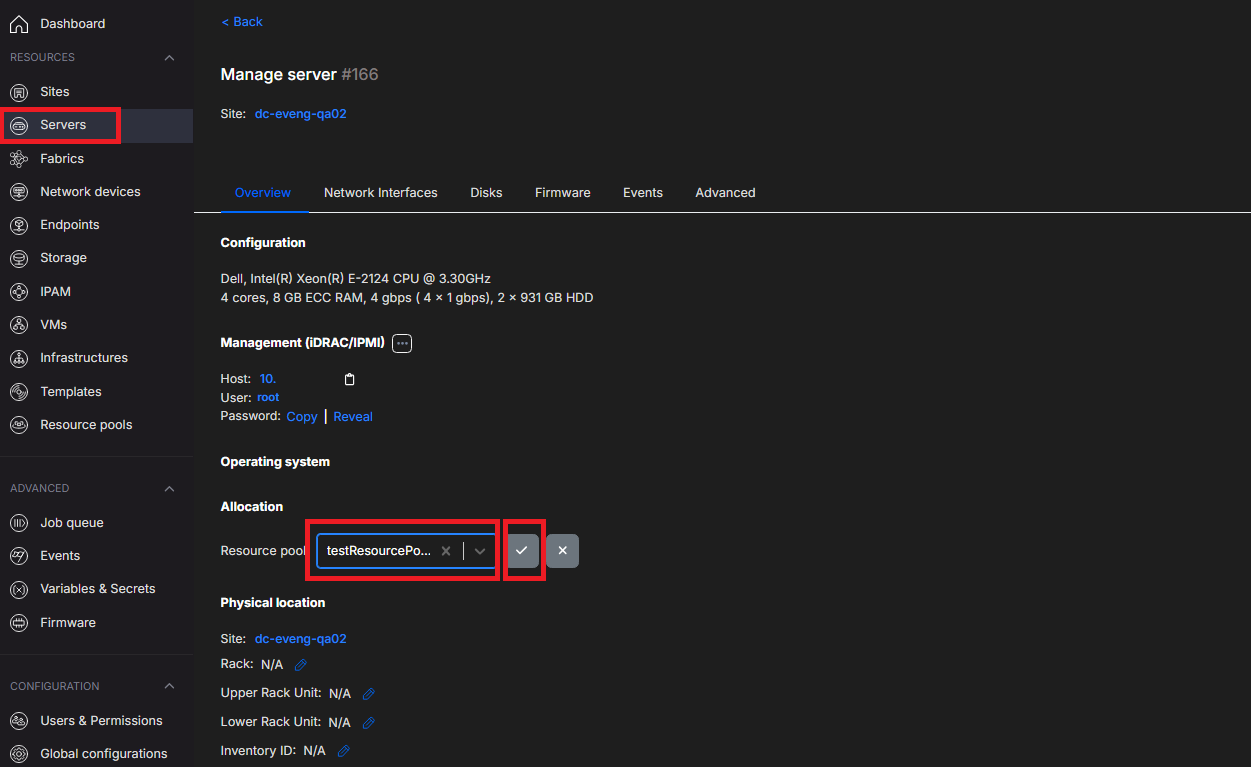
- Navigate back to Resource Pools and review Users and Servers assigned to the Resource pool
Advanced Testing
Section titled “Advanced Testing”Advanced Test 1 Validate secure decommission of a server resource
Section titled “Advanced Test 1 Validate secure decommission of a server resource”- Procedure
MetalSoft support Secure Erase if the server and drives support this. If not, it will write zero’s to the disk which will take longer.
Navigate to the infrastructure designer, click on Settings on the left and click “Delete”, then type “delete data” in the pop up and click on “Delete infrastructure”

The infrastruture will now be deleted. Once the infrastructure is deleted, the server/s will change to the “Available” state once. See Server Lifecycle.
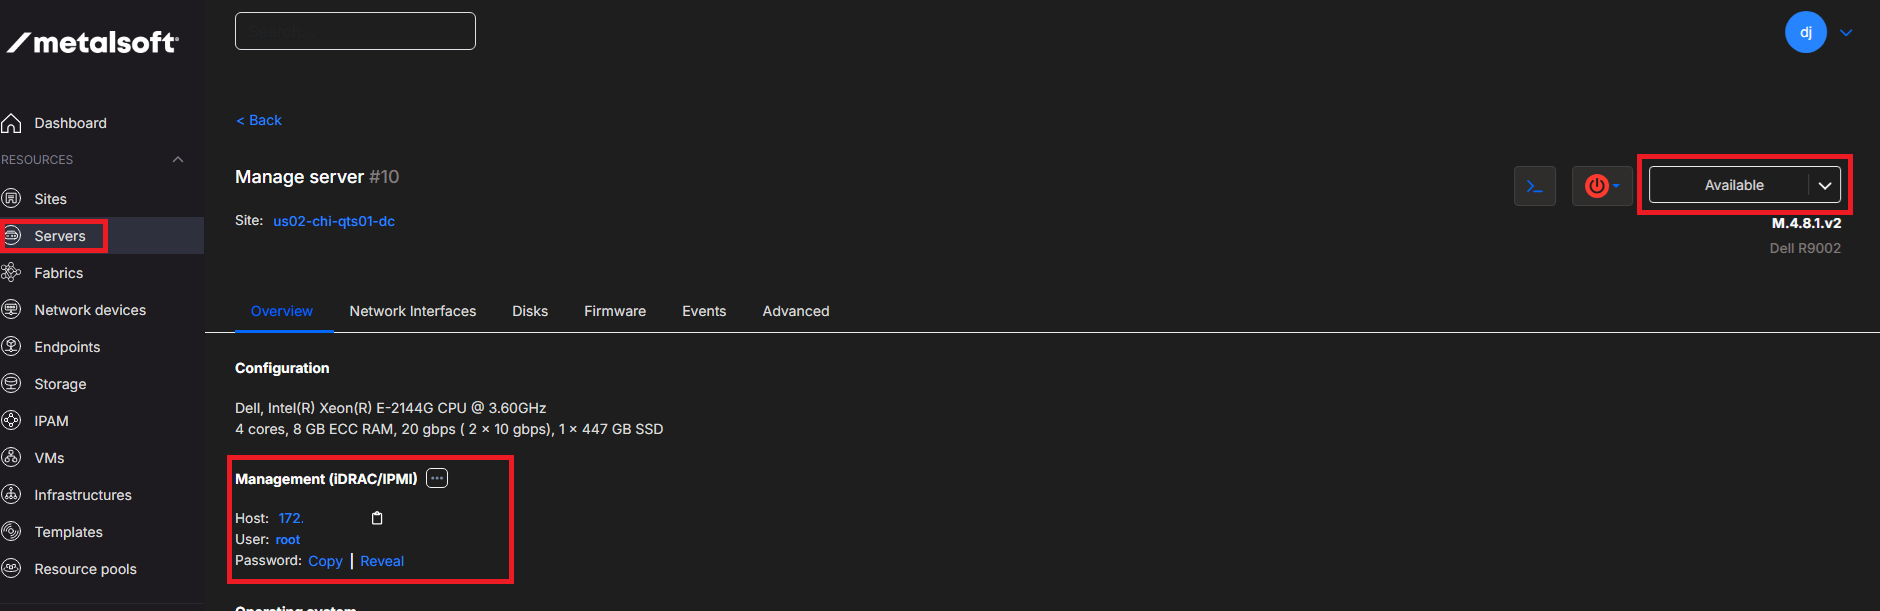
Navigate to servers > select a server, notice the available state (or if “cleaning” wait until cleaning is complete and server is in Available state) Use the iDRAC credentials to login into the iDRAC and try to boot the server.
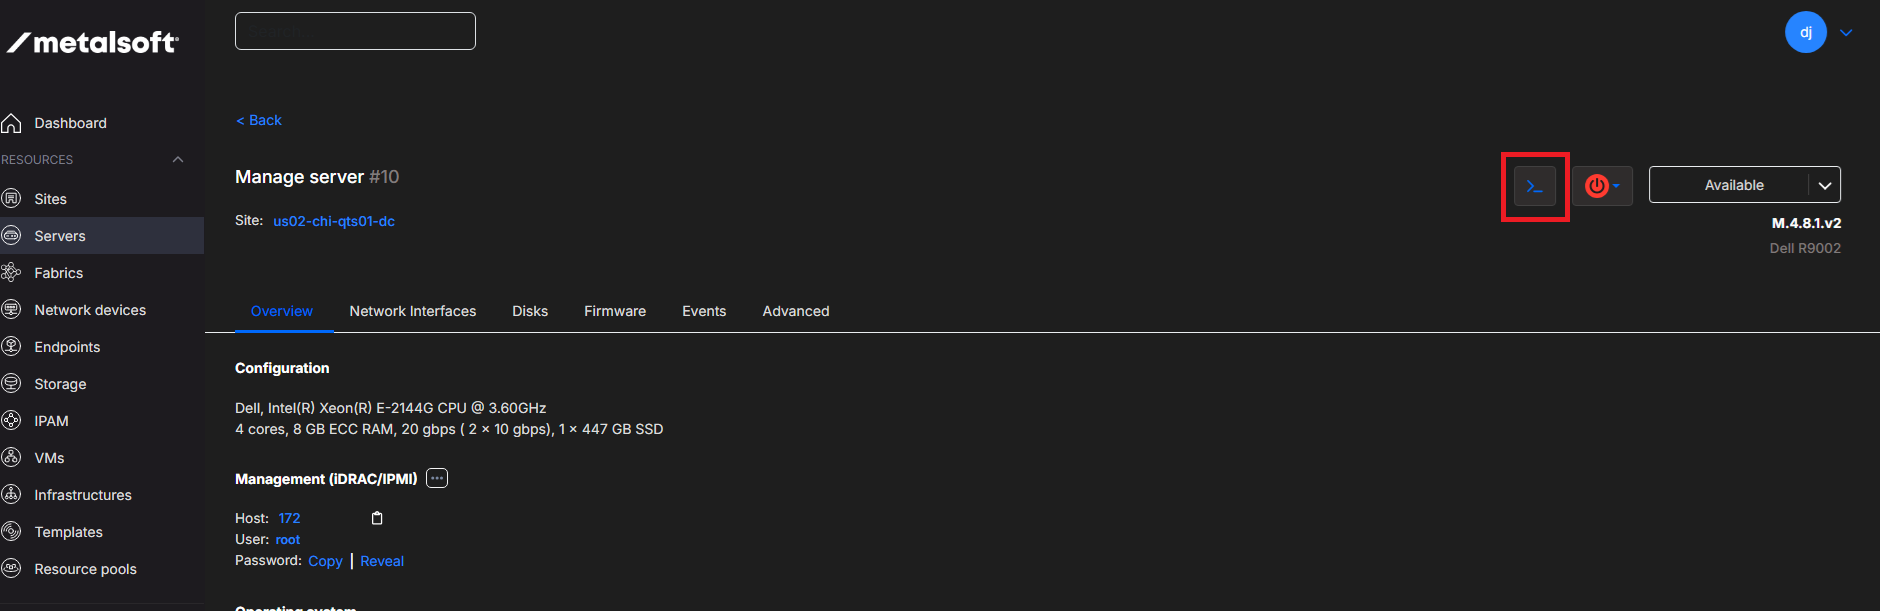
Alternatively click on the console button at the top right of the server page to check the console directly if the server hardware supports remote console and click on the power button.
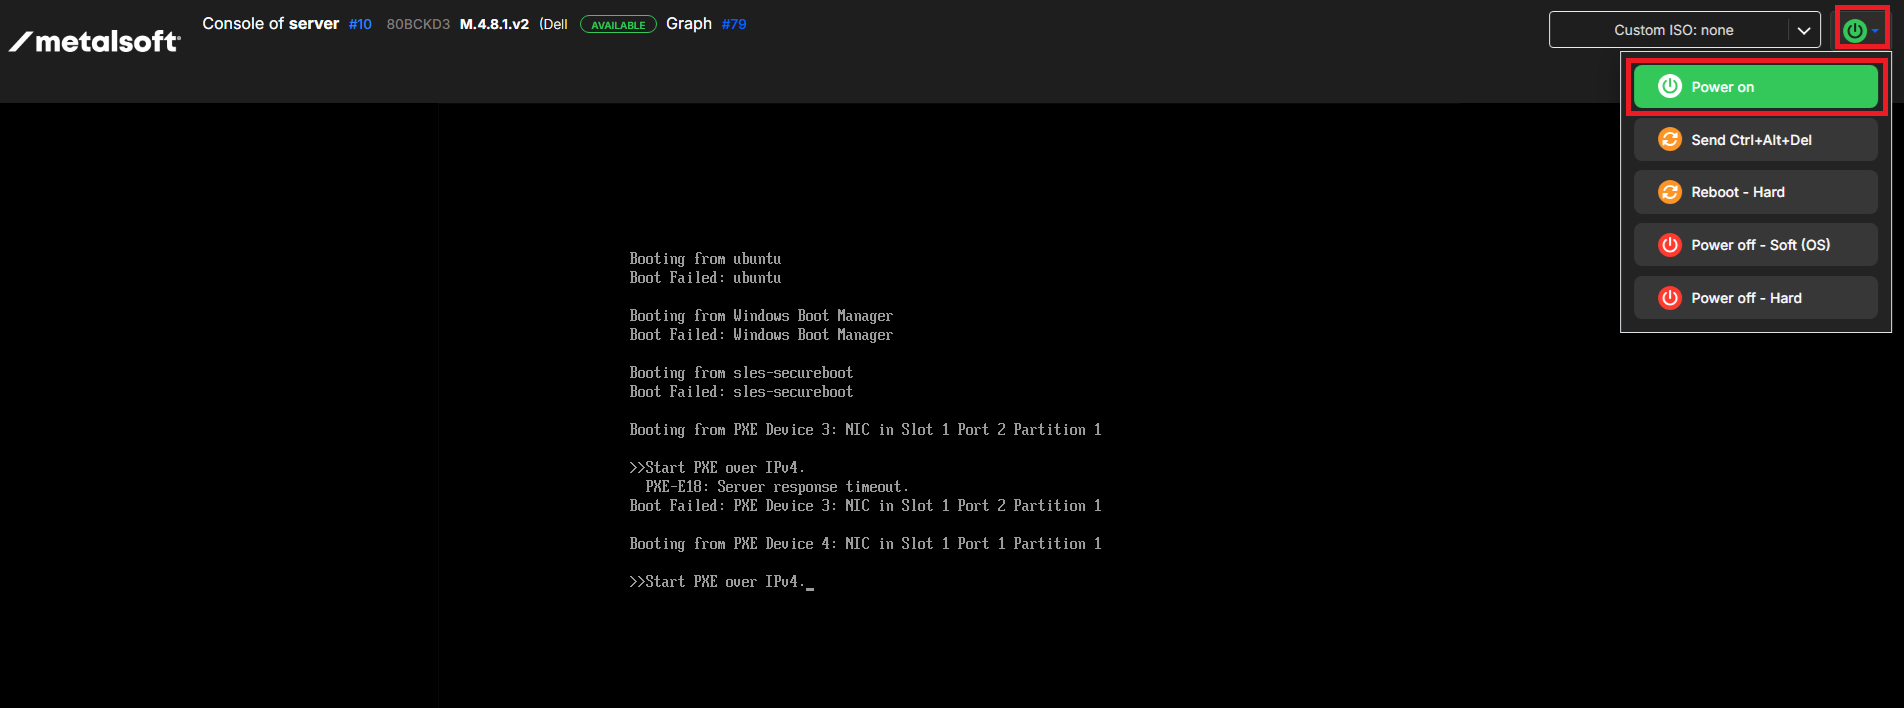
The server will not boot as the drive has been erased
Advanced Test 2 Review audit log content
Section titled “Advanced Test 2 Review audit log content”- Procedure
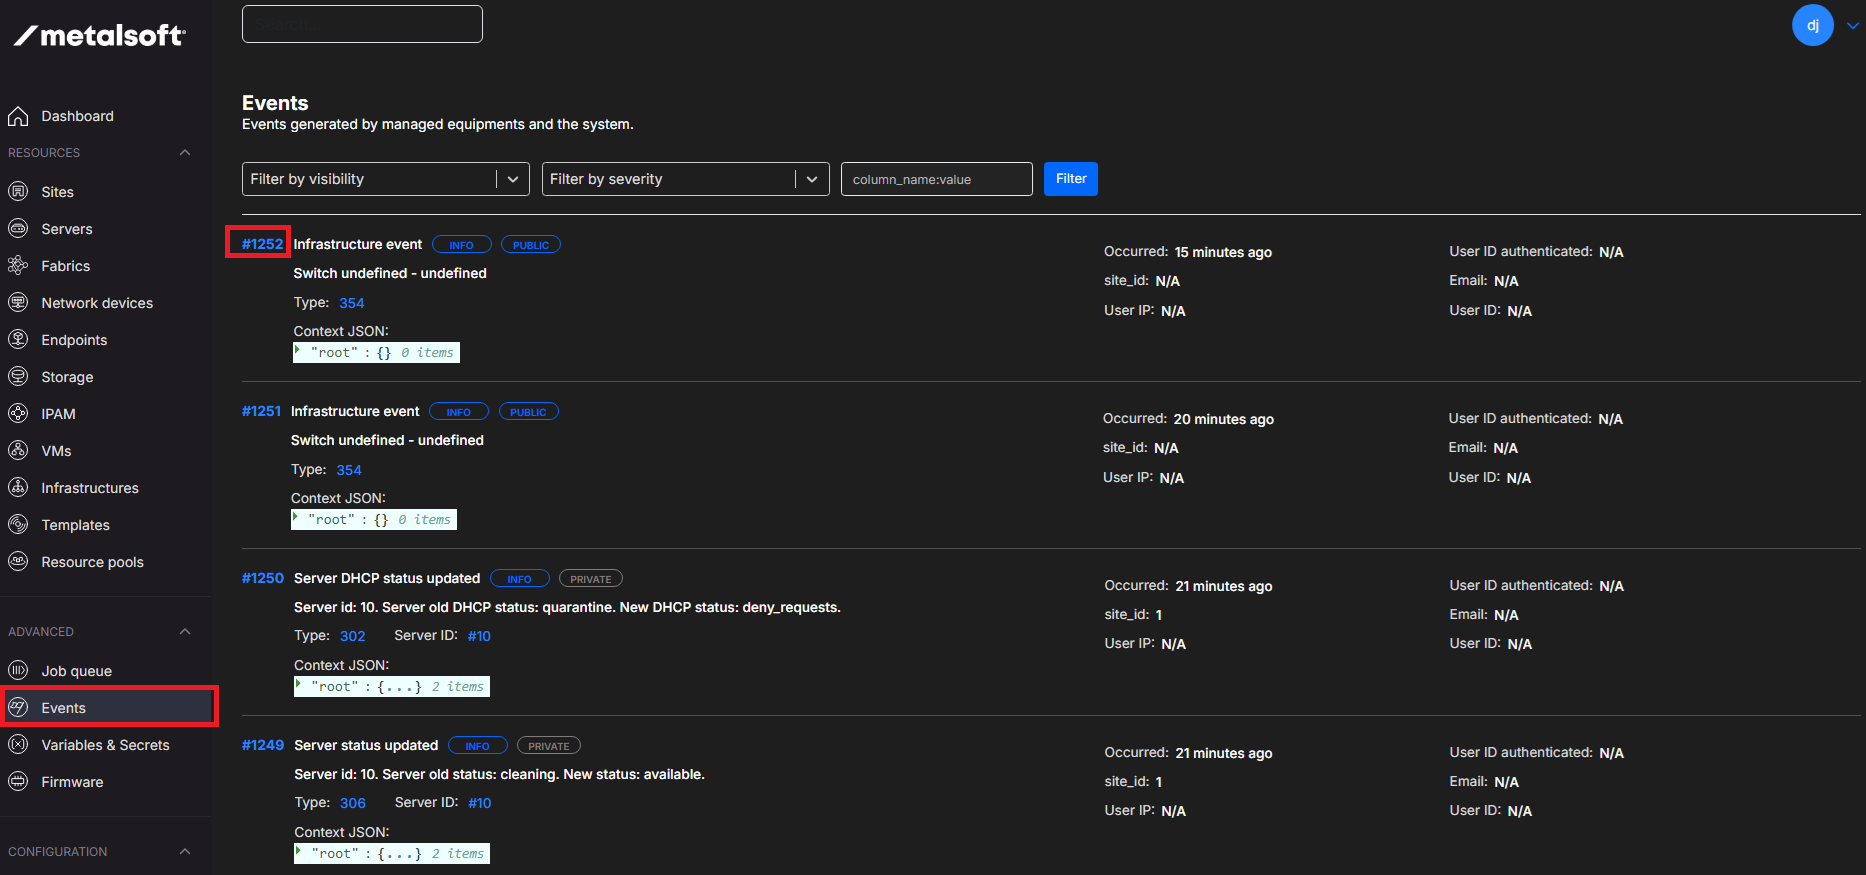
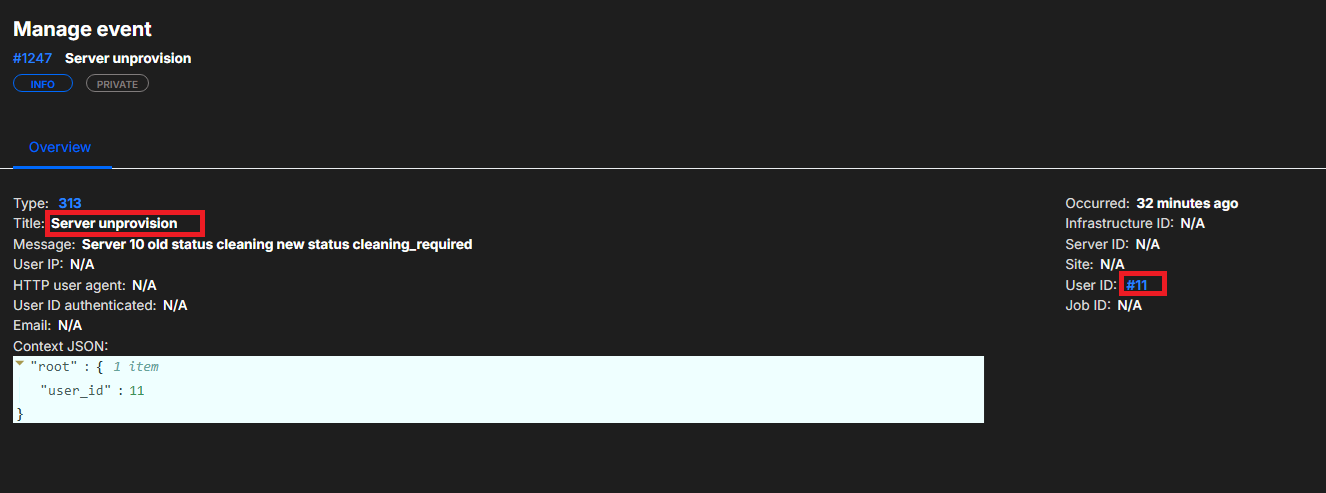
Navigate to the Events section and click on any event
Advanced Test 3 Explore Workflow Extensions
Section titled “Advanced Test 3 Explore Workflow Extensions”- Procedure
DJCHANGETHIS AS NOT SURE IF WE HAVE THIS YET
Advanced Test 4 Review Job queue
Section titled “Advanced Test 4 Review Job queue”- Procedure
Start a deploy in Infrastructure editor, then go back to Admin UI Click on Job Queue Look for Running or Pending Jobs using the Last 4h summary box
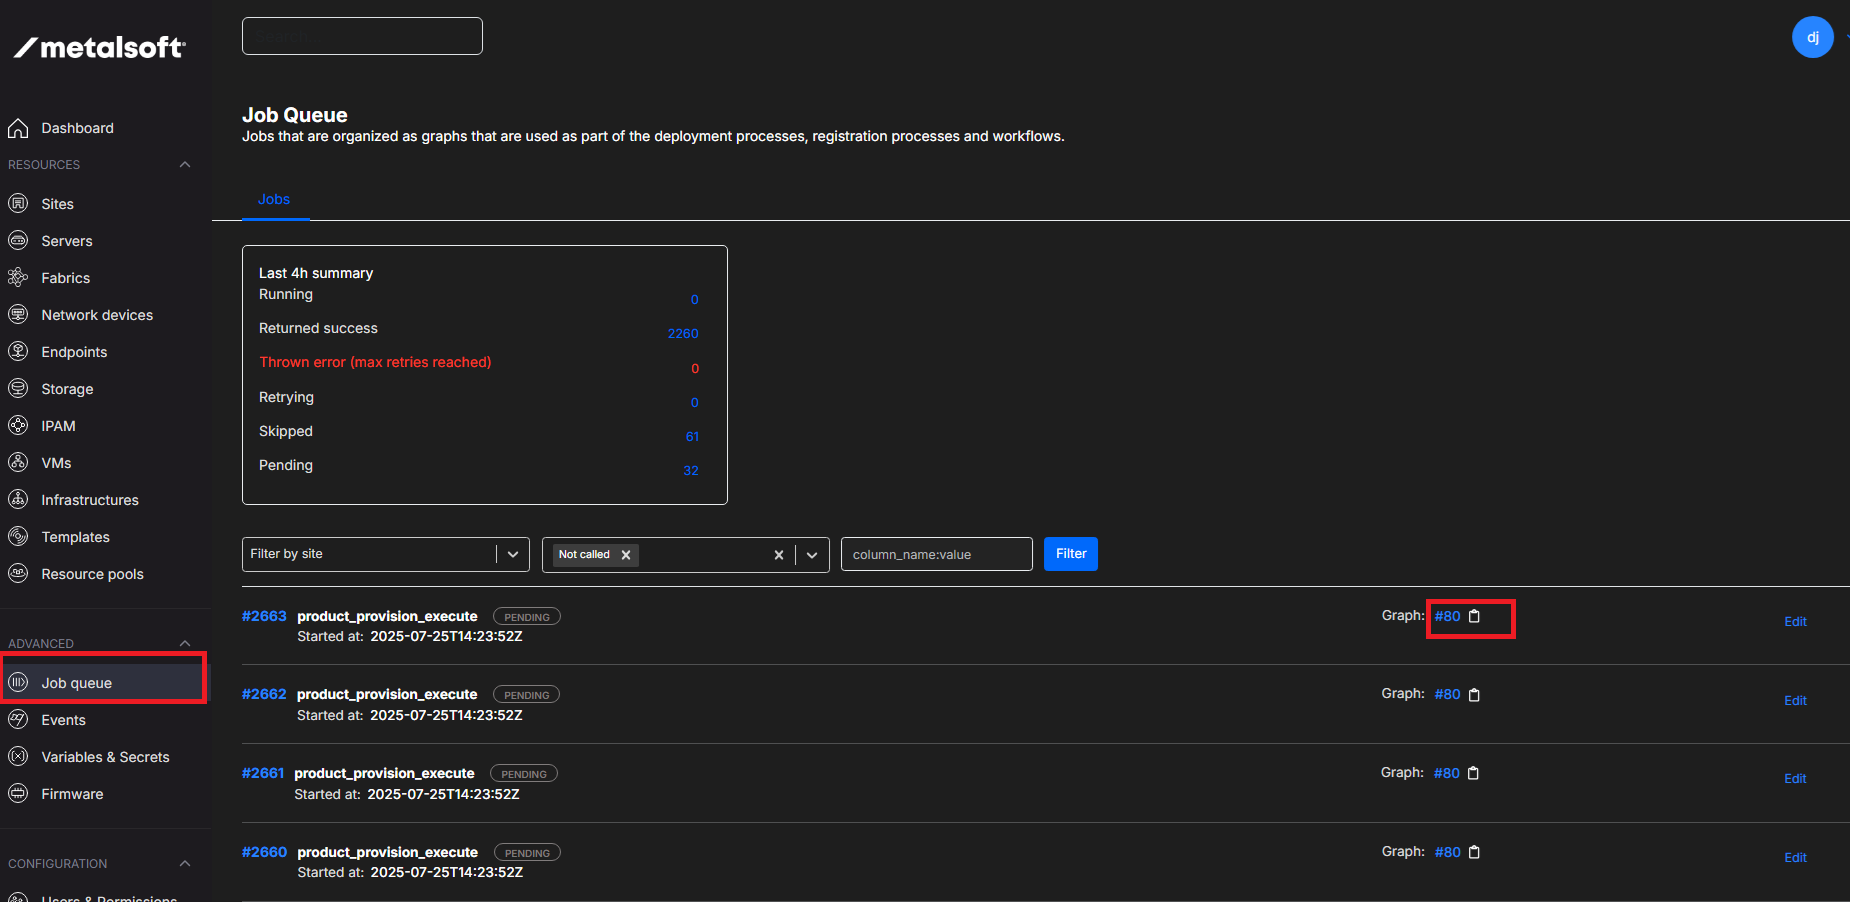
Click on the graph number on the right and review the AFC graph and running tasks
Advanced Test 5 Review command line and API coverage
Section titled “Advanced Test 5 Review command line and API coverage”- Procedure
Advanced Test 6 Set up and manage different login authentication methods in MetalSoft
Section titled “Advanced Test 6 Set up and manage different login authentication methods in MetalSoft”- Procedure
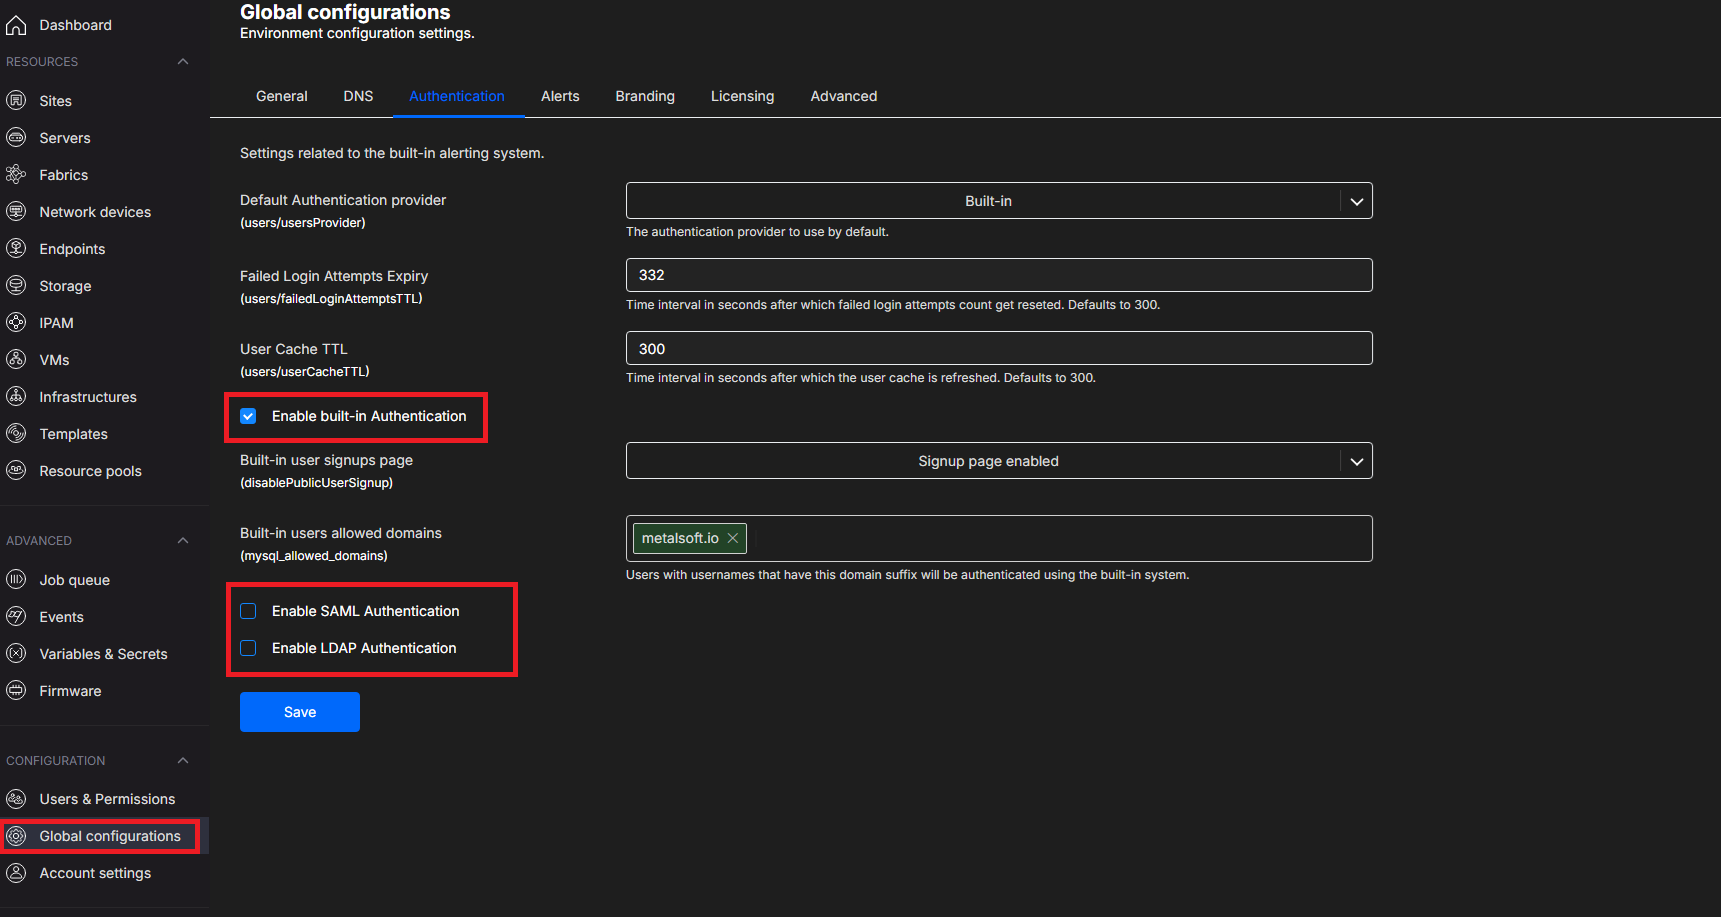
MetalSoft supports Built in, LDAP and SAML login authentication. Built in is default. To set up an alternate login authentication method:
In the Admin UI, click on Global Configuration, then Authentication and tick the Authentication method you would like to use.
Fill in the required fields in the selected authentication method as per these documents:
Configuring LDAP for Microsoft Active Directory
Click on Save
Test if a test user can log in
Note, during testing, we suggest you do not disable built in authentication as a backup.
Advanced Test 7 Export logs to an external log collecion service
Section titled “Advanced Test 7 Export logs to an external log collecion service”- Procedure
MetalSoft support exporting Kafka queues as well as Syslog forwarding.
To archive event logs via Kafka, follow these instructions:
To forward Syslog messages, follow these instructions: