Deploying Kubernetes on MetalSoft
MetalSoft provides a built-in mechanism to deploy and expand a single-tenant kubernetes (upstream open source version) application in an infrastructure.
Note that Kubernetes deployment must be enabled by the admin in the user limits before it is available to users.
The Kubernetes cluster is deployed using Calico and Ceph as an option for PVCs. Other options include using the CSI providers for the storage systems managed by MetalSoft.
Deploying Kubernetes using the UI:
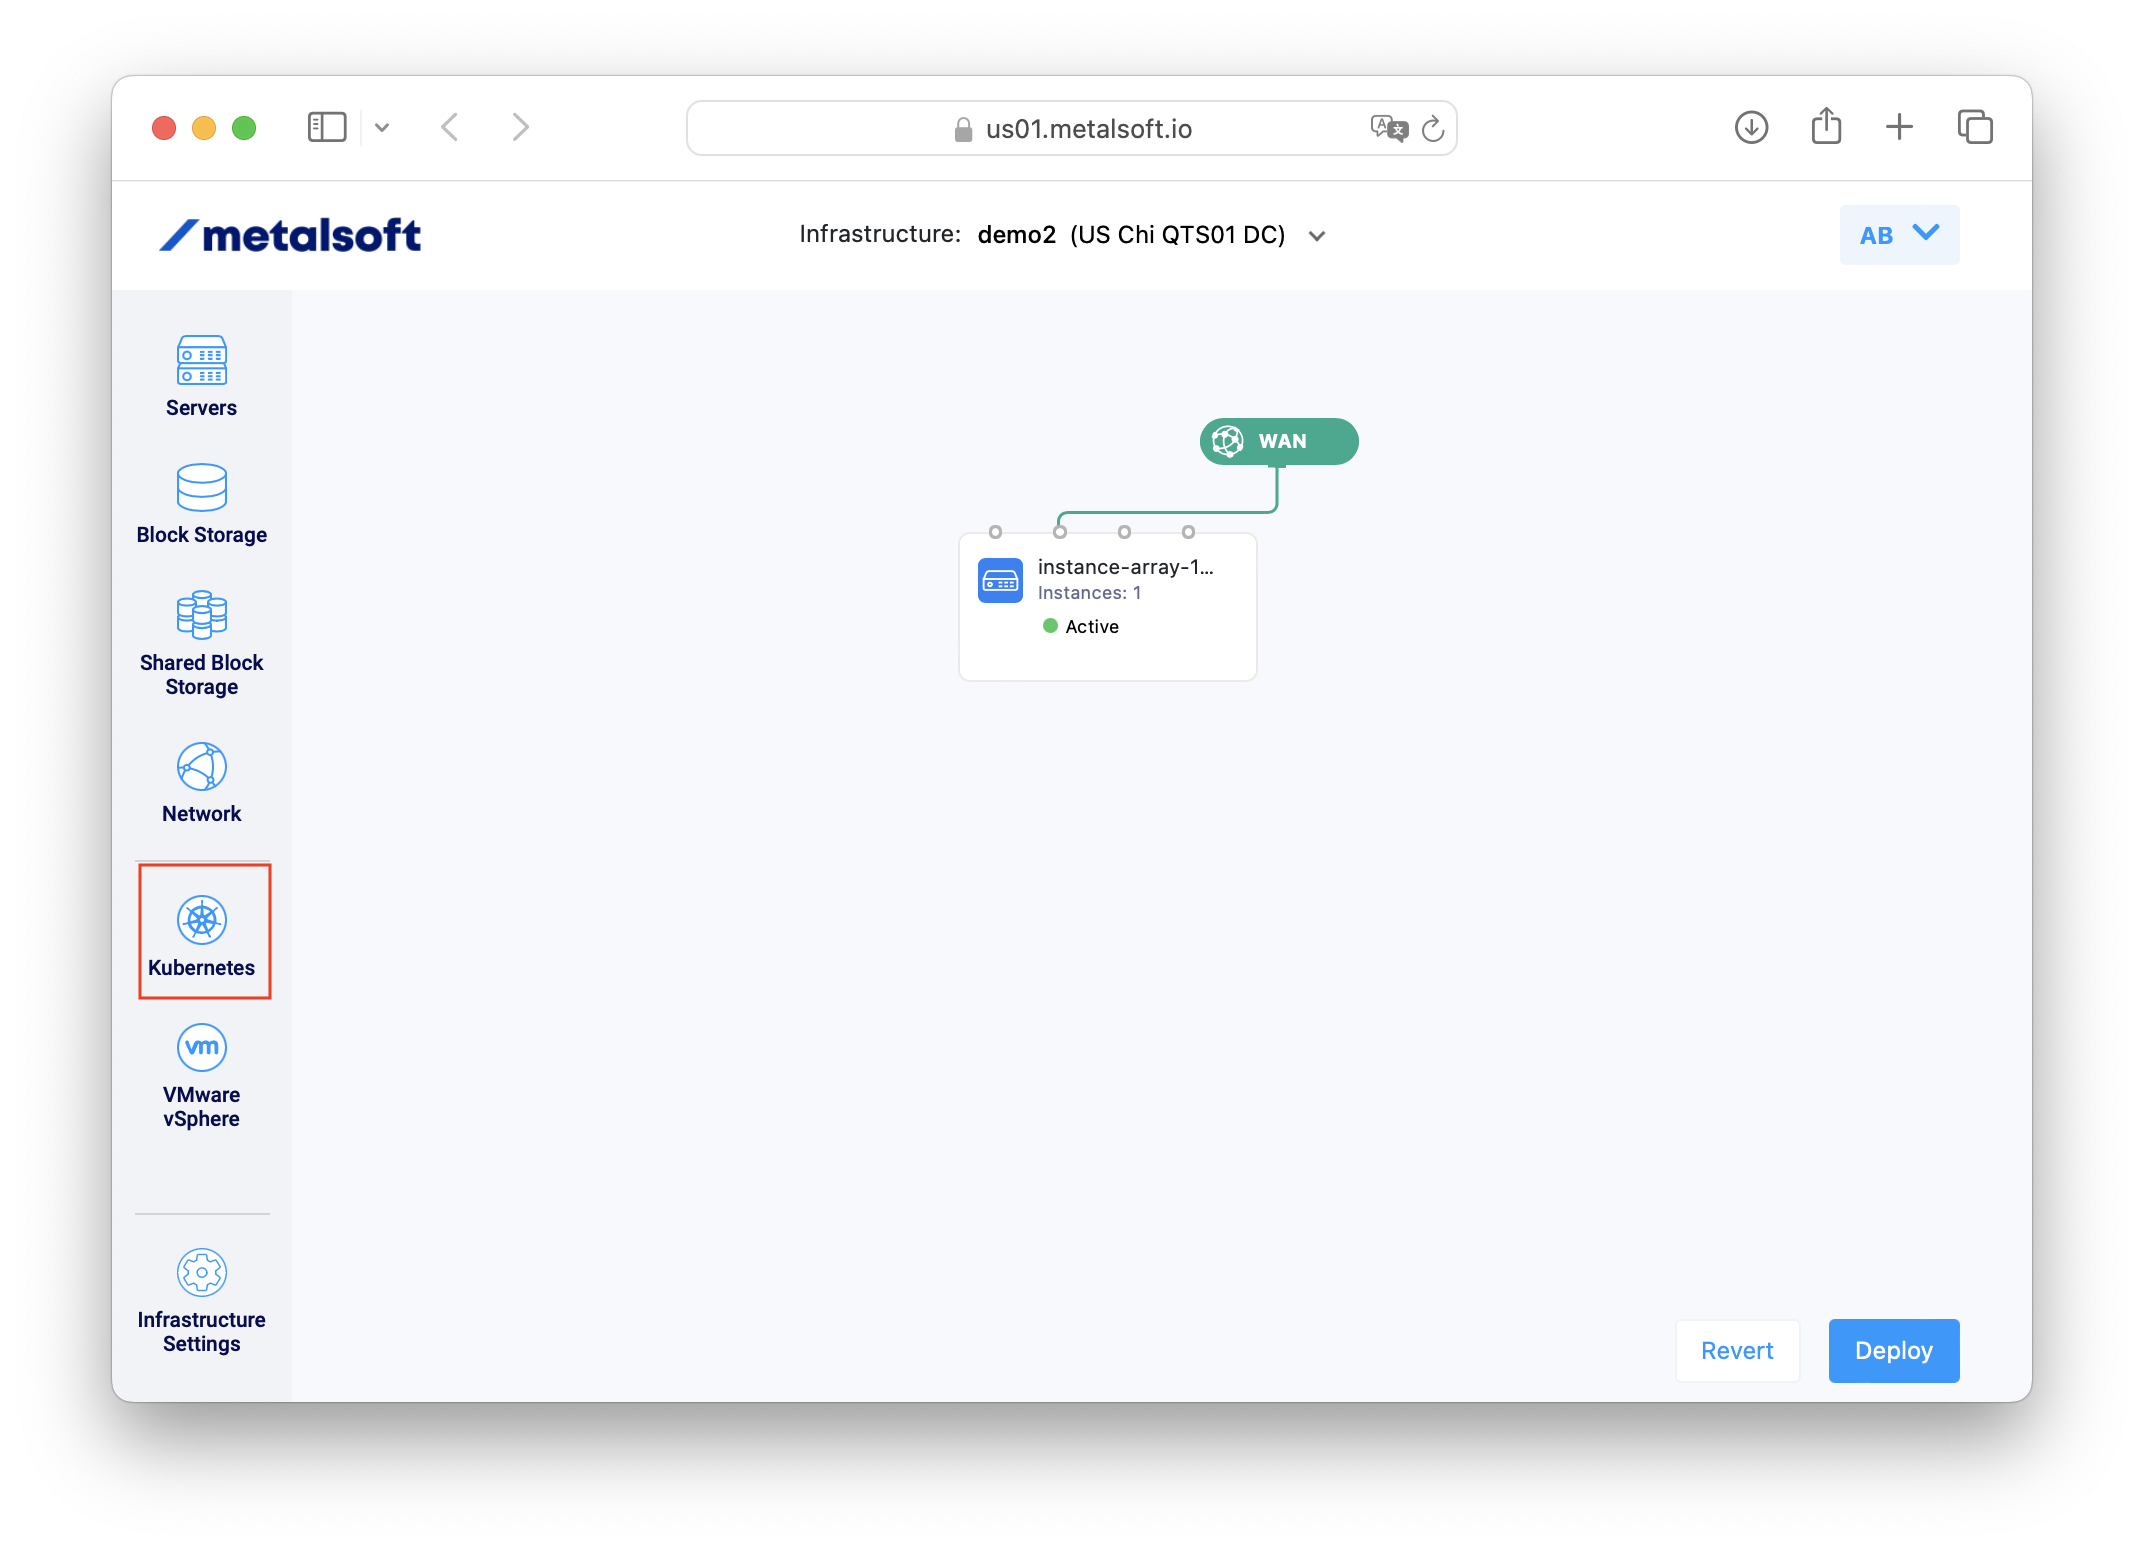
Section titled “Deploying Kubernetes using the UI:”Click on the Kubernetes icon on the left
Configure the node server types and count
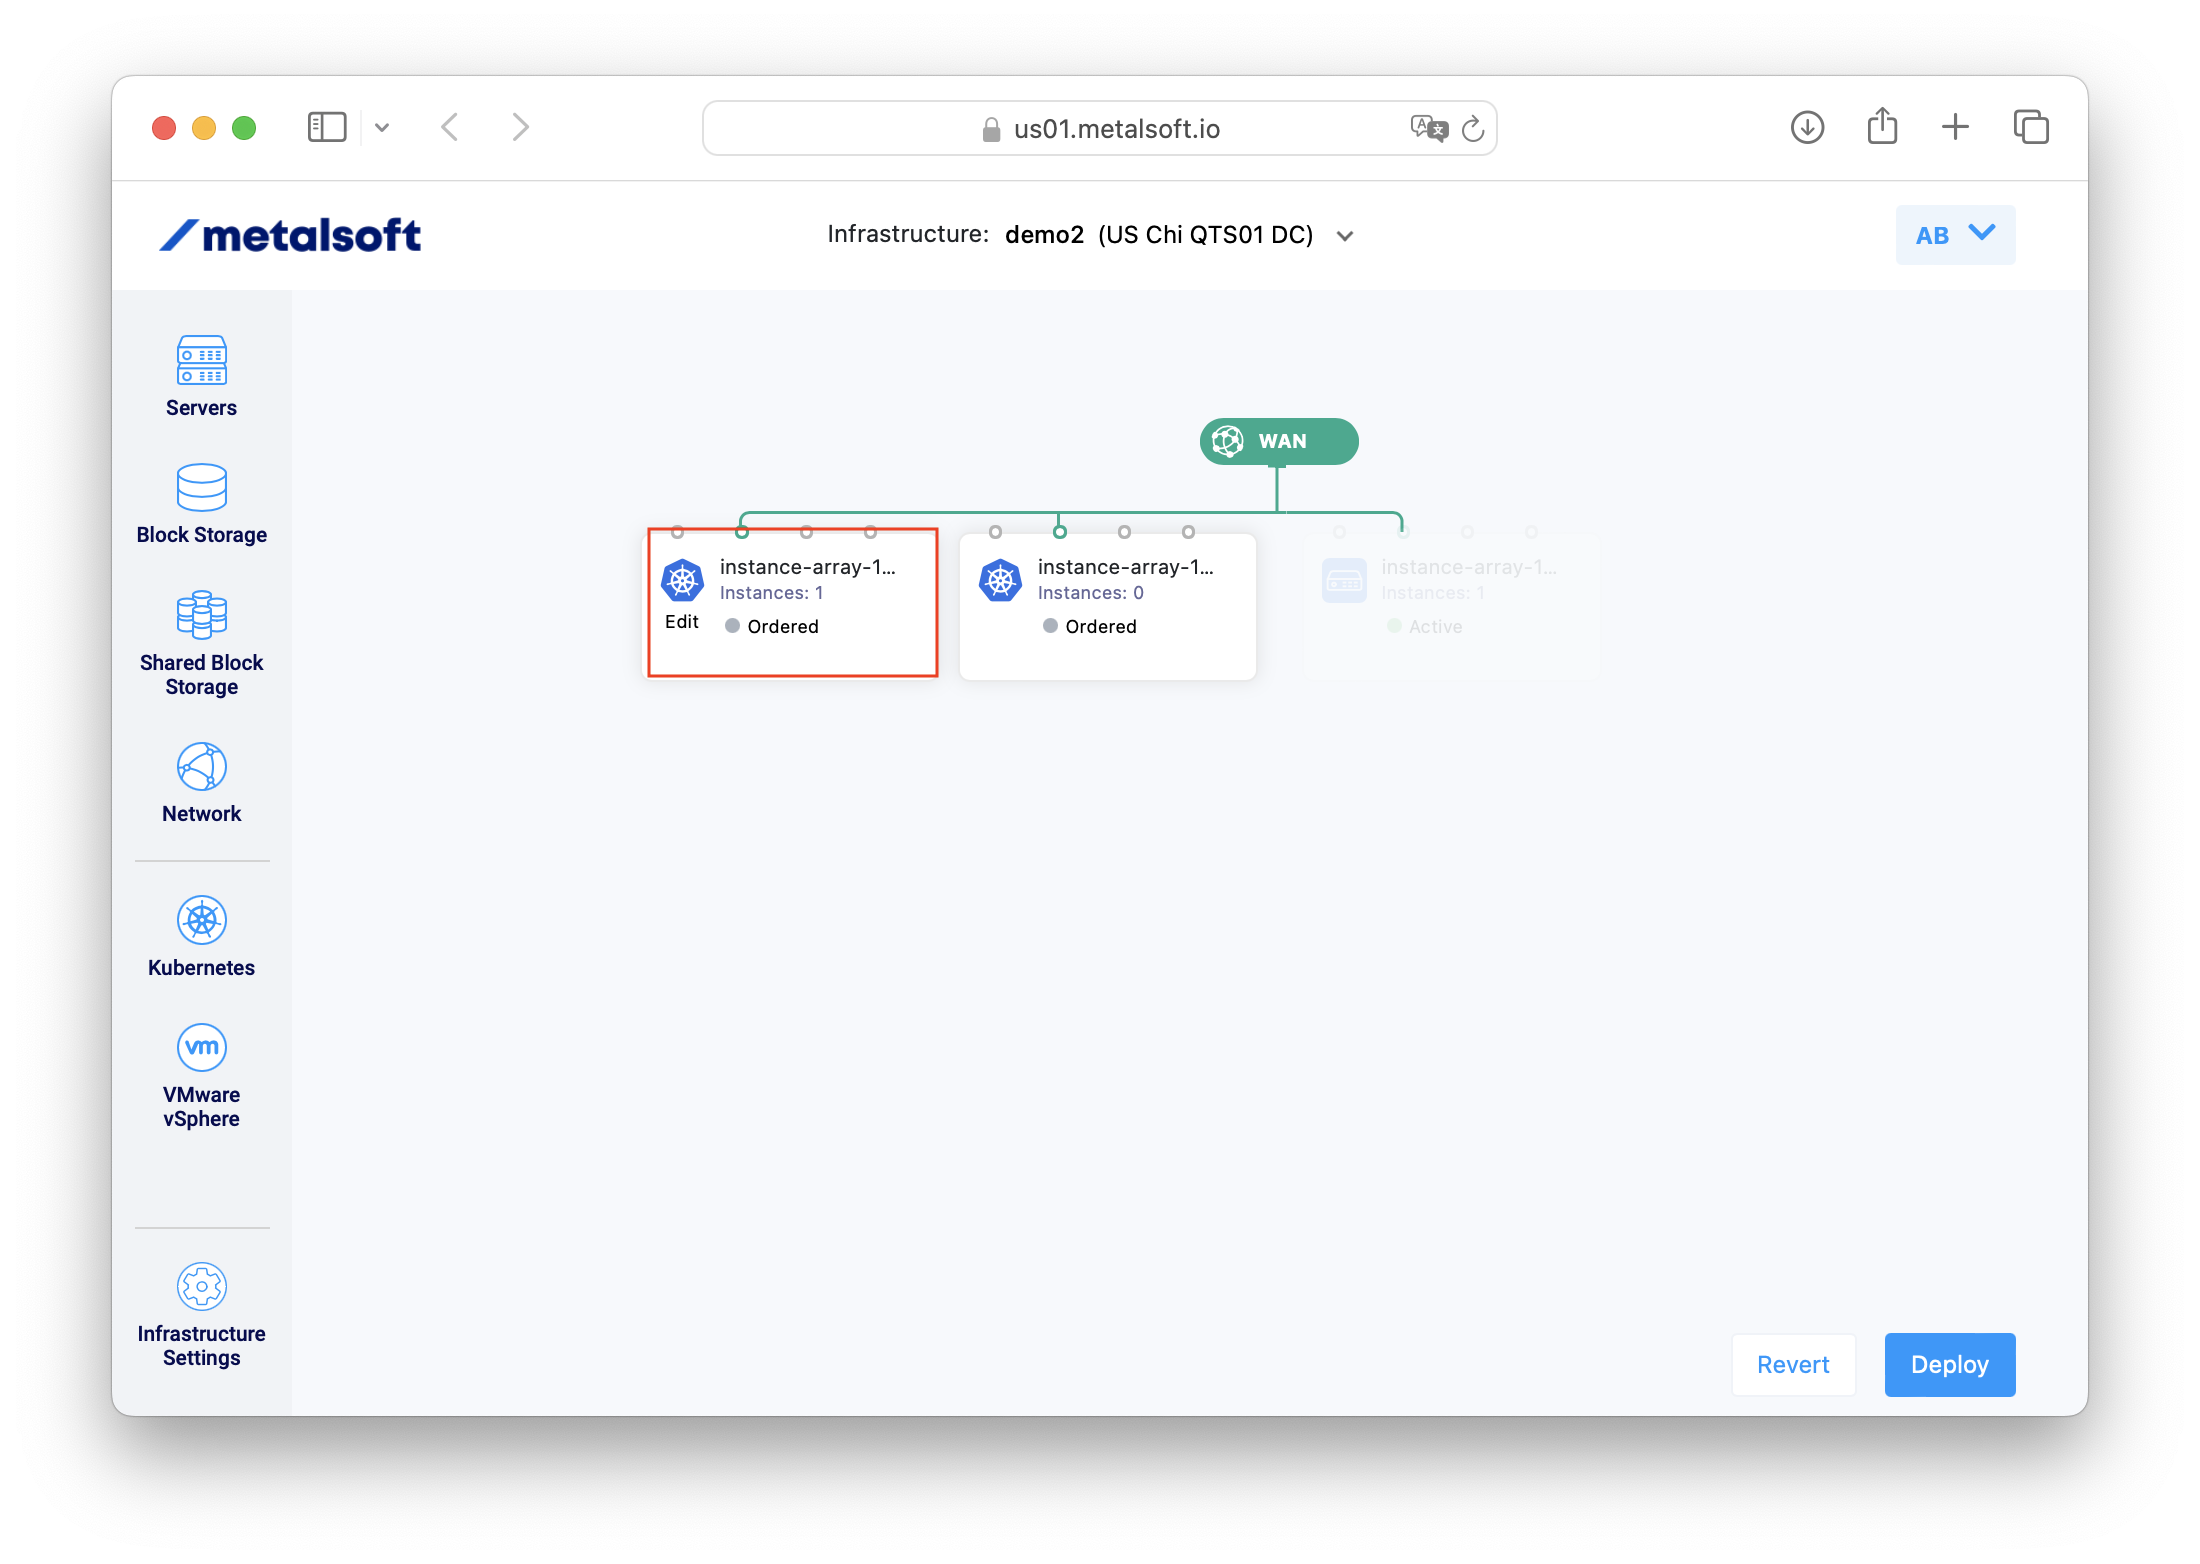
Section titled “Configure the node server types and count”Click on one of the two instance arrays.
Go to the Configuration tab and select the configuration and count for both the Head and the Worker nodes:
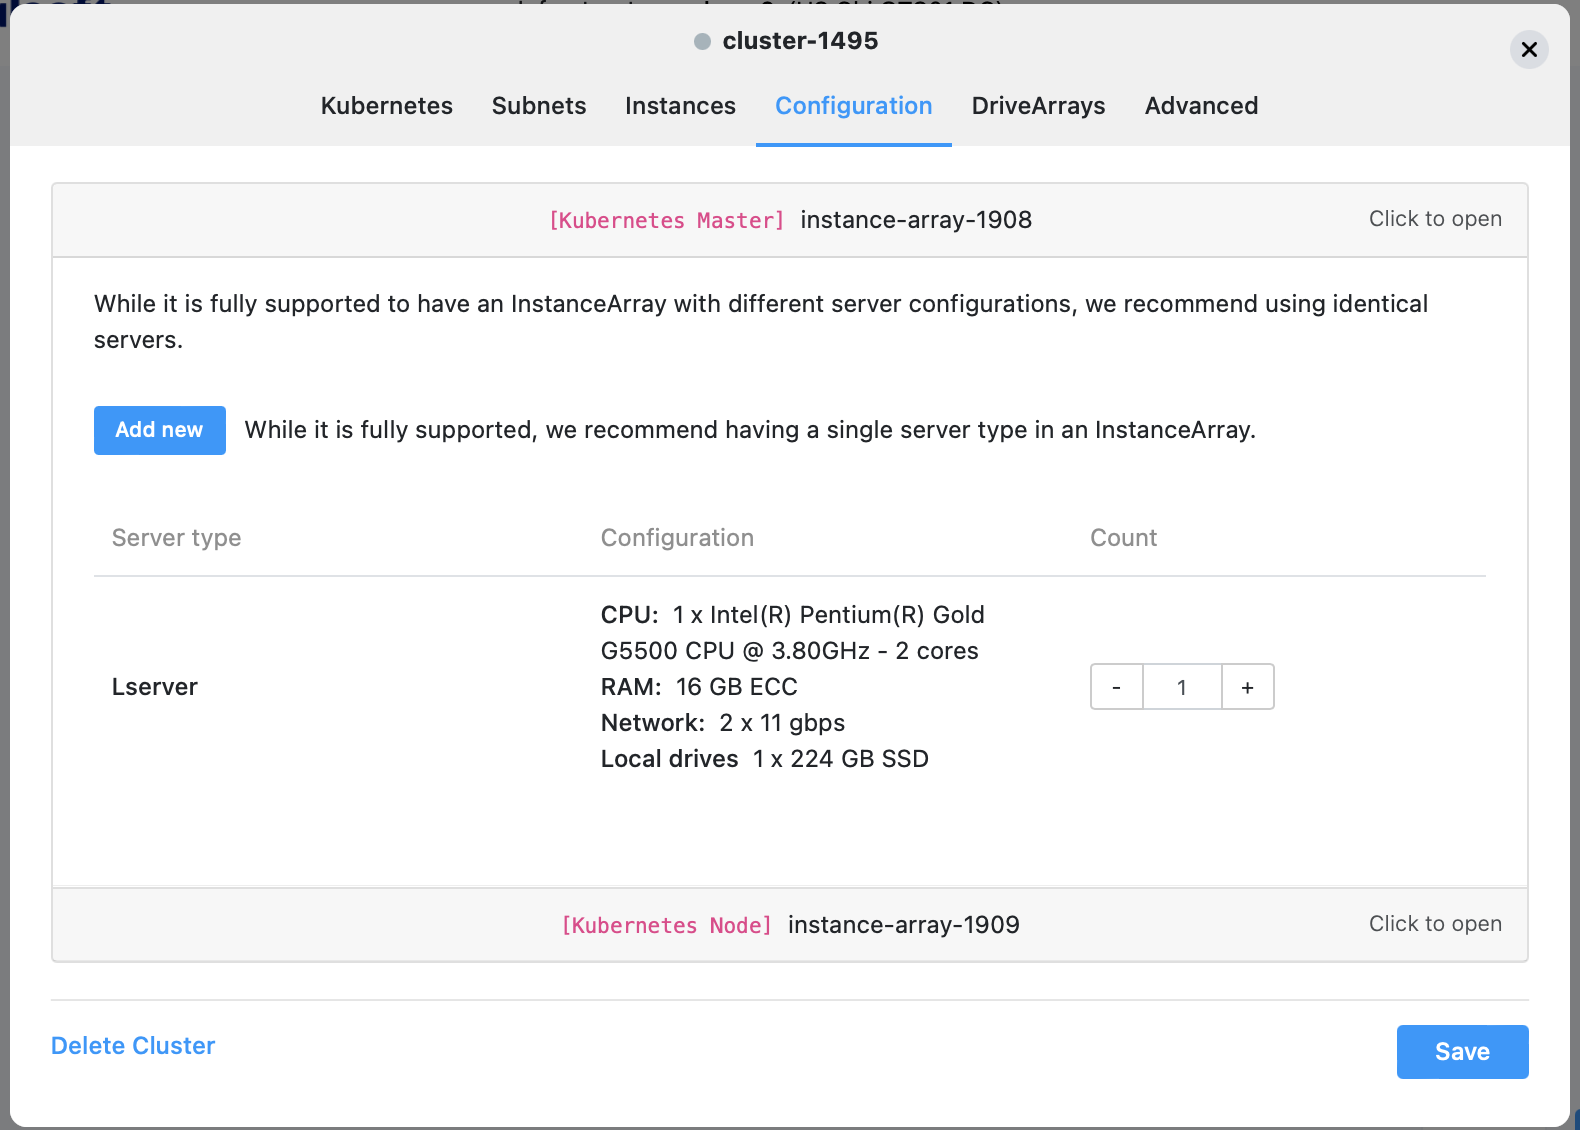
Click on the ”-” to remove the currently selected option and click Add New and select a configuration that is available.
Click “Deploy”.
Accessing the cluster
Section titled “Accessing the cluster”To access the cluster either connect via SSH on the first node or use the kubectl configuration file provided in the interface to connect from outside the cluster.
Setting up a sample application on Kubernetes
Section titled “Setting up a sample application on Kubernetes”-
Setting up the initial application
In this example, the application and service are in a single file. This is based on ASP.NET samples container To set up your initial application, connect to the Master node by SSH as described in the previous section and accept the security warning. Create a directory structure to keep your configuration files in. For this example, we will use /app/ for the application
Create the file to store the configuration in:
vim kubernetes-sample.yaml
And copy the following into the file and save it
---kind: ServiceapiVersion: v1metadata: name: dotnet-servicespec: selector: app: dotnet ports: - protocol: TCP port: 80 targetPort: 80---apiVersion: apps/v1kind: Deploymentmetadata: name: dotnet-deployment labels: app: dotnetspec: replicas: 2 selector: matchLabels: app: dotnet template: metadata: labels: app: dotnet spec: containers: - name: dotnet image: mcr.microsoft.com/dotnet/samples:aspnetapp ports: - containerPort: 80Lastly, you need to use kubectl to create the app and service:
kubectl create -f kubernetes-sample.yamlYou should receive the following output:
[root@instance-60451 apps]# kubectl create -f kubernetes-sample.yamlservice/dotnet-service createddeployment.apps/dotnet-deployment created-
Setting up the ingress controller
Next we need to expose the application to the internet using an Ingress controller.
Create the file to store the configuration in:
vim kubernetes-sample-ingress.yaml
And copy the following into the file and save it:
---apiVersion: networking.k8s.io/v1kind: Ingressmetadata: name: asp-ingress annotations: nginx.ingress.kubernetes.io/rewrite-target: /spec: rules: - http: paths: - path: / pathType: Prefix backend: service: name: dotnet-service port: number: 80Lastly, you need to use kubectl to create the app and service:
kubectl create -f kubernetes-sample-ingress.yaml-
Verifying the application and controller are set up.
If you run:
kubectl get services --all-namespacesYou should get an output similar to this:
NAMESPACE NAME TYPE CLUSTER-IP EXTERNAL-IP PORT(S) AGEdefault dotnet-service ClusterIP 10.103.116.90 <none> 80/TCP 4m20sdefault kubernetes ClusterIP 10.96.0.1 <none> 443/TCP 3h52mingress-nginx ingress-nginx-controller LoadBalancer 10.109.186.4 84.40.62.50 80:30972/TCP,443:31184/TCP 3h50mingress-nginx ingress-nginx-controller-admission ClusterIP 10.107.104.161 <none> 443/TCP 3h50mingress-nginx ingress-nginx-defaultbackend ClusterIP 10.103.243.207 <none> 80/TCP 3h50mkube-system kube-dns ClusterIP 10.96.0.10 <none> 53/UDP,53/TCP,9153/TCP 3h52mkubernetes-dashboard dashboard-metrics-scraper ClusterIP 10.100.132.173 <none> 8000/TCP 3h49mkubernetes-dashboard kubernetes-dashboard NodePort 10.97.126.97 <none> 443:31708/TCP 3h49mYou should be able to see that the EXTERNAL-IP is set for the Load Balancer ingress-nginx-controller. In this instance 84.40.62.50.
If you now go back to the infrastructure manager and add a firewall rule to allow port 80, you should be able to view the application in a web browser.
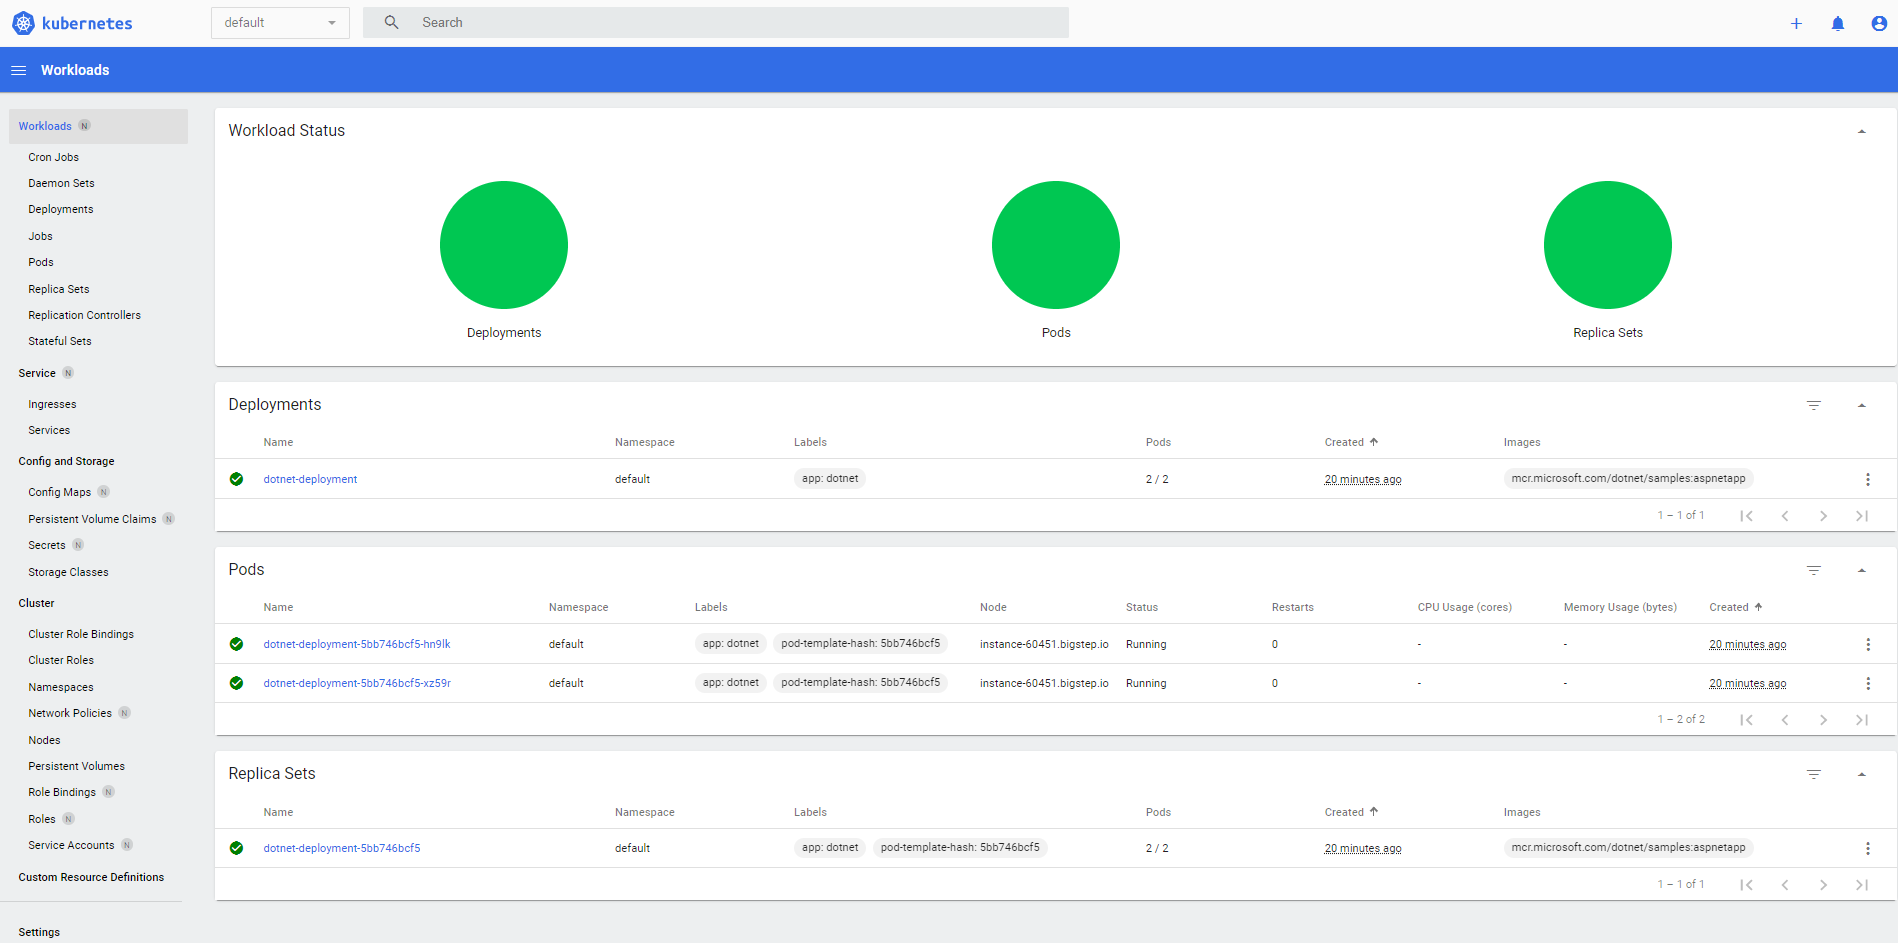
You will also be able to view the details in the dashboard which you can acces from the infrastruture designer after clicking on one of the Instance Arrays (Kubernetes/Dashboard):

Deploying RedHat OpenShift, Rancher or other distributions of Kubernetes on MetalSoft
Section titled “Deploying RedHat OpenShift, Rancher or other distributions of Kubernetes on MetalSoft”Other versions of kubernetes can be deployed after the bare metal servers have been deployed. Follow the instructions for the respective distributions for more details:
MetalSoft automatic DNS management
Section titled “MetalSoft automatic DNS management”MetalSoft provides built-in DNS records for each for WAN IPs provisioned.
For example instance-array-1576.vanilla.demo2.7.us01.metalsoft.io will be mapped to the ip 192.168.64.20
$ dig instance-array-1576.vanilla.demo2.7.us01.metalsoft.io
; <<>> DiG 9.10.6 <<>> instance-array-1576.vanilla.demo2.7.us01.metalsoft.io;; global options: +cmd;; Got answer:;; ->>HEADER<<- opcode: QUERY, status: NXDOMAIN, id: 48397;; flags: qr rd ra; QUERY: 1, ANSWER: 0, AUTHORITY: 1, ADDITIONAL: 1
;; OPT PSEUDOSECTION:; EDNS: version: 0, flags:; udp: 512;; QUESTION SECTION:;instance-array-1576.vanilla.demo2.7.us01.metalsoft.io. IN A
;; AUTHORITY SECTION:demo2.7.us01.metalsoft.io. 300  IN      SOA     ns1.metalsoft.io. alex.bordei\@metalsoft.io. 1684800083 300 600 86400 1200
;; Query time: 381 msec;; SERVER: 192.168.1.1#53(192.168.1.1);; WHEN: Tue Nov 07 12:13:19 CET 2023;; MSG SIZE  rcvd: 144
If additional DNS records are required an external DNS system might be needed to set CNAME records towards the records managed by MetalSoft.