

NVIDIA Spectrum-X: 1-SU Demo (256 GPU)
This demo builds a single scalable-unit Spectrum-X fabric from a clean state and attaches a tenant to it, using the MetalSoft CLI and Terraform. The fabric is a two-tier leaf-spine design running EVPN over eBGP on Cumulus Linux 5.14.0. Allow about 40 minutes end to end; most of that is switch deployment time.
What you will build
Section titled “What you will build”| Property | Value |
|---|---|
| Switches | 6 (4 leaf, 2 spine) |
| HGX hosts | 4 (256 GPUs) |
| Fabric label | spectrumx-1su-514 |
| Tenant | tenant1, one L3 EVPN network |
| NOS | Cumulus Linux 5.14.0 |
Before you begin
Section titled “Before you begin”The lab was launched from the MetalSoft Spectrum-X checkpoint, and the per-restart steps
in the lab preparation guide have been applied. To understand or rebuild that setup, see
MetalSoft-SpectrumX-initial-air-setup.md.
The lab environment
Section titled “The lab environment”MetalSoft runs its controller inside the lab and manages the fabric centrally. You
describe the fabric and the tenant with metalcloud-cli on the jumpstation (oob-mgmt-server), and the
controller renders the Cumulus configuration and pushes it to every switch; you never log
in to a switch to configure it by hand. The lab is made up of these parts:
| Component | Address | Role |
|---|---|---|
Jumpstation (oob-mgmt-server) | external SSH (see below) | Where you run every command in this demo |
| Global Controller (GC) | 192.168.200.3 | MetalSoft control plane and web UI |
| Site Controller (SC) | 192.168.200.2 | Site agent that reaches and configures the switches |
| Leaf and spine switches | 192.168.200.11 and up | Cumulus Linux 5.14.0 |
| HGX hosts | 192.168.200.17 to .20 | Ubuntu compute nodes, eight rail NICs each |
Credentials
Section titled “Credentials”Use these credentials for the lab.
| Target | How to reach it | Username | Password |
|---|---|---|---|
Jumpstation (oob-mgmt-server) | Air console, then SSH | ubuntu | nvidia |
| Global Controller | ssh -l root 192.168.200.3 | root | MetalsoftR0cks@$@$ |
| Site Controller | ssh -l root 192.168.200.2 | root | MetalsoftR0cks@$@$ |
| MetalSoft web UI | https://demo.metalsoft.io | demo@metalsoft.io | MetalsoftR0cks@$@$ |
| MetalSoft Fabric Manager UI | https://demo.metalsoft.io:<http service port>/designer/dashboard | demo@metalsoft.io | MetalsoftR0cks@$@$ |
| Switches | ssh cumulus@<switch-ip> | cumulus | set in switches.1su.yaml |
| HGX hosts | ssh ubuntu@<host-ip> | ubuntu | nvidia |
Prerequisites 1. Enable SSH to the oob-mgmt-server jumpstation
Section titled “Prerequisites 1. Enable SSH to the oob-mgmt-server jumpstation”Before you can run anything, you need SSH access to the oob-mgmt-server jumpstation. A
freshly launched lab accepts key-based SSH only, never a password, and does not expose SSH
to the outside yet, so you cannot connect with ssh straight away (an early attempt fails
with Permission denied (publickey)).
First, open the jumpstation console inside NVIDIA Air. In the Air interface, open the
Nodes tab (or the topology view) and double-click the oob-mgmt-server node to
open its console in the browser. Log in at the console with the default credentials
ubuntu / nvidia. Use Google Chrome; the Air console does not work in Safari.
Then install your public key from that console, so your workstation can SSH in:
mkdir -p ~/.ssh && chmod 700 ~/.sshecho 'ssh-ed25519 AAAA...replace-with-your-public-key... you@workstation' >> ~/.ssh/authorized_keyschmod 600 ~/.ssh/authorized_keysFinally, publish an SSH service so the jumpstation is reachable from outside. In the Air interface, add a service on the jumpstation:
- Service Name:
SSH - Interface:
oob-mgmt-server:eth0 - Service Type:
SSH - Service Port:
22
Air returns an external host name and port for the service. You can now reach the
jumpstation over SSH at that host and port. Connect to it as ubuntu and work in
~/nvidia, where the configuration templates, the topology YAML files, and the Terraform
manifests are already staged:
ubuntu@oob-mgmt-server:~$ cd nvidia/ubuntu@oob-mgmt-server:~/nvidia$ lscumulus-5.14-templates ethernet-fabric.1su.yaml l3-profile.1su.yaml oob-subnet.1su.yaml switches.1su.yamlendpoints.1su.yaml fabric-config.1su.l3evpn.yaml netplan route-domain.1su.yaml terraformubuntu@oob-mgmt-server:~/nvidia$The switch password has been set in switches.1su.yaml.
Prerequisites 2. Confirm the controller is reachable
Section titled “Prerequisites 2. Confirm the controller is reachable”Before you continue, make sure the GC and SC components are fully up as it may take a few minutes to boot.
The environment table above lists the two controller VMs. Confirm both answer from the jumpstation before you start running the rest of the commands:
ping -c3 192.168.200.3 # Global Controllerping -c3 192.168.200.2 # Site ControllerIf either address does not answer, the virtual machine did not receive a DHCP lease when the lab started. Stop the lab in NVIDIA Air, start it again, and re-check.
Then confirm the Site Controller has connected to the Global Controller:
metalcloud-cli site agents 1Output similar to the following confirms that the Site Controller has connected to the Global Controller:
┌─────────────────────────────────────────────────┬────────────────────────────┬─────────┬────────────┬─────────┬───────────────────┬─────────────────────┐│ ID │ HOSTNAME │ SITE │ AGENT TYPE │ VERSION │ IP │ LAST SEEN │├─────────────────────────────────────────────────┼────────────────────────────┼─────────┼────────────┼─────────┼───────────────────┼─────────────────────┤│ dc-demo-fd17-625c-f037-2-a00-27ff-fec9-ab57-05e │ ms-tunnel-6b4869d7d9-qk57x │ dc-demo │ ms-agent │ v7.4.2 │ 10.42.0.152:34482 │ 16 Jul 26 14:50 UTC │└─────────────────────────────────────────────────┴────────────────────────────┴─────────┴────────────┴─────────┴───────────────────┴─────────────────────┘Prerequisites 3. Enable HTTPS access to the Fabric Manager UI (optional)
Section titled “Prerequisites 3. Enable HTTPS access to the Fabric Manager UI (optional)”This demo runs entirely from the command line, thus the web UI is optional but recommended.
The UI runs on the Global Controller; the steps below expose it and open it from your workstation.
On the jumpstation, forward the controller’s HTTPS port. These rules are not persistent, so re-apply them after every lab restart:
sudo sysctl -w net.ipv4.ip_forward=1sudo iptables -t nat -A PREROUTING -i eth0 -p tcp --dport 443 -j DNAT --to 192.168.200.3:443sudo iptables -t nat -A POSTROUTING -p tcp -d 192.168.200.3 --dport 443 -j MASQUERADEIn NVIDIA Air, publish an HTTPS service on the jumpstation, the same way you added the SSH service:
- Service Name:
HTTPS - Interface:
oob-mgmt-server:eth0 - Service Type:
HTTPS - Service Port:
443
Air returns an external host name and port for the service (for example
worker-8f961120.dsx-air.nvidia.com and 24371). Note both; Air assigns a new external
port on each restart.
On the Global Controller, point the UI at that external port. Log in as root
(ssh -l root 192.168.200.3, password MetalsoftR0cks@$@$) and run it with the port Air
returned:
nvidia-ms-helper 24371On your workstation, look up the external host’s IP address (ping or dig the host name
Air returned), then map demo.metalsoft.io to it in your local /etc/hosts:
<external-host-ip> demo.metalsoft.ioThe controller uses a self-signed certificate, so the browser warns about it. Either
accept the warning to continue, or trust the MetalSoft CA certificate on your workstation
(it is staged on the jumpstation at /usr/local/share/ca-certificates/metalsoft_ca.crt
and reproduced in MetalSoft-SpectrumX-initial-air-setup.md).
Open https://demo.metalsoft.io:<external-port>/ in the browser, using the port from
above, and log in:
- Username:
demo@metalsoft.io - Password:
MetalsoftR0cks@$@$
The port-forward, the Air service port, and nvidia-ms-helper all reset when the lab
restarts; the lab preparation guide collects these under “After each lab restart”.
Once you are in, you can access various components via the “burger” menu on the top left, next to the logo:
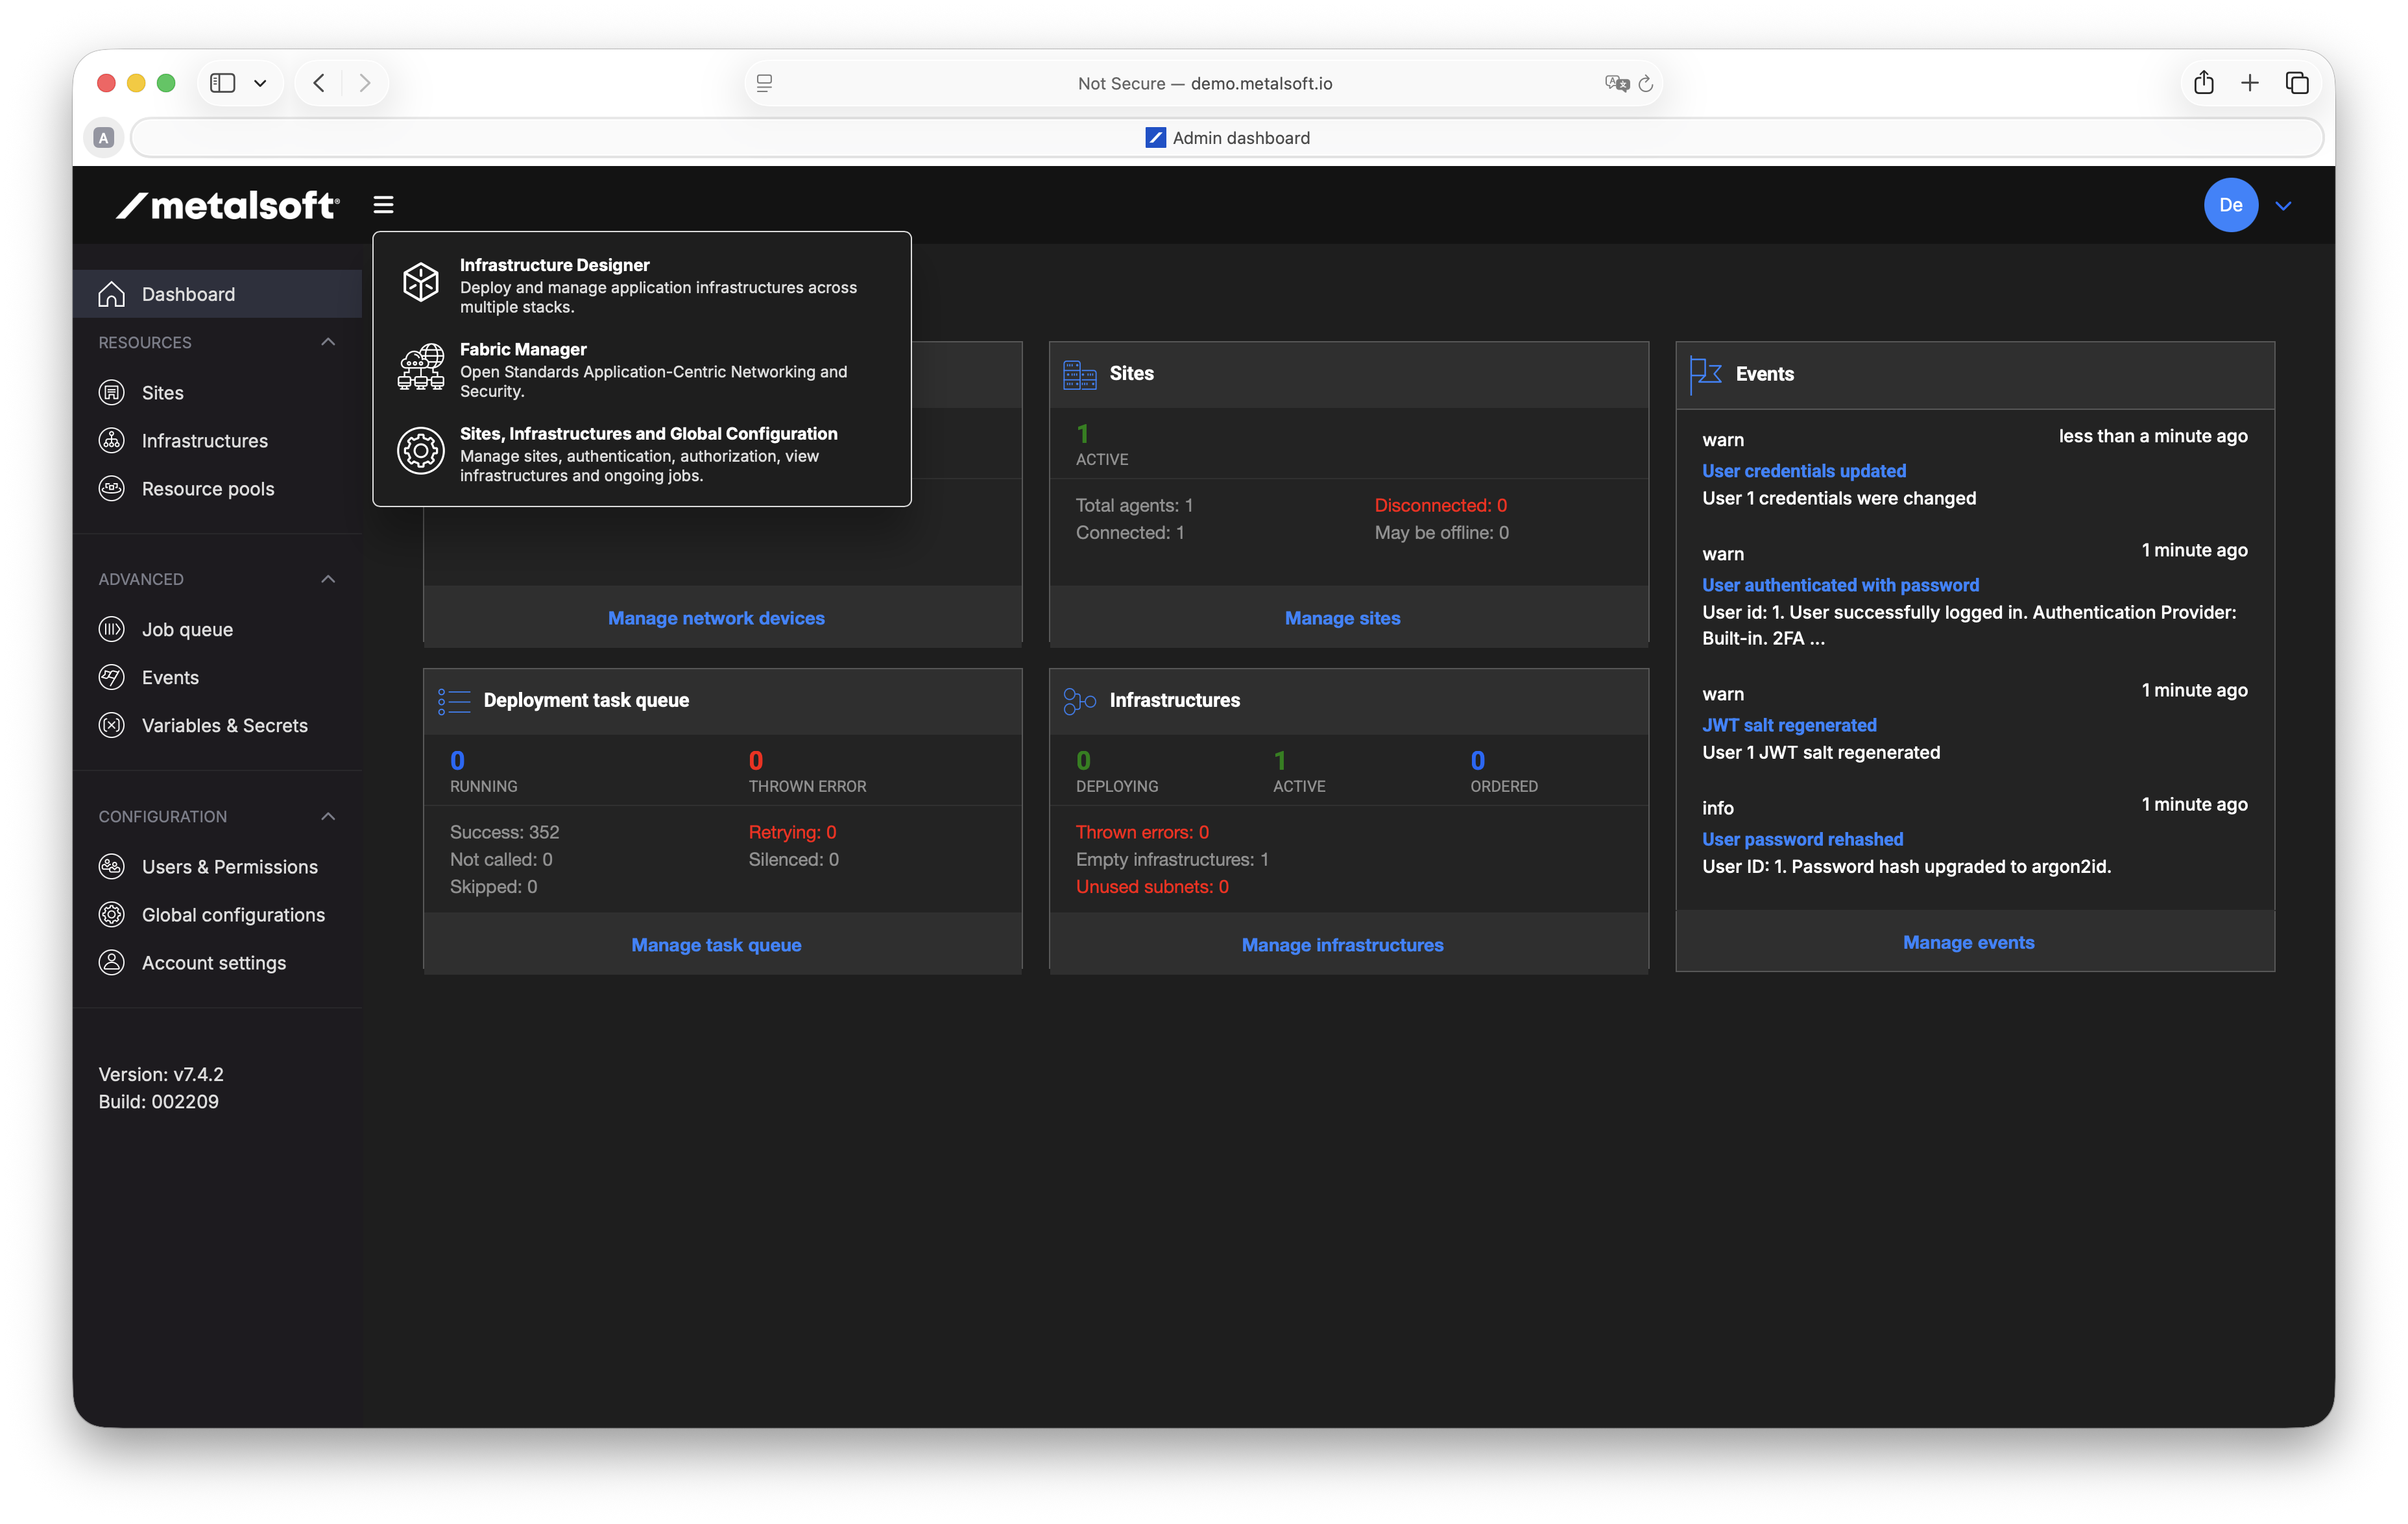
| Component | Comments | URL |
|---|---|---|
| Sites, Infrastructures & Global Configurations | This is the home of the application, you use this to create sites, see tenant infrastructures and ongoing deploys | https://demo.metalsoft.io:<external-port>/ |
| Fabric Manager | Used to manage network equipment. | https://demo.metalsoft.io:<external-port>/designer/fabrics/1/topology |
| Compute & storage Manager | Not used in this demo. | |
| Infrastructure designer | Tenant’s view. | https://demo.metalsoft.io:<external-port>/designer/infrastructures/1 |
Step 1: Create and activate the fabric
Section titled “Step 1: Create and activate the fabric”Create the fabric on the lab site, activate it, and create the out-of-band management subnet the switches are addressed from.
metalcloud-cli fabric create 1 spectrumx-1su-514 ethernet "Spectrum-X 1-SU (5.14)" \ --config-source ethernet-fabric.1su.yamlmetalcloud-cli fabric activate 1metalcloud-cli subnet create --config-source oob-subnet.1su.yaml(optional) In the UI, navigate to the Fabric Manager to see the Fabric you created:
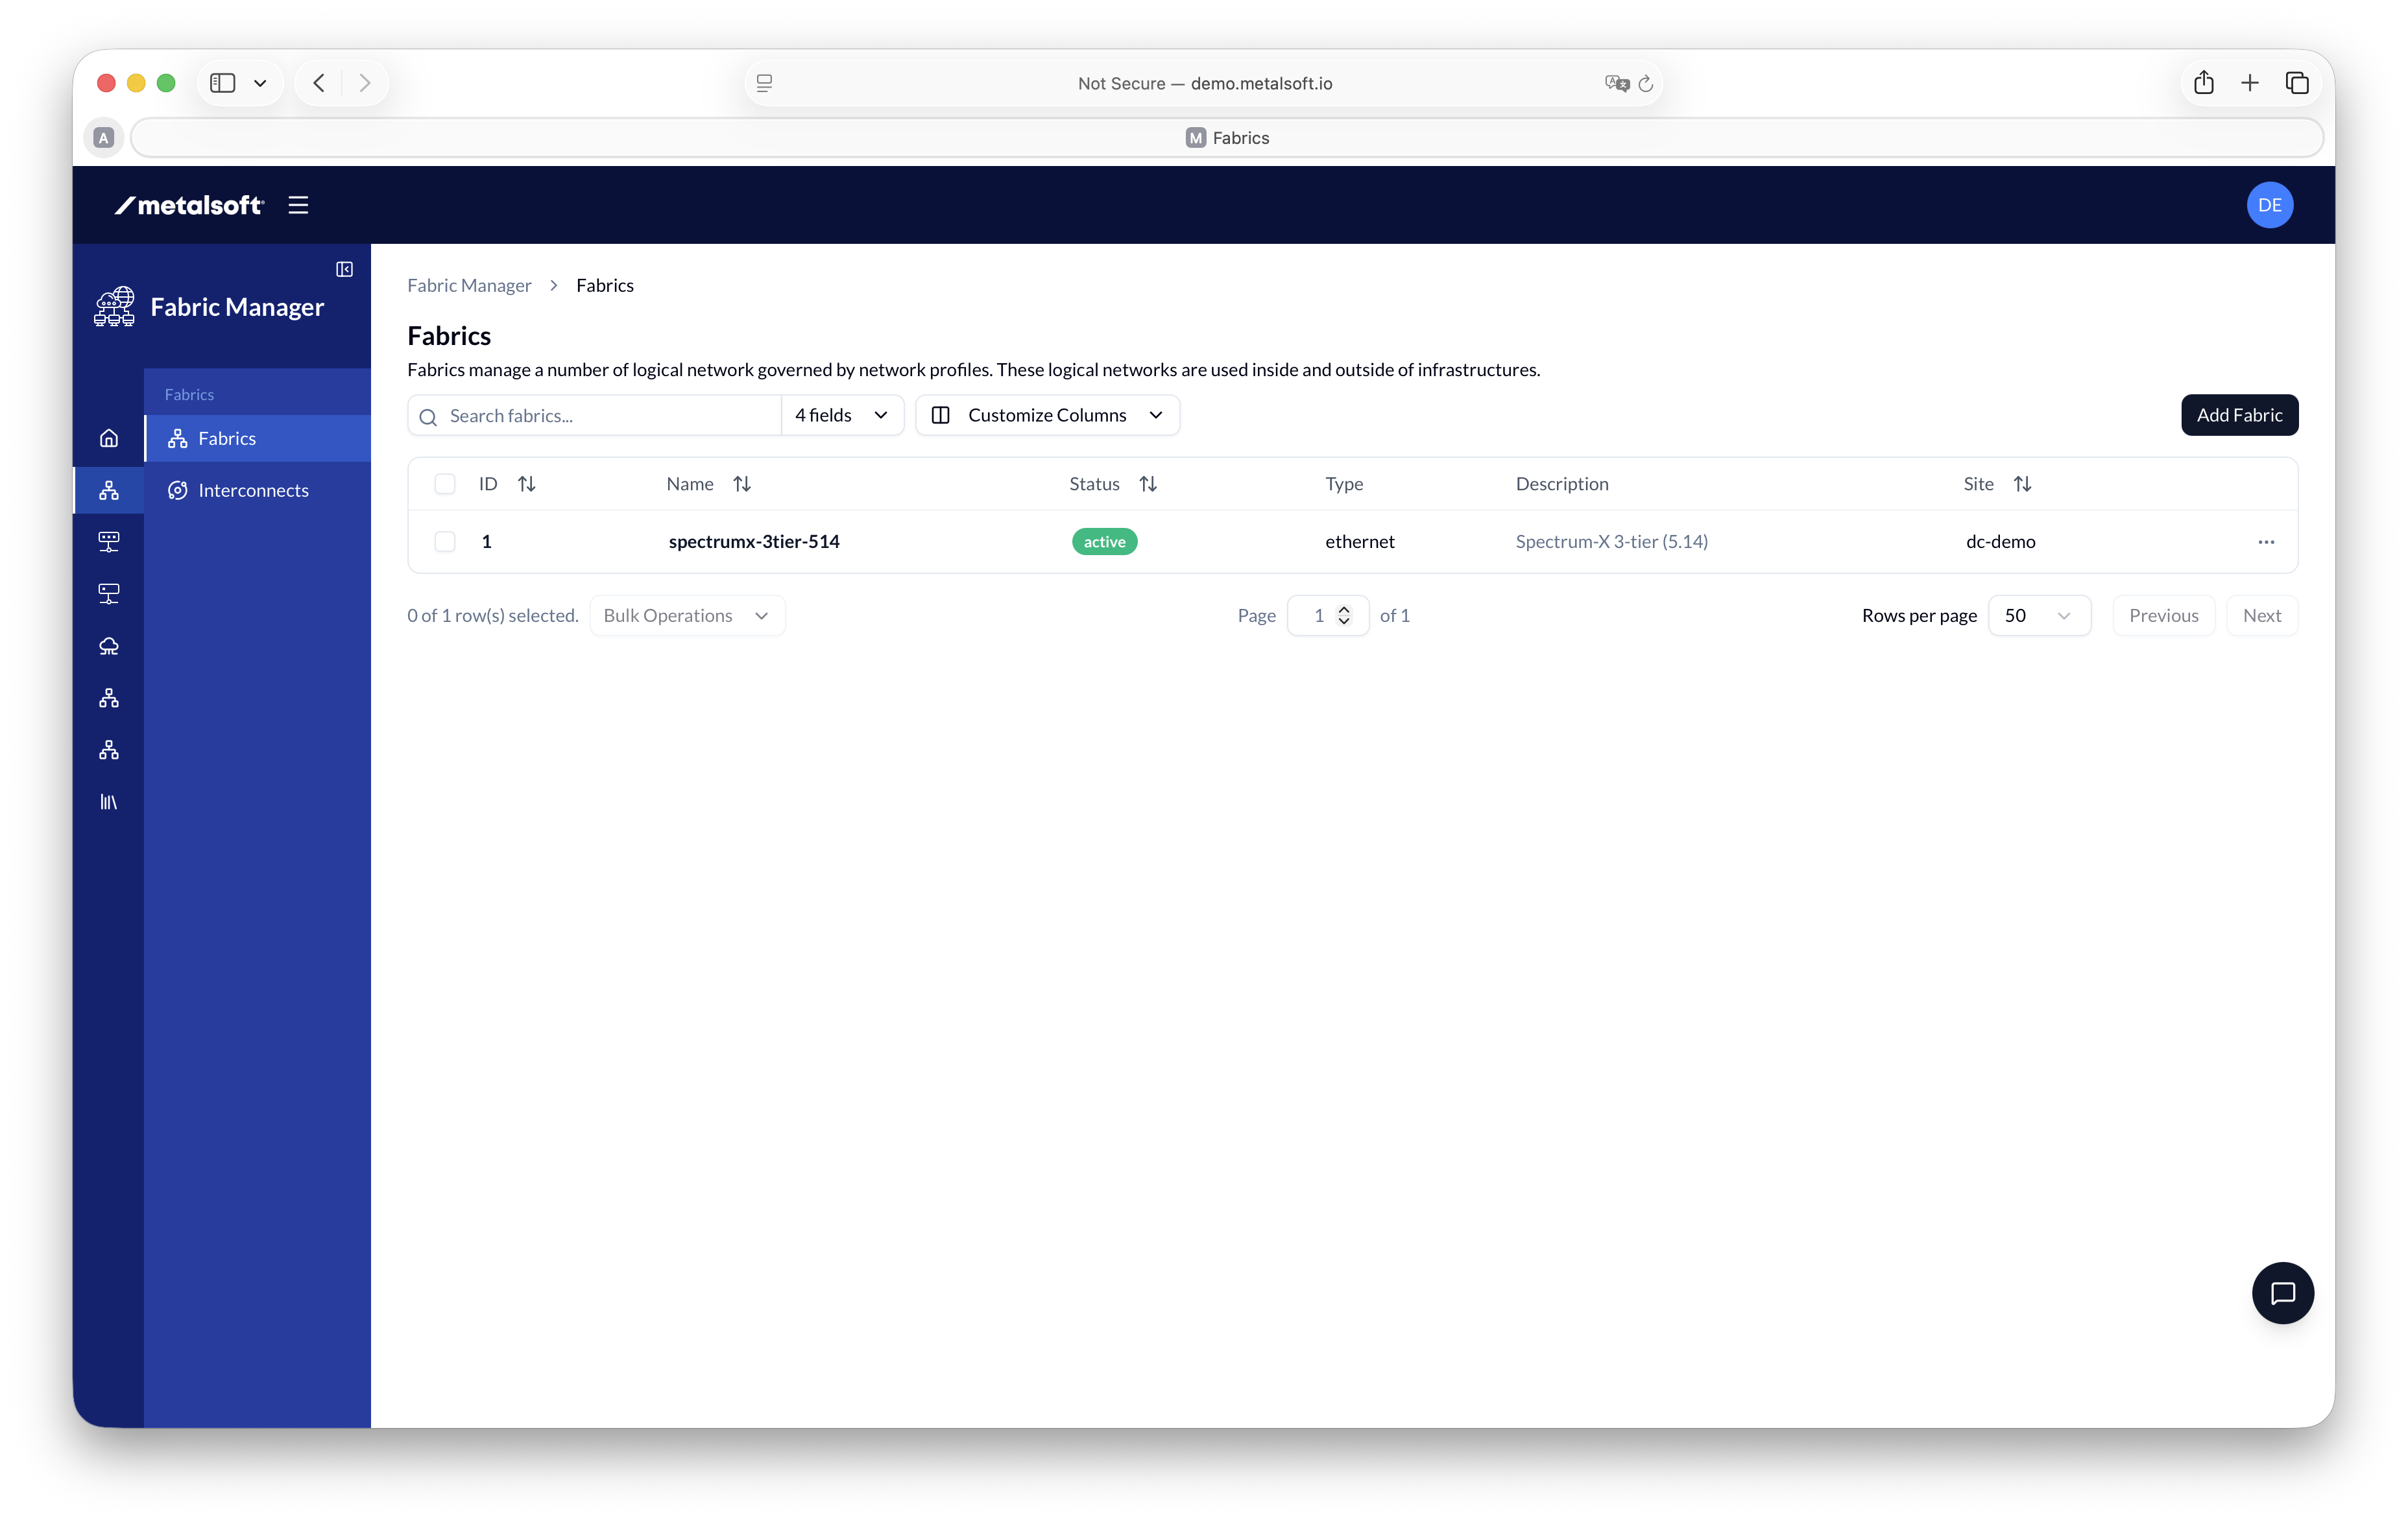
Keep the fabric label spectrumx-1su-514. The Terraform manifest in Step 8 resolves
the fabric by that label.
Step 2: Import the switches
Section titled “Step 2: Import the switches”Set fabricId in switches.1su.yaml to 1, then import the six switches:
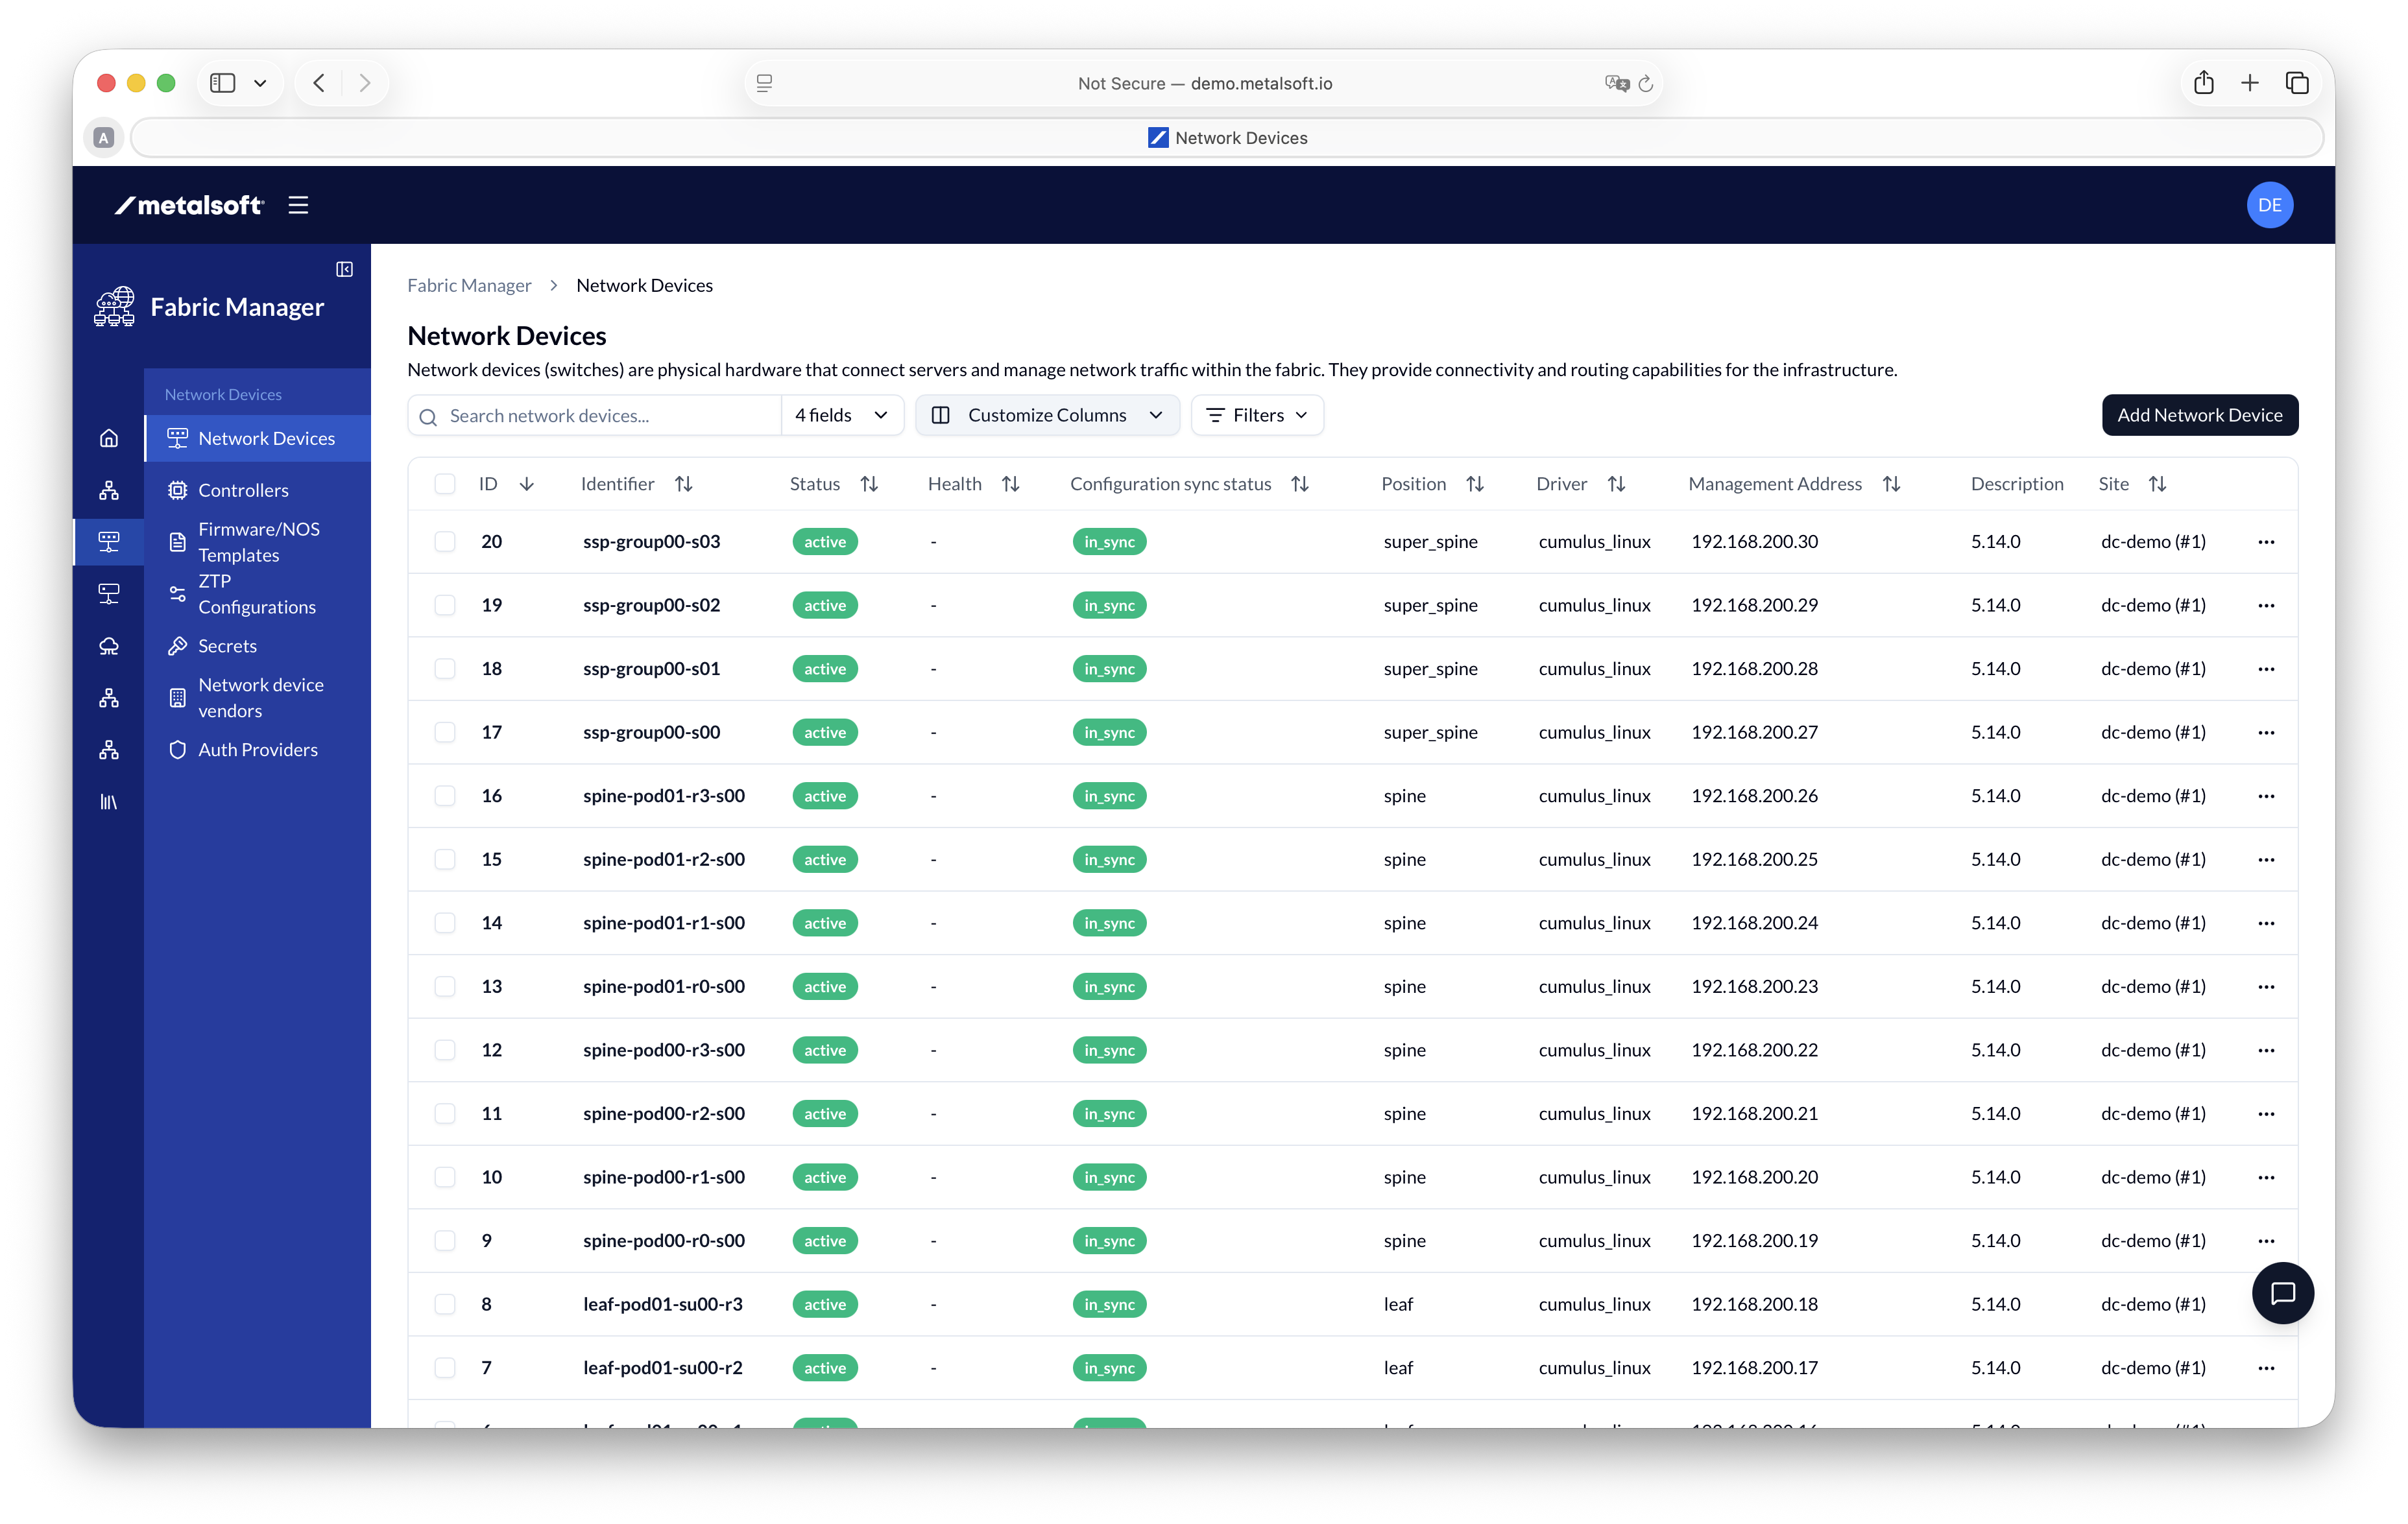
metalcloud-cli fabric import-devices 1 --config-source switches.1su.yaml(optional) In the UI, see the list of equipment in the Fabric Manager (the number of items may differ from this screenshot):
Step 3: Discover switch interfaces
Section titled “Step 3: Discover switch interfaces”The switch configuration in Step 4 works from each switch’s discovered port inventory. Trigger discovery across every switch; this may take a few minutes to complete. Then confirm one switch reports interfaces:
for ID in $(metalcloud-cli fabric get-devices 1 -f json | jq -r '.[].id'); do metalcloud-cli network-device discover "$ID"donemetalcloud-cli network-device get-ports 1 # returns a list of swpNsN portsIf the port list is empty, the switch is not reachable. Check the address and password
in switches.1su.yaml.
The switches are imported and reachable, but MetalSoft has not configured them yet.
Each switch check in this demo runs against a single switch chosen by the SW variable
at the top of the block; change SW and re-run to inspect another switch. Each output
line is prefixed with the switch name in green, so it is clear which switch answered. The
switch hostnames for this topology are:
- Leaves:
leaf-su00-r0,leaf-su00-r1,leaf-su00-r2,leaf-su00-r3 - Spines:
spine-s00,spine-s01
Log in as cumulus (the password is read from switches.1su.yaml) and capture the
baseline, so the later steps have something to compare against:
# This block inspects one switch. The two awk lines resolve SW to its management IP and the# cumulus password from the switch inventory; sshpass runs the commands below on the switch# over SSH; the trailing awk prefixes each output line with the switch name in green. The# commands that run on the switch are:# hostname (its configured hostname)# ip -br addr show lo (loopback addresses)# sudo vtysh -c "show bgp summary" (BGP neighbour table, from FRR)SW=leaf-su00-r0 # switch to inspect; any hostname listed above, then re-runSWIP=$(awk -v s="$SW" '$2=="identifierString:" && $3==s{f=1} f && $1=="managementAddress:"{print $2; exit}' ~/nvidia/switches.1su.yaml)SWPW=$(awk '/managementPassword:/{print $2; exit}' ~/nvidia/switches.1su.yaml)sshpass -p "$SWPW" ssh -n -o ConnectTimeout=10 -o StrictHostKeyChecking=no "cumulus@$SWIP" 'hostname; ip -br addr show lo; sudo vtysh -c "show bgp summary"' 2>&1 \ | awk -v h="$SW" '{ printf "\033[1;92m%s\033[0m | %s\n", h, $0 }'At this stage the loopback carries only 127.0.0.1/8, no 10.253.x.x/32 address is
assigned, BGP is not running, and nv config show -o commands returns only the factory
defaults. Re-run with SW set to each switch to confirm they all start clean; Steps 5
and 8 change this.
Step 4: Configure the switches
Section titled “Step 4: Configure the switches”Set fabricId in fabric-config.1su.l3evpn.yaml to 1. This step assigns
hostnames, ASNs, loopbacks, the fabric point-to-point addresses, and the host
downlinks. It may take a few minutes to complete:
metalcloud-cli fabric configure-switches 1 --config-source fabric-config.1su.l3evpn.yamlStep 5: Deploy the underlay addressing
Section titled “Step 5: Deploy the underlay addressing”The first deploy pushes hostnames, loopbacks, point-to-point addresses, and port settings. It is asynchronous; wait for its job group to finish before continuing:
wait_for_job_group "$(metalcloud-cli fabric deploy 1 -f json | jq -r '.jobGroupId')"The deploy pushed the hostnames, loopbacks, and point-to-point addresses to every switch. Re-run the check against each switch and compare with the Step 3 baseline:
# The awk lines resolve SW to its IP and password; these commands then run on the switch:# hostname (its configured hostname)# ip -br addr show lo (loopback addresses)# nv config show -o commands (the full switch configuration, as NVUE commands)SW=leaf-su00-r0 # any hostname from the list in Step 3SWIP=$(awk -v s="$SW" '$2=="identifierString:" && $3==s{f=1} f && $1=="managementAddress:"{print $2; exit}' ~/nvidia/switches.1su.yaml)SWPW=$(awk '/managementPassword:/{print $2; exit}' ~/nvidia/switches.1su.yaml)sshpass -p "$SWPW" ssh -n -o ConnectTimeout=10 -o StrictHostKeyChecking=no "cumulus@$SWIP" 'hostname; ip -br addr show lo; nv config show -o commands' 2>&1 \ | awk -v h="$SW" '{ printf "\033[1;92m%s\033[0m | %s\n", h, $0 }'The switch now reports its assigned hostname and a 10.253.128.x/32 loopback
(leaf-su00-r0 is 10.253.128.1, r1 is .2, and so on), and nv config show -o commands returns the full configuration where the baseline showed only defaults.
Step 6: Discover links and redeploy
Section titled “Step 6: Discover links and redeploy”With the ports up, re-scan the fabric so the discovered links become managed, then deploy again:
wait_for_job_group "$(metalcloud-cli fabric rescan-links 1 -f json | jq -r '.jobGroupId')"wait_for_job_group "$(metalcloud-cli fabric deploy 1 -f json | jq -r '.jobGroupId')"The rescan reads each switch’s LLDP neighbours and records the discovered links in the fabric database. Confirm a switch now sees its neighbours over LLDP:
# The awk lines resolve SW to its IP and password; this command then runs on the switch:# nv show interface lldp (the LLDP neighbour discovered on each port)SW=leaf-su00-r0 # any hostname from the list in Step 3SWIP=$(awk -v s="$SW" '$2=="identifierString:" && $3==s{f=1} f && $1=="managementAddress:"{print $2; exit}' ~/nvidia/switches.1su.yaml)SWPW=$(awk '/managementPassword:/{print $2; exit}' ~/nvidia/switches.1su.yaml)sshpass -p "$SWPW" ssh -n -o ConnectTimeout=10 -o StrictHostKeyChecking=no "cumulus@$SWIP" 'nv show interface lldp' 2>&1 \ | awk -v h="$SW" '{ printf "\033[1;92m%s\033[0m | %s\n", h, $0 }'Each fabric-facing port lists the neighbour it discovered: a leaf sees its spines, and a spine sees the leaves below it. These are the links the rescan imported and the redeploy confirmed.
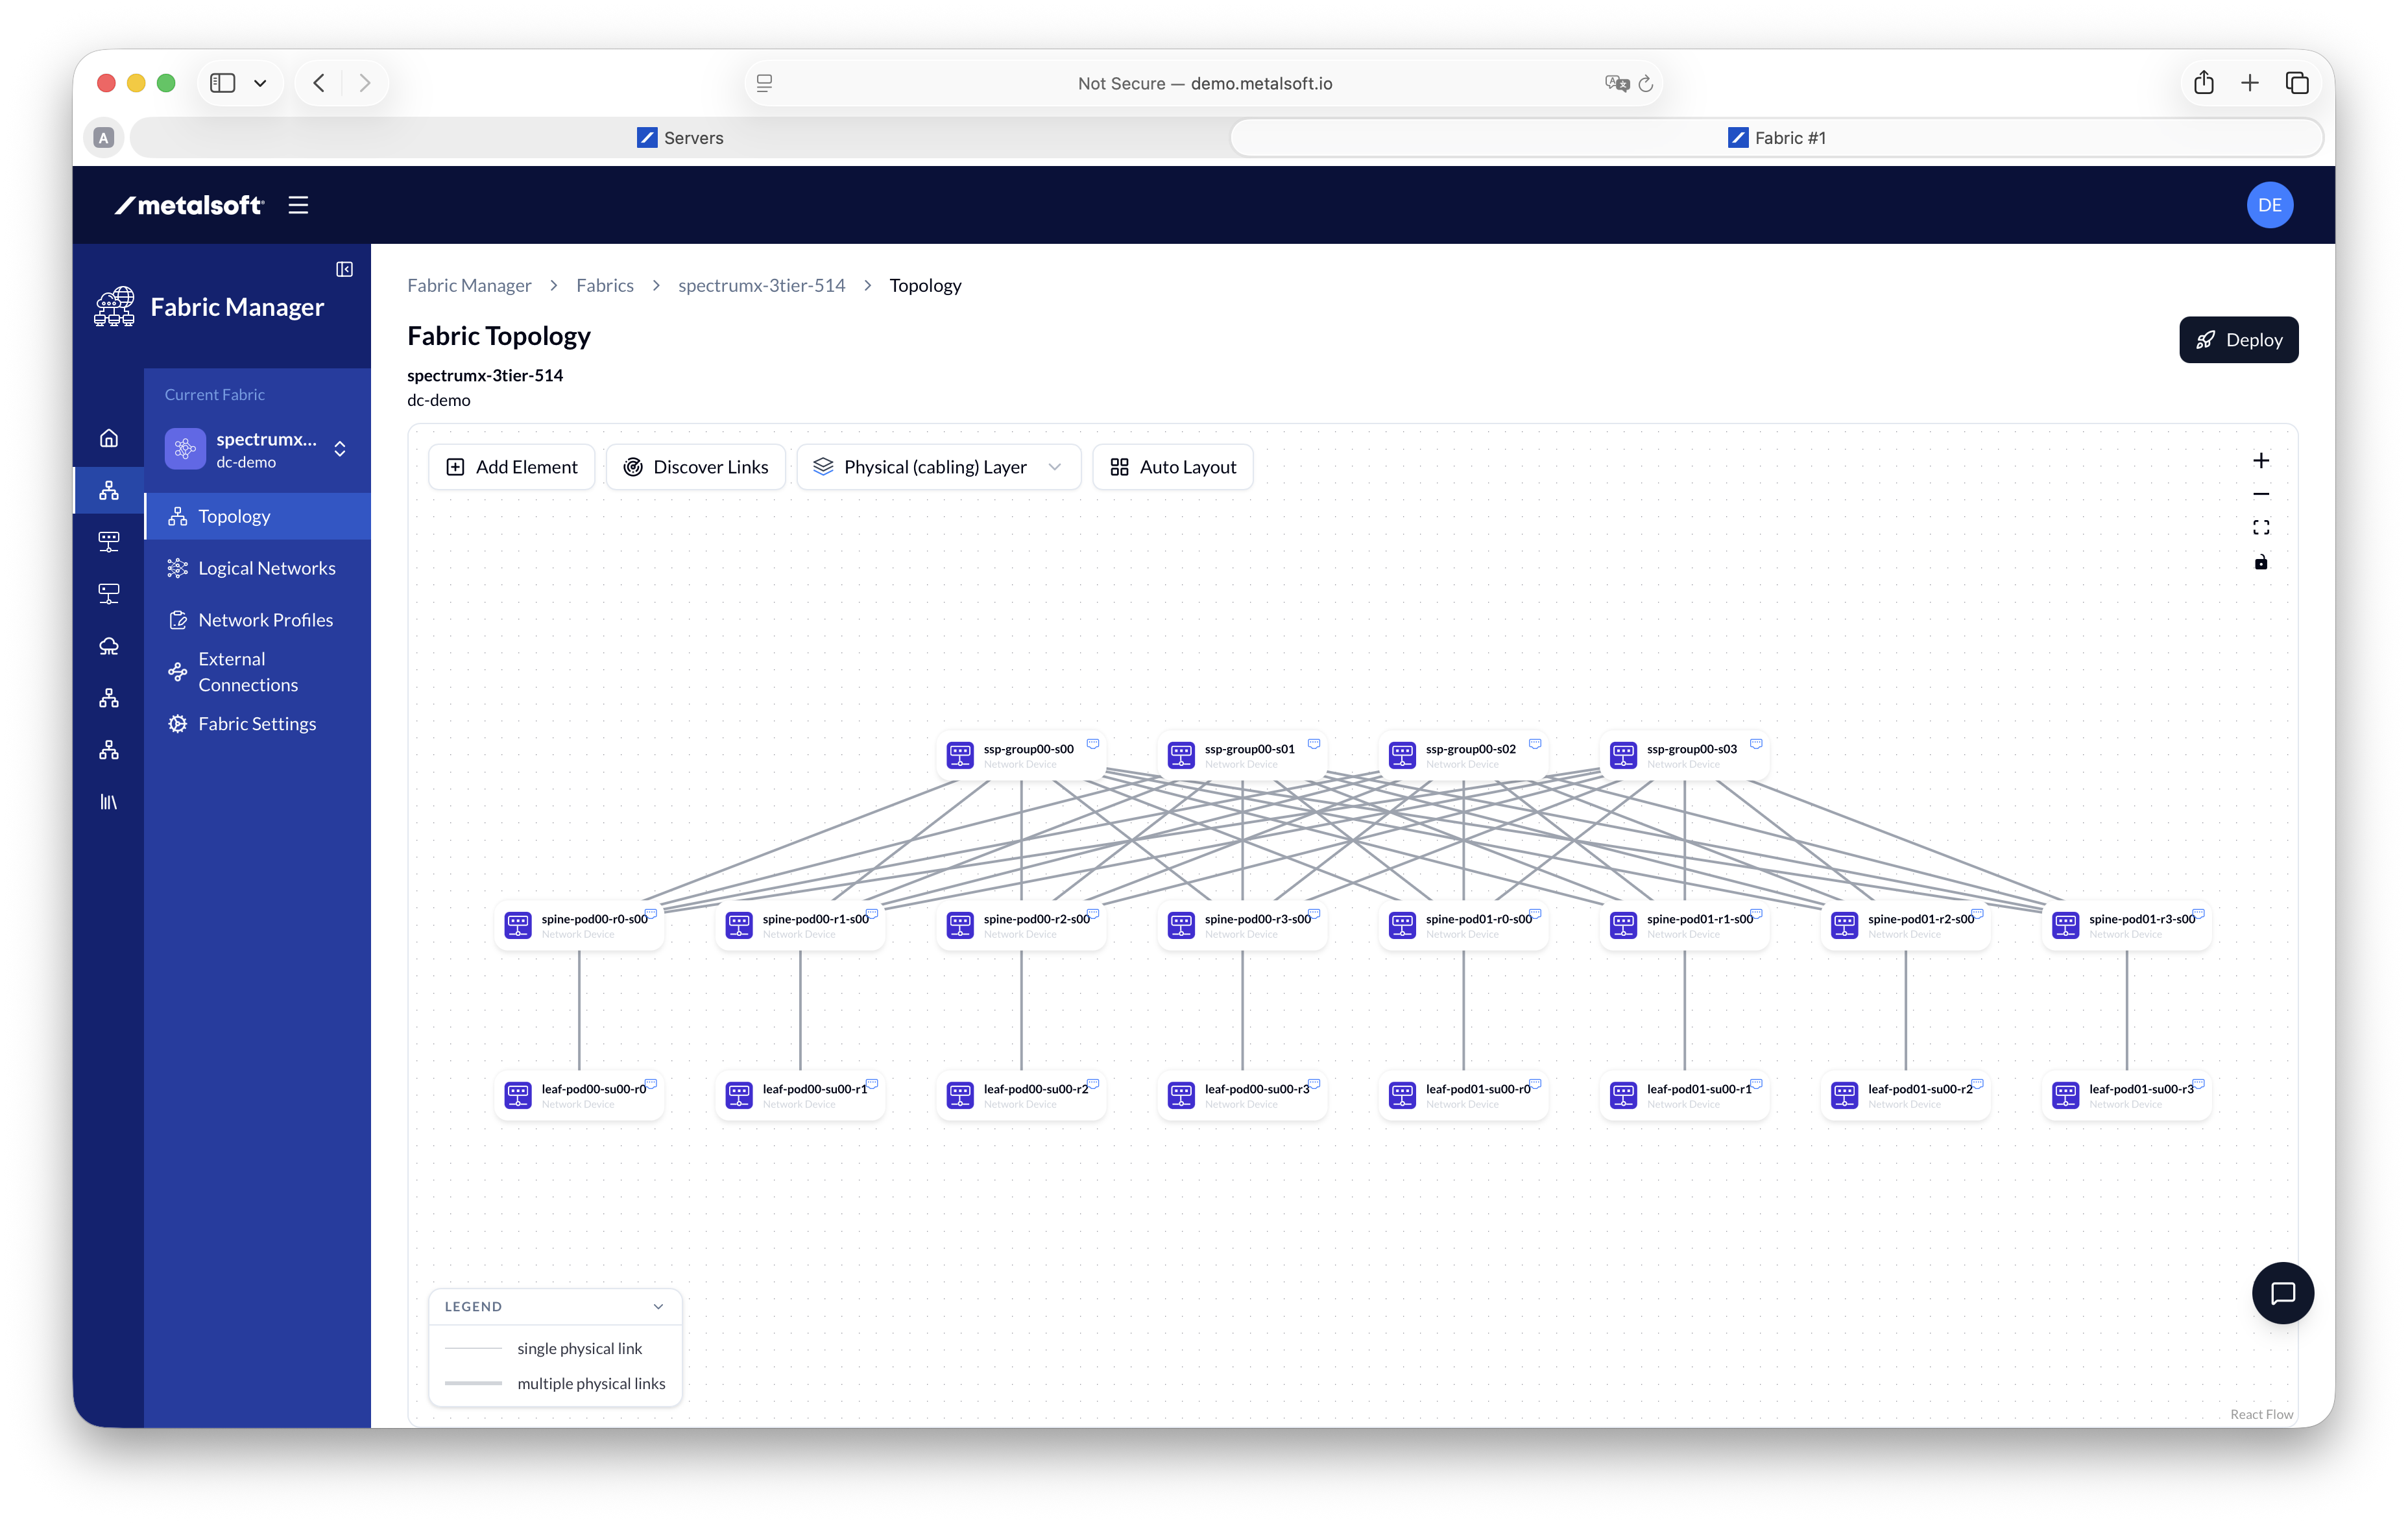
(optional) In the UI, the fabric view should look like this (the number of links and switches might vary):
Step 7: Register the fabric templates
Section titled “Step 7: Register the fabric templates”fabric-config.1su.l3evpn.yaml names the Cumulus 5.14 templates under
cumulus-5.14-templates/. Register them in two commands. The order matters: the base
profile installs the QoS, adaptive-routing, and VTEP configuration that the BGP and
EVPN profiles depend on.
metalcloud-cli fabric configure-freeform 1 \ --config-source fabric-config.1su.l3evpn.yaml --verify-rendermetalcloud-cli fabric configure-bgp 1 \ --config-source fabric-config.1su.l3evpn.yaml --verify-render--verify-render renders every switch’s configuration on the controller and stops
before writing if any switch fails to render.
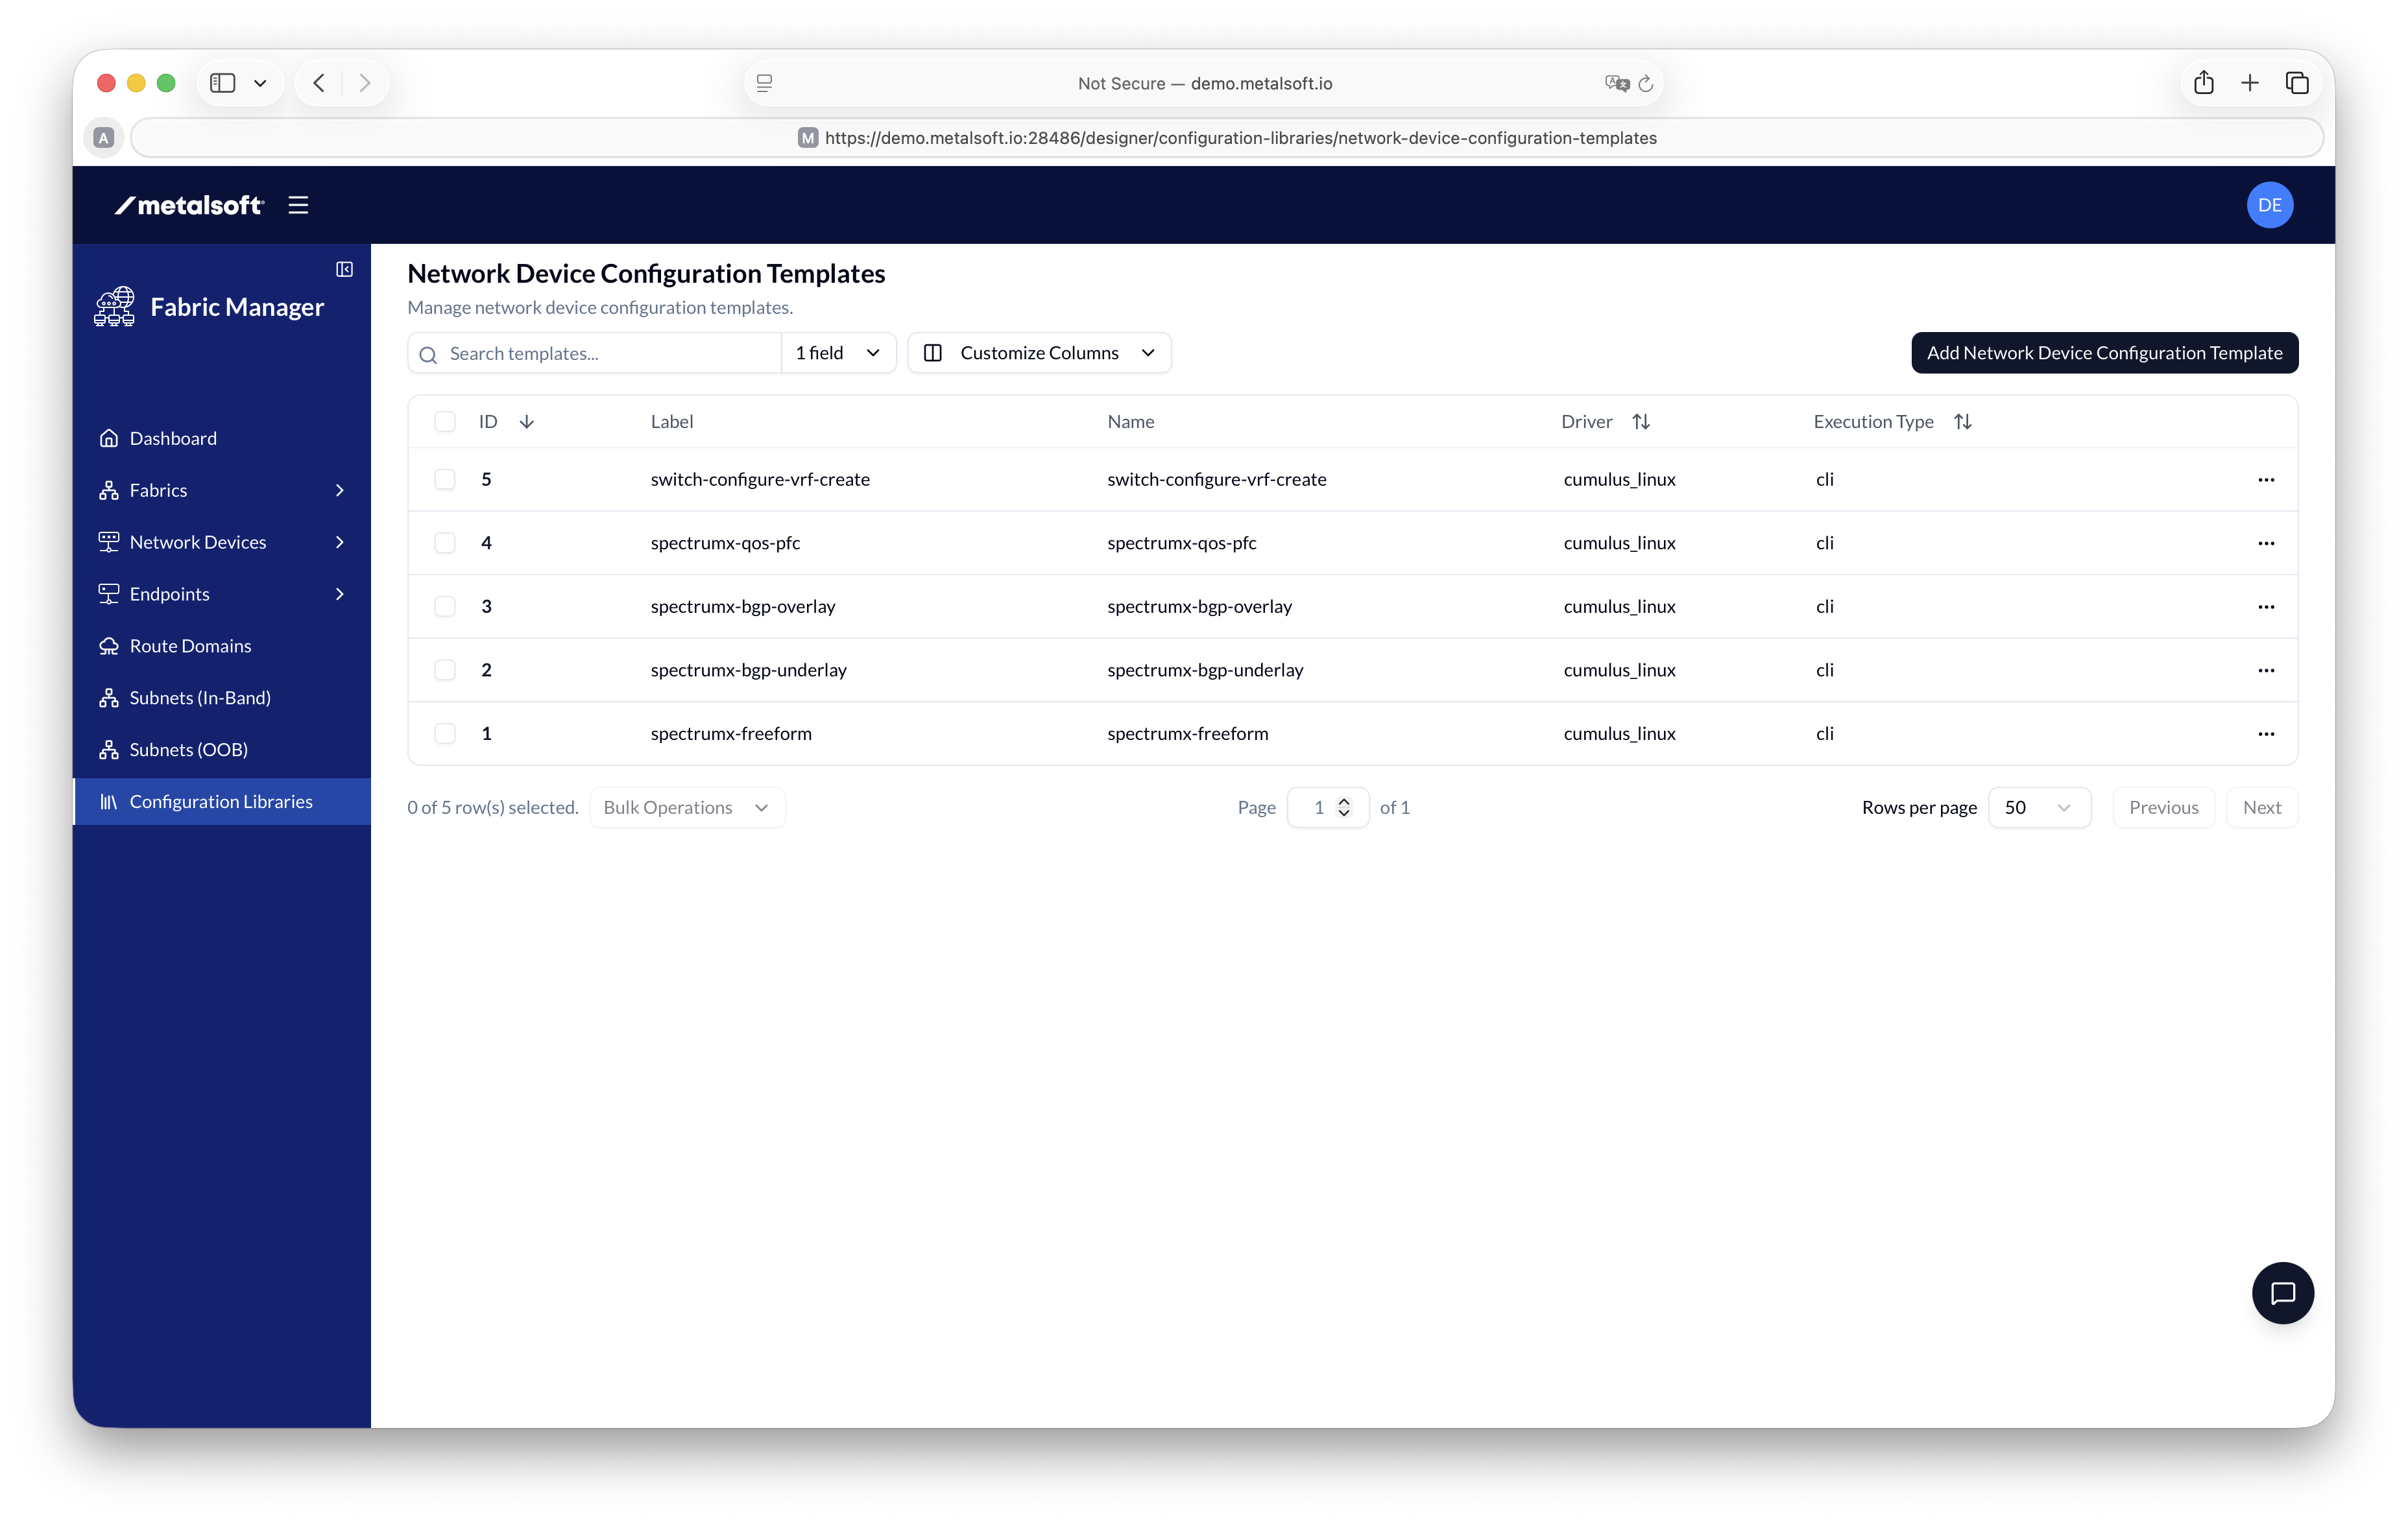
(optional) In the UI, the list of templates shows up under Fabric Manager > Configuration Libraries > Network Device Configuration Templates:
Step 8: Deploy the fabric
Section titled “Step 8: Deploy the fabric”A single deploy applies the base, underlay, overlay, and QoS profiles in order. This is the longest step, about 10 to 12 minutes:
wait_for_job_group "$(metalcloud-cli fabric deploy 1 -f json | jq -r '.jobGroupId')"Continue only once every job reports success. BGP and EVPN come up during this deploy.
This deploy brings up BGP. Compare with the Step 3 baseline, where BGP was not running. The block prints the underlay summary and the EVPN overlay summary together:
# The awk lines resolve SW to its IP and password; this runs on the switch, in one vtysh# session with two show commands:# show bgp summary (underlay BGP neighbour table)# show bgp l2vpn evpn summary (EVPN overlay neighbour table)SW=leaf-su00-r0 # any hostname from the list in Step 3SWIP=$(awk -v s="$SW" '$2=="identifierString:" && $3==s{f=1} f && $1=="managementAddress:"{print $2; exit}' ~/nvidia/switches.1su.yaml)SWPW=$(awk '/managementPassword:/{print $2; exit}' ~/nvidia/switches.1su.yaml)sshpass -p "$SWPW" ssh -n -o ConnectTimeout=10 -o StrictHostKeyChecking=no "cumulus@$SWIP" 'sudo vtysh -c "show bgp summary" -c "show bgp l2vpn evpn summary"' 2>&1 \ | awk -v h="$SW" '{ printf "\033[1;92m%s\033[0m | %s\n", h, $0 }'Every switch now has established underlay sessions, each with a non-zero prefix count in
place of Idle or Active. The EVPN overlay runs between the leaves and the relay
spines spine-s00 and spine-s01, so the EVPN summary is populated on the leaves and on
those two spines.
Step 9: Register the HGX endpoints
Section titled “Step 9: Register the HGX endpoints”Register the four HGX hosts as endpoints. Each host binds to eight leaf ports, one per
rail. The definitions are in endpoints.1su.yaml:
metalcloud-cli endpoint create-bulk --config-source endpoints.1su.yamlList the endpoints to confirm MetalSoft created all four:
metalcloud-cli endpoint list --filter-site 1Do not rename the endpoints. The Terraform manifest resolves them by label
(hgx-su00-h00, hgx-su00-h08, hgx-su00-h16, hgx-su00-h24).
Step 10: Create the tenant route domain and profile
Section titled “Step 10: Create the tenant route domain and profile”Create the tenant VRF (route domain) and the L3-only logical network profile that builds the tenant network:
metalcloud-cli route-domain create --config-source route-domain.1su.yamlmetalcloud-cli logical-network-profile create vxlan --config-source l3-profile.1su.yamlMetalSoft allocates the L3VNI automatically for the fabric. Keep the profile label
tenant-l3; the Terraform manifest resolves it by that label.
Step 11: Onboard the tenant with Terraform
Section titled “Step 11: Onboard the tenant with Terraform”The Terraform manifest terraform/nvidia-spectrumx-1su.tf creates the tenant
infrastructure, builds an L3 network from the tenant-l3 profile, attaches the four
endpoints with eight interfaces each, and deploys:
cd ~/nvidia/terraform/terraform initterraform applycd ~/nvidiaThe deploy takes about 5 minutes. When it completes, the attached hosts’ rail gateways are live.
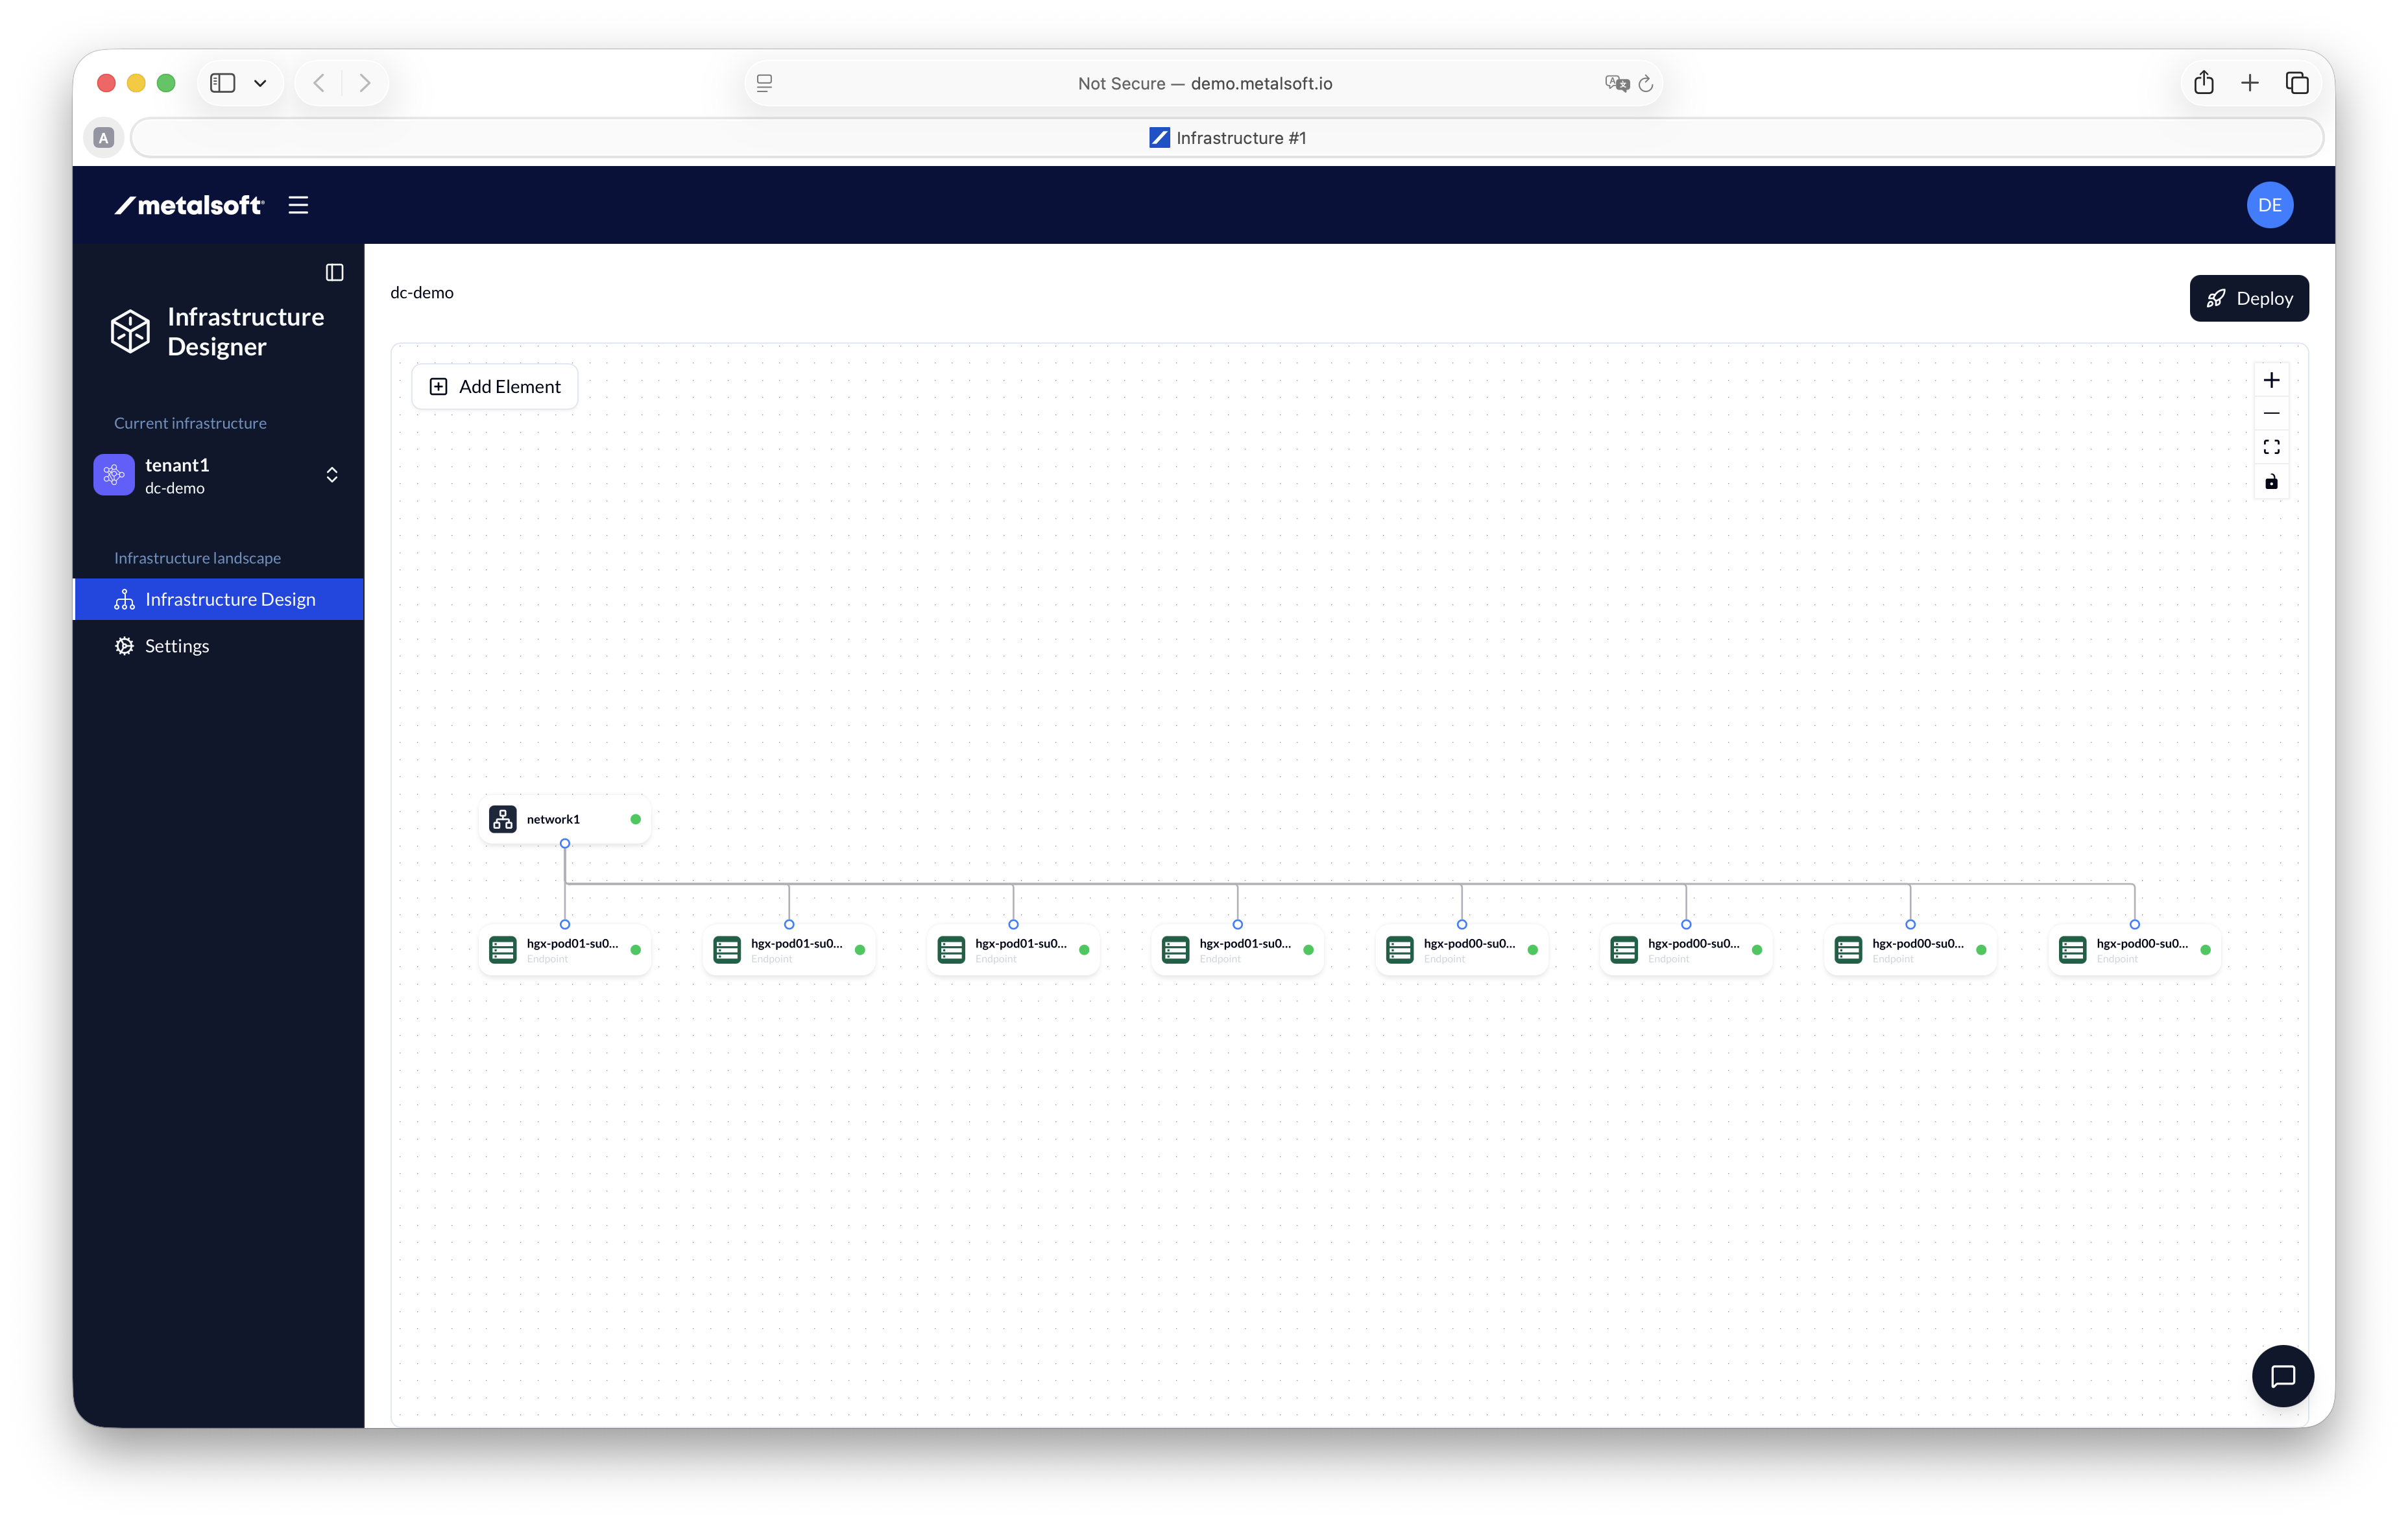
(optional) In the UI, view the tenant infrastructure in the Infrastructure Designer (the number of endpoints in the infrastructure may differ):
Terraform created the tenant VRF, attached the endpoints, and deployed. The tenant VRF and the host rail gateways live on the leaves. Inspect a leaf:
# The awk lines resolve SW to its IP and password; these commands then run on the switch,# all scoped to the tenant1 VRF:# ip -br link show type vrf (VRFs present, including tenant1)# ip -br addr show vrf tenant1 | grep -E "swp|172\." (rail gateway /31s in the VRF)# sudo vtysh -c "show bgp vrf tenant1 ipv4 unicast" (tenant routes learned by BGP)# -c "show ip route vrf tenant1" (the tenant VRF routing table)SW=leaf-su00-r0 # a leaf: leaf-su00-r0, leaf-su00-r1, leaf-su00-r2, leaf-su00-r3SWIP=$(awk -v s="$SW" '$2=="identifierString:" && $3==s{f=1} f && $1=="managementAddress:"{print $2; exit}' ~/nvidia/switches.1su.yaml)SWPW=$(awk '/managementPassword:/{print $2; exit}' ~/nvidia/switches.1su.yaml)sshpass -p "$SWPW" ssh -n -o ConnectTimeout=10 -o StrictHostKeyChecking=no "cumulus@$SWIP" 'ip -br link show type vrf; ip -br addr show vrf tenant1 | grep -E "swp|172\."; sudo vtysh -c "show bgp vrf tenant1 ipv4 unicast" -c "show ip route vrf tenant1"' 2>&1 \ | awk -v h="$SW" '{ printf "\033[1;92m%s\033[0m | %s\n", h, $0 }'tenant1 appears in the VRF list, the host-facing swp ports carry their 172.x rail
gateway /31s inside it, and the VRF routing table holds both the local rail subnets and
the remote ones learned over EVPN.
The spines do not hold the tenant VRF; that lives on the leaves. On the EVPN overlay relay you can see the type-5 host routes it re-advertises:
# The awk lines resolve SW to its IP and password; this command runs on the relay switch:# sudo vtysh -c "show bgp l2vpn evpn route type prefix"# (the EVPN type-5 host routes this switch re-advertises)SW=spine-s00 # the overlay relay: spine-s00, spine-s01SWIP=$(awk -v s="$SW" '$2=="identifierString:" && $3==s{f=1} f && $1=="managementAddress:"{print $2; exit}' ~/nvidia/switches.1su.yaml)SWPW=$(awk '/managementPassword:/{print $2; exit}' ~/nvidia/switches.1su.yaml)sshpass -p "$SWPW" ssh -n -o ConnectTimeout=10 -o StrictHostKeyChecking=no "cumulus@$SWIP" 'sudo vtysh -c "show bgp l2vpn evpn route type prefix"' 2>&1 \ | awk -v h="$SW" '{ printf "\033[1;92m%s\033[0m | %s\n", h, $0 }'This is the control-plane state behind the host-to-host reachability that Step 13 verifies from the hosts.
Step 12: Configure the HGX hosts
Section titled “Step 12: Configure the HGX hosts”Each host has eight rail NICs (eth_rail0 through eth_rail7) at MTU 9216. Each rail
takes a /31, with the host on the even address and the leaf gateway on the odd one.
For host node h on rail r, the host address is 172.(16 + 2*r).0.(2*h) and the
gateway is one higher.
| rail | NIC | h00 | h08 | h16 | h24 |
|---|---|---|---|---|---|
| 0 | eth_rail0 | 172.16.0.0 | 172.16.0.16 | 172.16.0.32 | 172.16.0.48 |
| 1 | eth_rail1 | 172.18.0.0 | 172.18.0.16 | 172.18.0.32 | 172.18.0.48 |
| 2 | eth_rail2 | 172.20.0.0 | 172.20.0.16 | 172.20.0.32 | 172.20.0.48 |
| 3 | eth_rail3 | 172.22.0.0 | 172.22.0.16 | 172.22.0.32 | 172.22.0.48 |
| 4 | eth_rail4 | 172.24.0.0 | 172.24.0.16 | 172.24.0.32 | 172.24.0.48 |
| 5 | eth_rail5 | 172.26.0.0 | 172.26.0.16 | 172.26.0.32 | 172.26.0.48 |
| 6 | eth_rail6 | 172.28.0.0 | 172.28.0.16 | 172.28.0.32 | 172.28.0.48 |
| 7 | eth_rail7 | 172.30.0.0 | 172.30.0.16 | 172.30.0.32 | 172.30.0.48 |
The complete per-host netplan files are staged on the jumpstation under netplan/1su/,
one per host (hgx-su00-h00.yaml through hgx-su00-h24.yaml). Each holds all eight
rails and installs to /etc/netplan/60-spectrum-x.yaml on its host.
The hosts are reachable at 192.168.200.17 through .20 as user ubuntu.
First, capture each host’s rail state before applying netplan, so there is a baseline to
compare against. The eth_rail NICs carry no 172.x addresses yet and the routing table
holds no rail routes:
cd ~/nvidiaexport SSHPASS=nvidia # the HGX hosts are ubuntu:nvidiafor ip in 192.168.200.{17..20}; do host=$(sshpass -e ssh -n -o ConnectTimeout=10 -o StrictHostKeyChecking=no "ubuntu@$ip" hostname 2>/dev/null) sshpass -e ssh -n -o ConnectTimeout=10 -o StrictHostKeyChecking=no "ubuntu@$ip" 'ip -br address show; ip route show' 2>&1 \ | awk -v h="${host:-$ip}" '{ printf "\033[1;92m%s\033[0m | %s\n", h, $0 }'doneNow push each host the file named for it and apply it. This loop reads each host’s name,
copies its file, installs it with mode 0600, and runs netplan apply:
cd ~/nvidiaexport SSHPASS=nvidia # the HGX hosts are ubuntu:nvidiafor ip in 192.168.200.{17..20}; do host=$(sshpass -e ssh -n -o ConnectTimeout=10 -o StrictHostKeyChecking=no "ubuntu@$ip" hostname 2>/dev/null) { sshpass -e scp -o StrictHostKeyChecking=no "netplan/1su/$host.yaml" "ubuntu@$ip:/tmp/60-spectrum-x.yaml" && sshpass -e ssh -n -o ConnectTimeout=10 -o StrictHostKeyChecking=no "ubuntu@$ip" \ 'sudo install -m 600 /tmp/60-spectrum-x.yaml /etc/netplan/60-spectrum-x.yaml && sudo netplan apply && rm -f /tmp/60-spectrum-x.yaml' && echo "netplan applied" } 2>&1 | awk -v h="${host:-$ip}" '{ printf "\033[1;92m%s\033[0m | %s\n", h, $0 }'doneKeying on hostname makes the loop correct no matter which management address Air gave
each host. The lab’s ubuntu user has passwordless sudo; if yours does not, run the
two sudo commands by hand on each host after copying its file. Each host’s output is
prefixed with its name in green. A clean apply prints netplan applied, and any scp or
netplan warnings appear under the same host label.
Re-run the same two commands to see the effect of the netplan change. Each eth_rail NIC
is now UP with its /31 address, and the routing table has gained the per-rail /15 and
/12 rail routes (via each rail gateway) that carry the RoCE traffic, none of which were
present in the baseline above:
cd ~/nvidiaexport SSHPASS=nvidia # the HGX hosts are ubuntu:nvidiafor ip in 192.168.200.{17..20}; do host=$(sshpass -e ssh -n -o ConnectTimeout=10 -o StrictHostKeyChecking=no "ubuntu@$ip" hostname 2>/dev/null) sshpass -e ssh -n -o ConnectTimeout=10 -o StrictHostKeyChecking=no "ubuntu@$ip" 'ip -br address show; ip route show' 2>&1 \ | awk -v h="${host:-$ip}" '{ printf "\033[1;92m%s\033[0m | %s\n", h, $0 }'doneStep 13: Verify connectivity
Section titled “Step 13: Verify connectivity”Before running the checks, confirm that the Terraform deployment from Step 11 has finished. The following command refreshes every 10 seconds; leave it running until the deploy status shows finished:
watch -n 10 "metalcloud-cli infrastructure list"The output should look like this:
┌────┬─────────┬──────────────┬────────┬───────┬──────┬─────────────────────┬─────────────────────┬───────────────┬───────────┐│ ID │ LABEL │ CONFIG LABEL │ STATUS │ OWNER │ SITE │ CREATED │ UPDATED │ DEPLOY STATUS │ DEPLOY ID │├────┼─────────┼──────────────┼────────┼───────┼──────┼─────────────────────┼─────────────────────┼───────────────┼───────────┤│ 1 │ tenant1 │ tenant1 │ active │ 1 │ 1 │ 16 Jul 26 15:26 UTC │ 16 Jul 26 15:30 UTC │ finished │ │└────┴─────────┴──────────────┴────────┴───────┴──────┴─────────────────────┴─────────────────────┴───────────────┴───────────┘The rail /31s live only on the hosts, so the ping sweep has to run on each host, not
on the jumpstation. This block drives all four hosts from the jumpstation: it SSHes in
with the lab credentials (ubuntu / nvidia, hardcoded so it never prompts) and runs
the full rail mesh on each one, covering all eight rails across all four hosts (32
targets per host). Every target should answer, so a clean fabric reports 32 passed, 0 failed on all four hosts. Each host’s output is prefixed with its name in green, and the
counts are coloured: the pass count green, any failures red.
cd ~/nvidiaexport SSHPASS=nvidia   # the HGX hosts are ubuntu:nvidia
# Runs on each host: ping every host on all eight rails, retrying for up to ~30s so any# rail still converging right after the deploy has time to come up. A target drops off the# retry list as soon as it answers; only targets still down at the end count as failures.mesh='targets=""for r in 16 18 20 22 24 26 28 30; do        # eth_rail0 .. eth_rail7 (second octet)  for h in 0 16 32 48; do targets="$targets 172.$r.0.$h"; done   # h00 h08 h16 h24donepending="$targets"for attempt in 1 2 3 4 5 6; do  still=""  for ip in $pending; do ping -c1 -W2 "$ip" >/dev/null 2>&1 || still="$still $ip"; done  pending="$still"; [ -z "$pending" ] && break  sleep 5donetotal=0; for ip in $targets; do total=$((total + 1)); donefail=0;  for ip in $pending; do echo "FAIL $ip"; fail=$((fail + 1)); doneecho "host mesh: $((total - fail)) passed, $fail failed"'
for ip in 192.168.200.{17..20}; do  host=$(sshpass -e ssh -n -o ConnectTimeout=10 -o StrictHostKeyChecking=no "ubuntu@$ip" hostname 2>/dev/null)  sshpass -e ssh -n -o ConnectTimeout=10 -o StrictHostKeyChecking=no "ubuntu@$ip" "$mesh" 2>&1 \    | awk -v h="${host:-$ip}" '        { s=$0          if (s ~ /^FAIL /) { s="\033[91m" s "\033[0m" }          else {            gsub(/[0-9]+ passed/,      "\033[92m&\033[0m", s)            gsub(/[1-9][0-9]* failed/, "\033[91m&\033[0m", s)          }          printf "\033[1;92m%s\033[0m | %s\n", h, s        }'done
A clean fabric prints four green-labelled host mesh: 32 passed, 0 failed lines and nothing
else. BGP and EVPN can still be converging in the first seconds after the deploy, so the
sweep retries each target for up to about thirty seconds rather than reporting a false
failure; the sweep lists anything still unreachable after that as a red FAIL <ip> line
under the host that could not reach it. Re-running the block is safe.
Result
Section titled “Result”| Check | Expected |
|---|---|
fabric configure-switches | devices patched=6, links created=256, /31 strategies added=288 |
| Endpoints | 4 created |
| Underlay BGP | all sessions established, 0 down |
| Tenant | tenant1 L3 network deployed, one L3VNI |
| Host mesh | 32 passed, 0 failed from all four hosts (32 targets each, 128 total) |
Troubleshooting
Section titled “Troubleshooting”- The CLI cannot reach the controller. If a
metalcloud-clicommand fails with a connection or TLS error, orsite agents 1returns no agent, the controller may still be starting, or the Site Controller may have lost its link to the Global Controller after a restart. Log in to the Global Controller asroot(ssh -l root 192.168.200.3, passwordMetalsoftR0cks@$@$) and runkwto watch the Kubernetes pods until each reachesRunning; if any stay stuck, runk-restart-all -Ato force a restart. On the Site Controller (ssh -l root 192.168.200.2, same password), rundocker psto confirm thenfs-serverandms-agentcontainers areUp,docker logs -f ms-agentto read the agent log, anddcrestartto restart the containers ifms-agentis not registering with the Global Controller. - A deploy job fails. Read the job with
metalcloud-cli job get <id>, correct the cause, and re-run the deploy step. BGP does not come up until the Step 8 deploy succeeds on every switch. get-portsis empty in Step 3. The switch is unreachable. Verify the management address and password inswitches.1su.yaml, then re-run discovery.- BFD sessions do not establish. NVIDIA Air’s Cumulus VX has no BFD daemon, so you cannot observe BFD liveness on the simulator. MetalSoft applies the configuration correctly, and it matches the reference; BFD is a hardware-only check.