Managing networks
MetalSoft networks are designed around performance and isolation. The network can be configured in many ways depending on the environment.
In general lines there are 3 types of networks:
- WAN - This network is usually used for getting out of the infrastructure. This is the most used network. Note that the WAN network can also contain additional networks available as trunk VLANs.
- LAN - This is usually used for connecting servers within the same infrastructure. This is rarely used, and MetalSoft will deprecate it in the future.
- SAN - This is a special network dedicated for SAN traffic, only present if drives are attached to server instances.
Networks are connected to server instance arrays which in turn will propagate the network configuration to all of the underlying server instances.
Using multiple links
Section titled “Using multiple links”It is possible and recommended to configure multiple links to join the same network. In these situations, the network of the server and the switch will change to enable the link aggregation to work by configuring M-LAG, VLT, or other forms of multi-chassis link aggregations on the switches, as well as bond interfaces on the Operating System.
Joining an existing network
Section titled “Joining an existing network”- Option #1
In the infrastructure designer, to join an existing network that connects two SEPARATE instance arrays, click any of the circles that are connected with the network that you want to join and DRAG to the other desired port (circle) on the target instance array and RELEASE. To connect only servers within the same instance array, use option #2 instead.
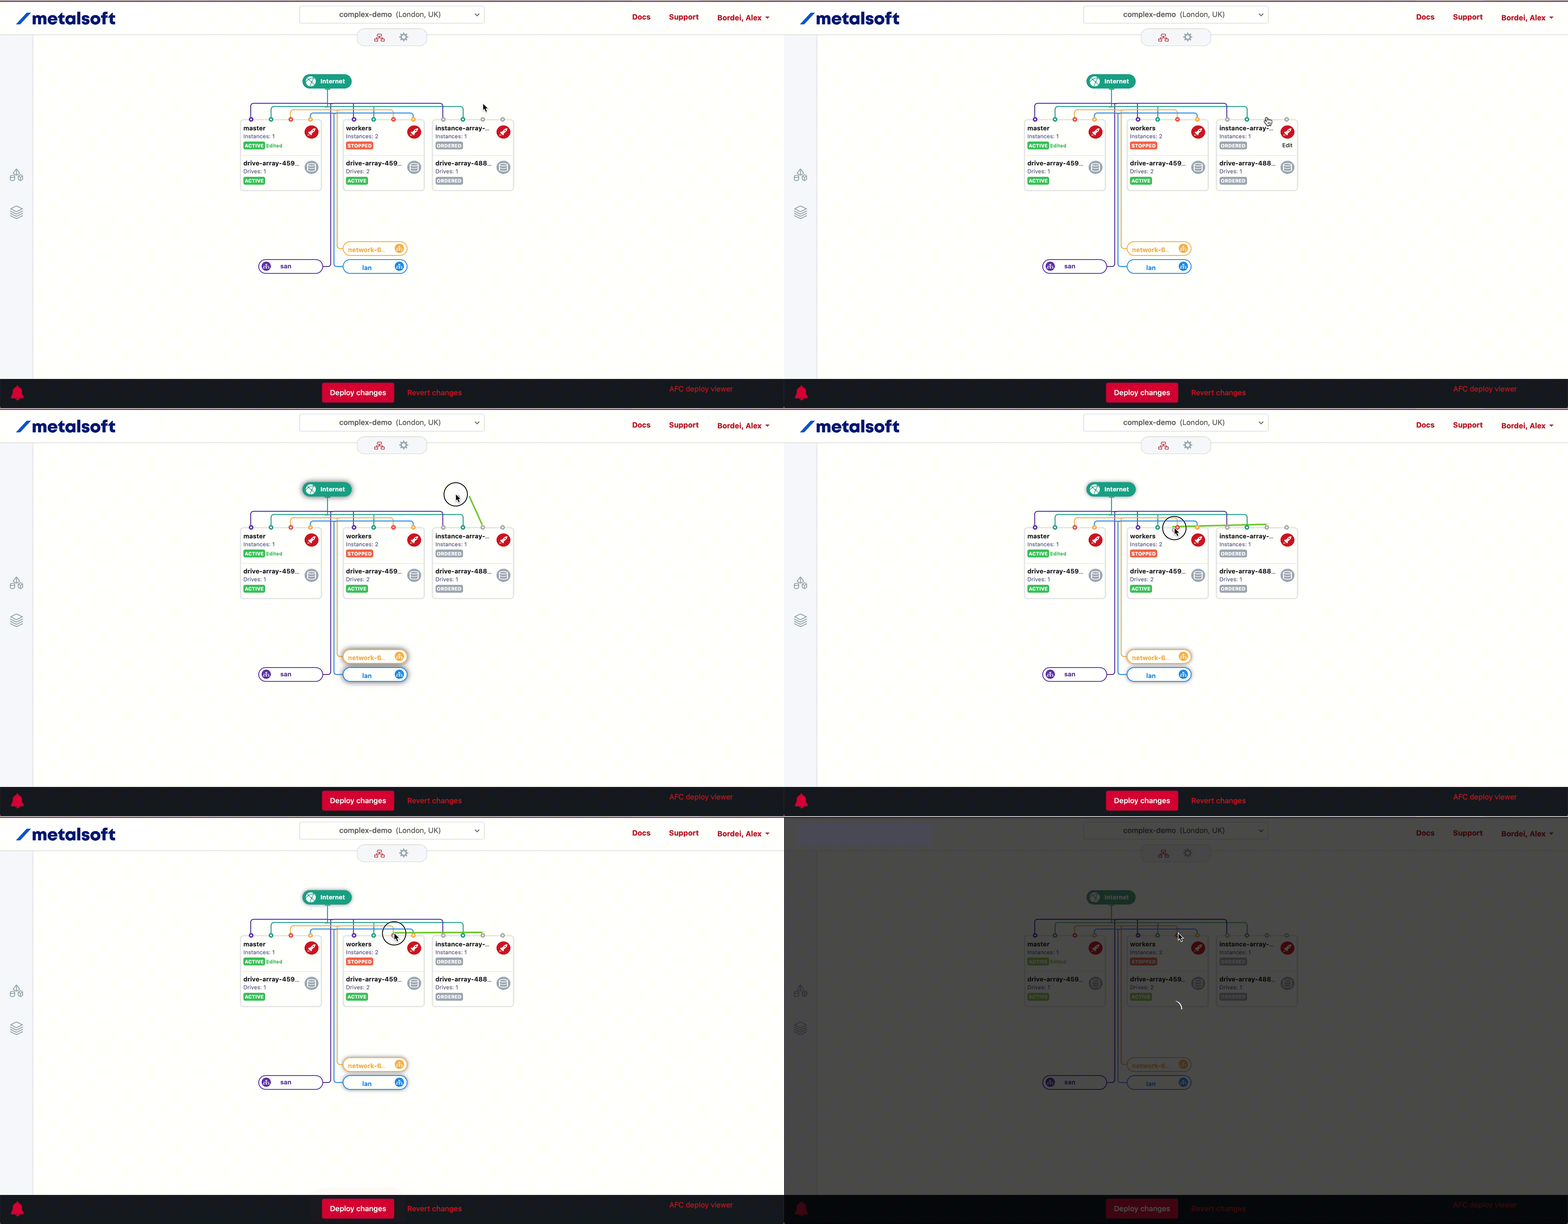
Press Deploy to effect the changes.
- Option #2
In the infrastructure designer, click on any of the ports (the circles on the top of instance arrays) and using the form select the network in which the respective port must be connected.
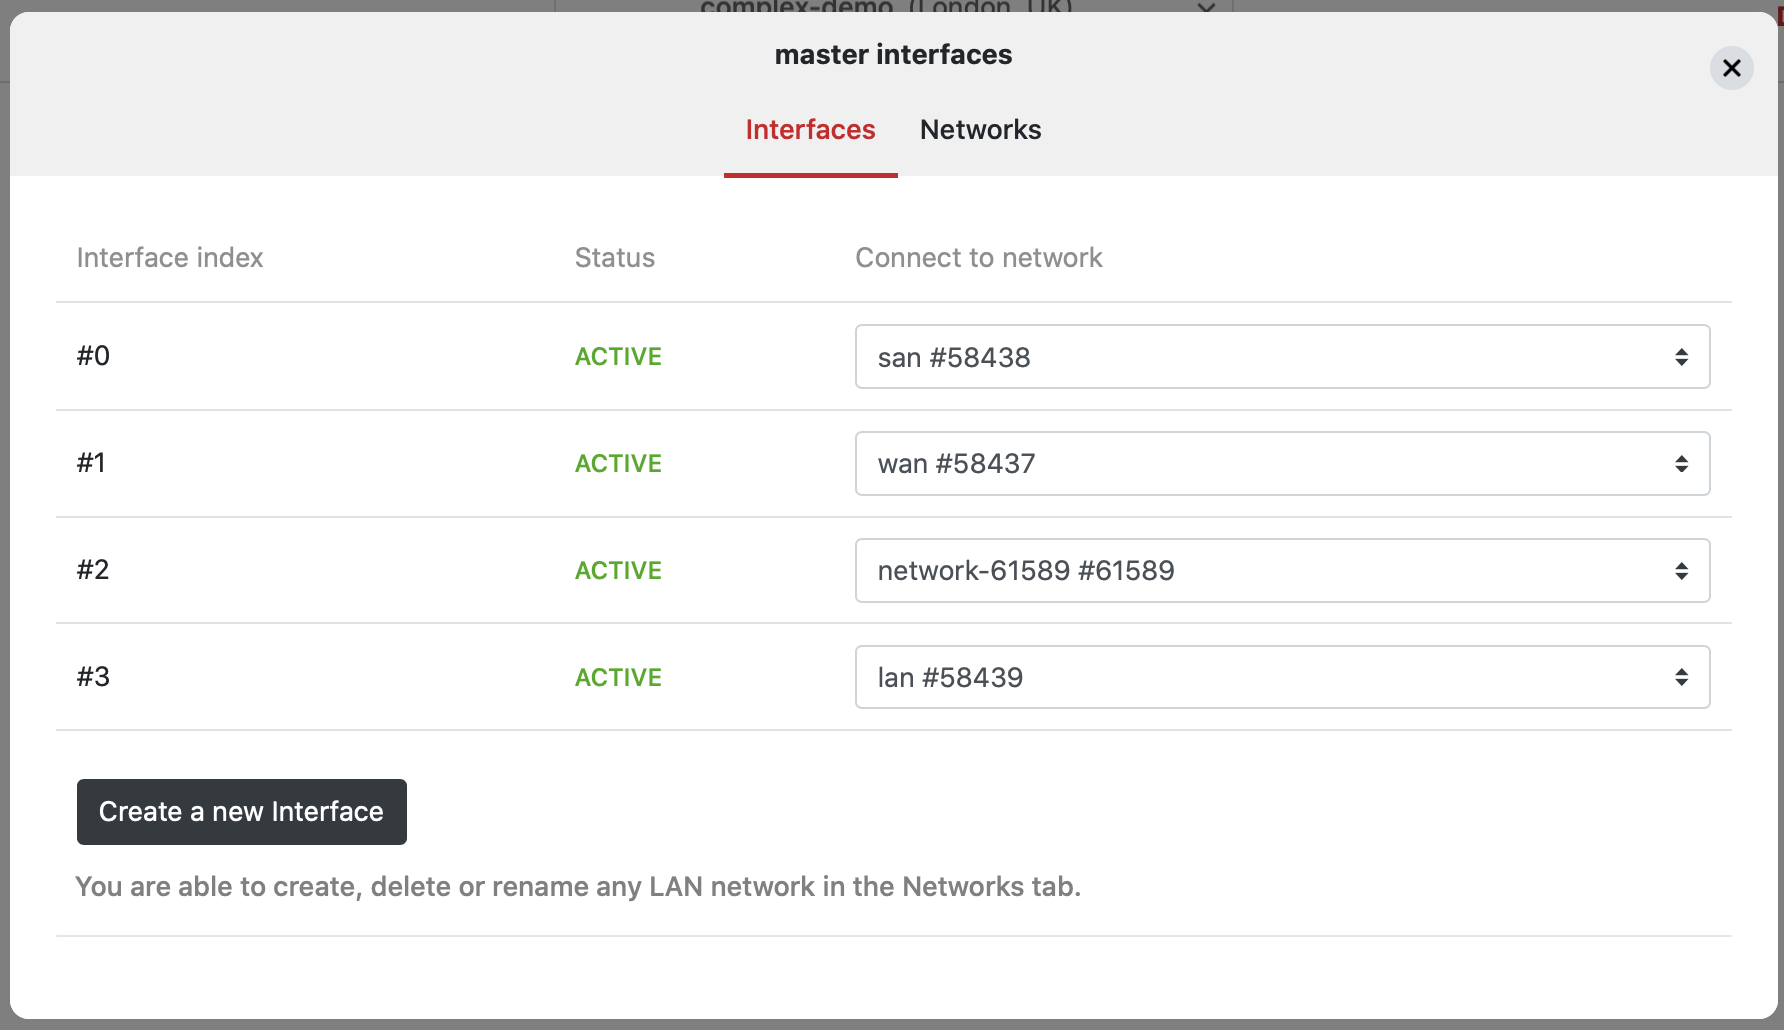
Press Deploy to effect the changes.
Creating a LAN network
Section titled “Creating a LAN network”- Option #1 In the infrastructure designer, to create a network that connects two instance arrays CLICK AND HOLD on the circles on the top of the instance arrays and DRAG to the other desired port (circle) on the target instance array and RELEASE.
Press Deploy to effect the changes.
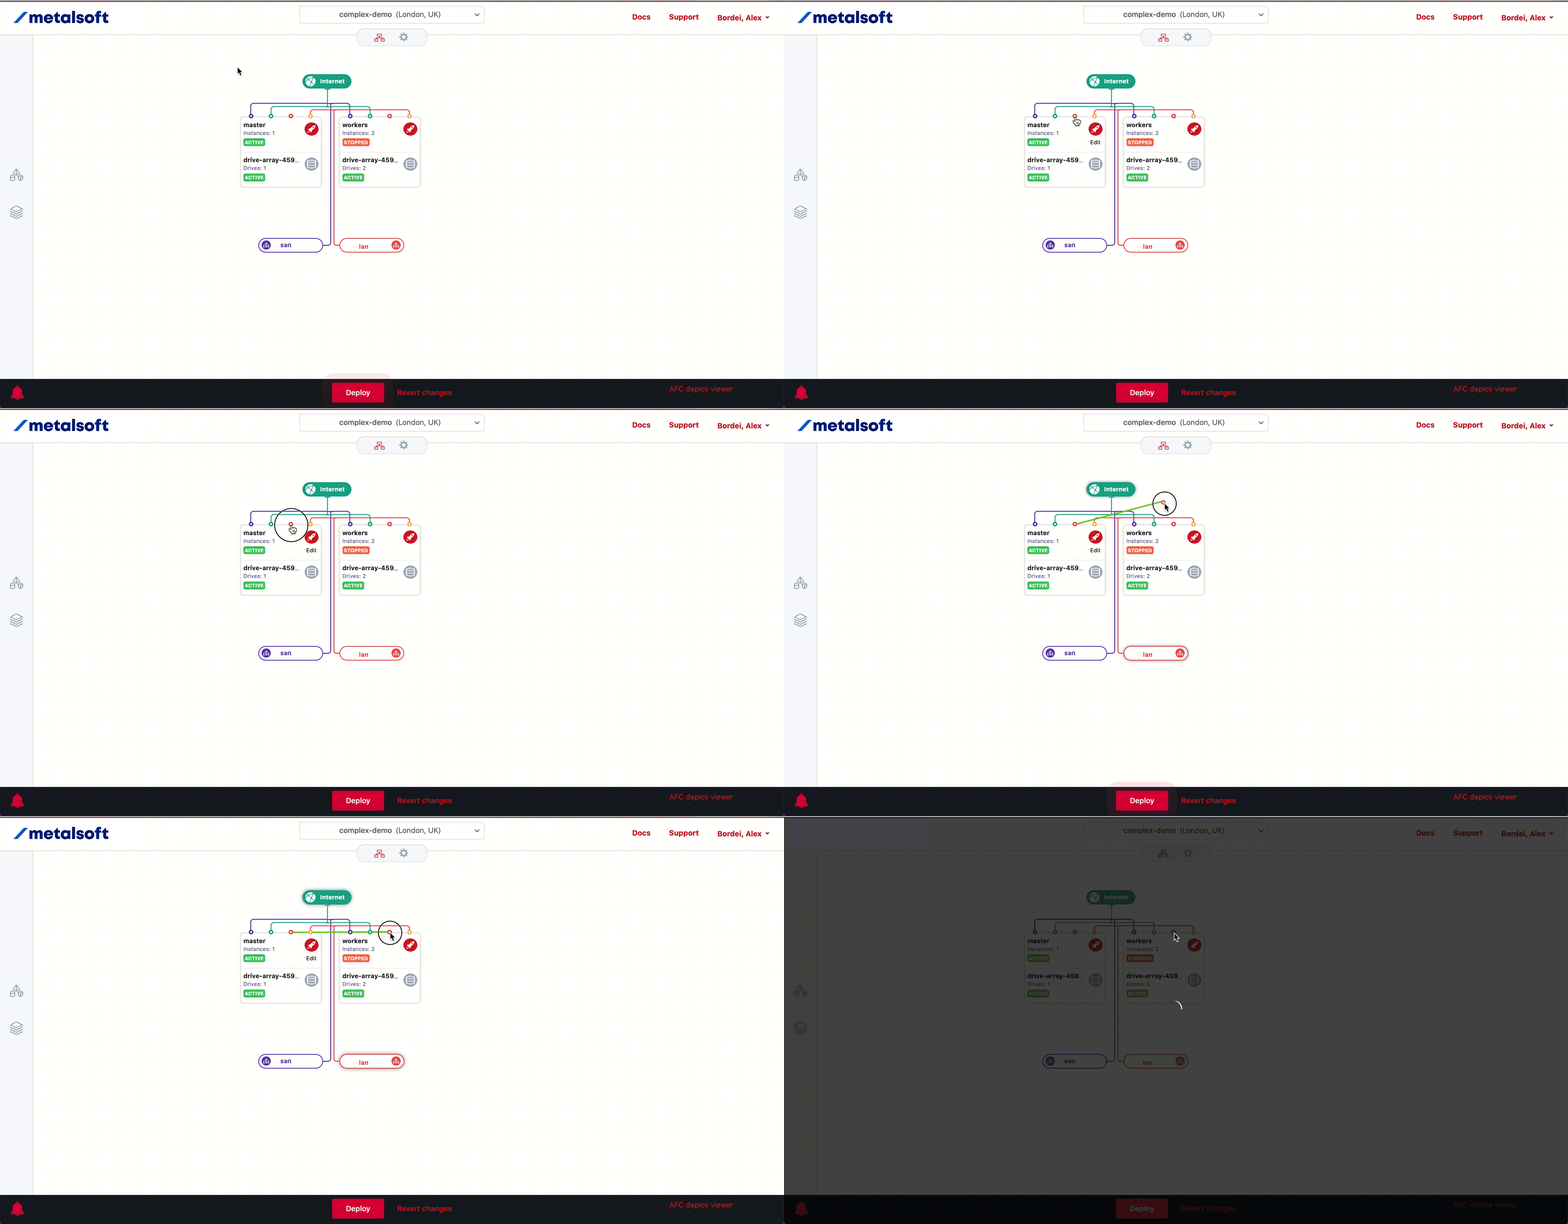
- Option #2 In the infrastructure designer, click on any of the ports and using the form select the Networks tab and input a name for the network and click Create LAN network button.
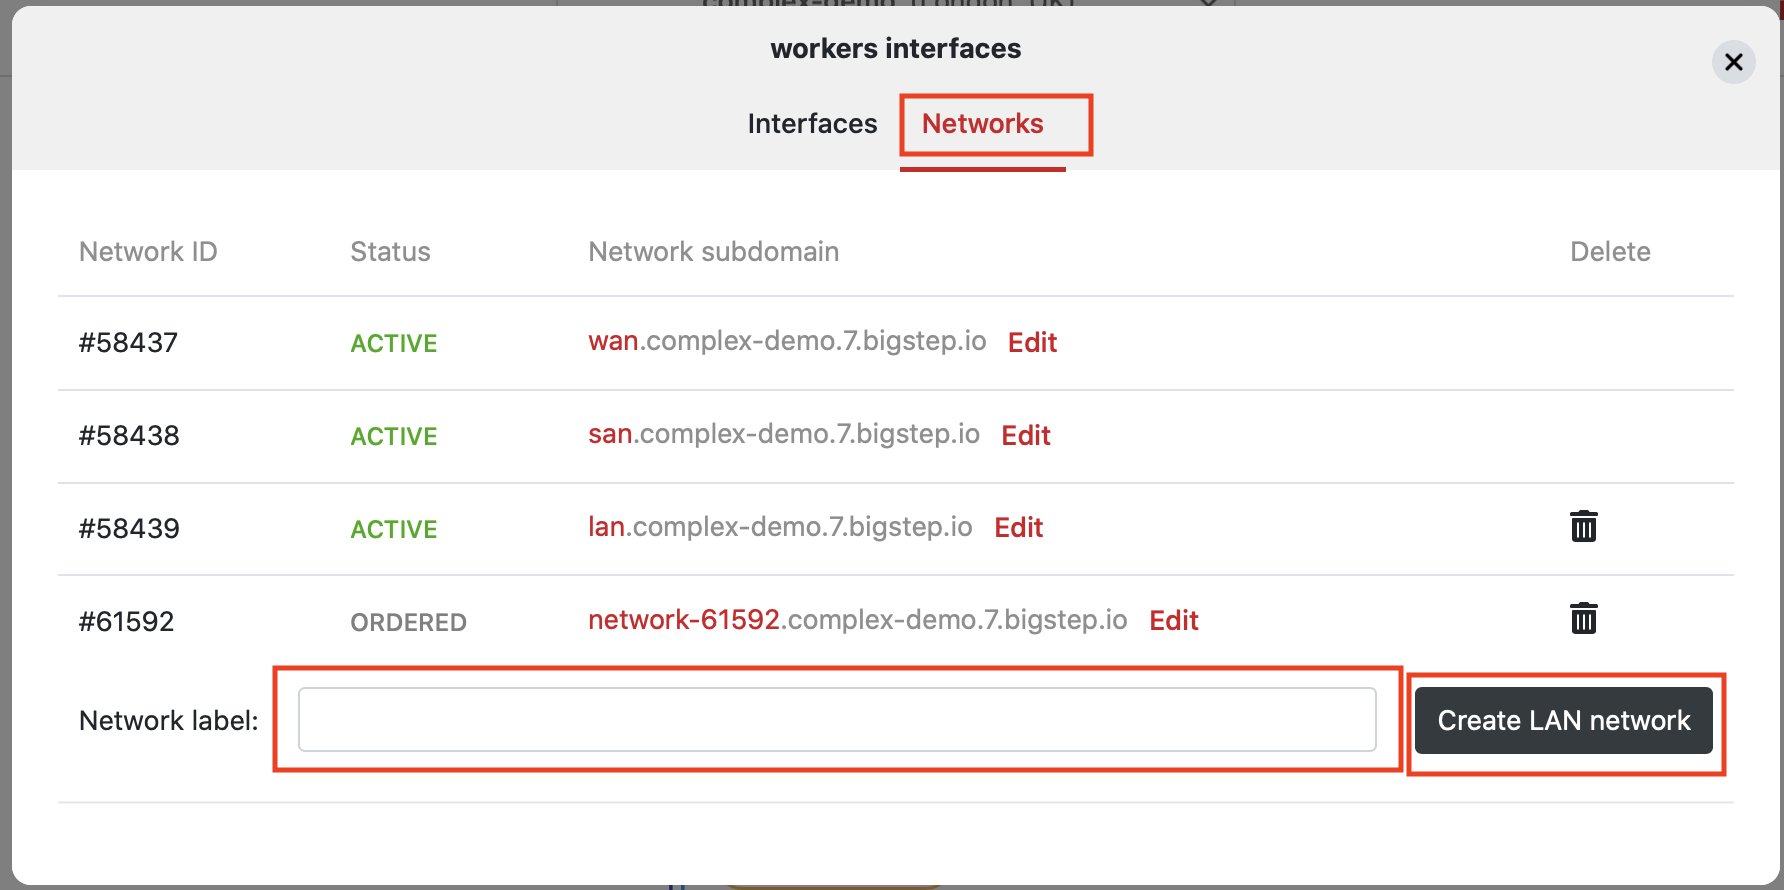
In the infrastructure designer, click on any of the ports (the circles on the top of instance arrays) and using the form select the network in which the respective port must be connected.
Press Deploy to effect the changes.
Advanced: Subnet pools
Section titled “Advanced: Subnet pools”You can create subnets from which network profiles allocate IPs or entire subnets to various uses.
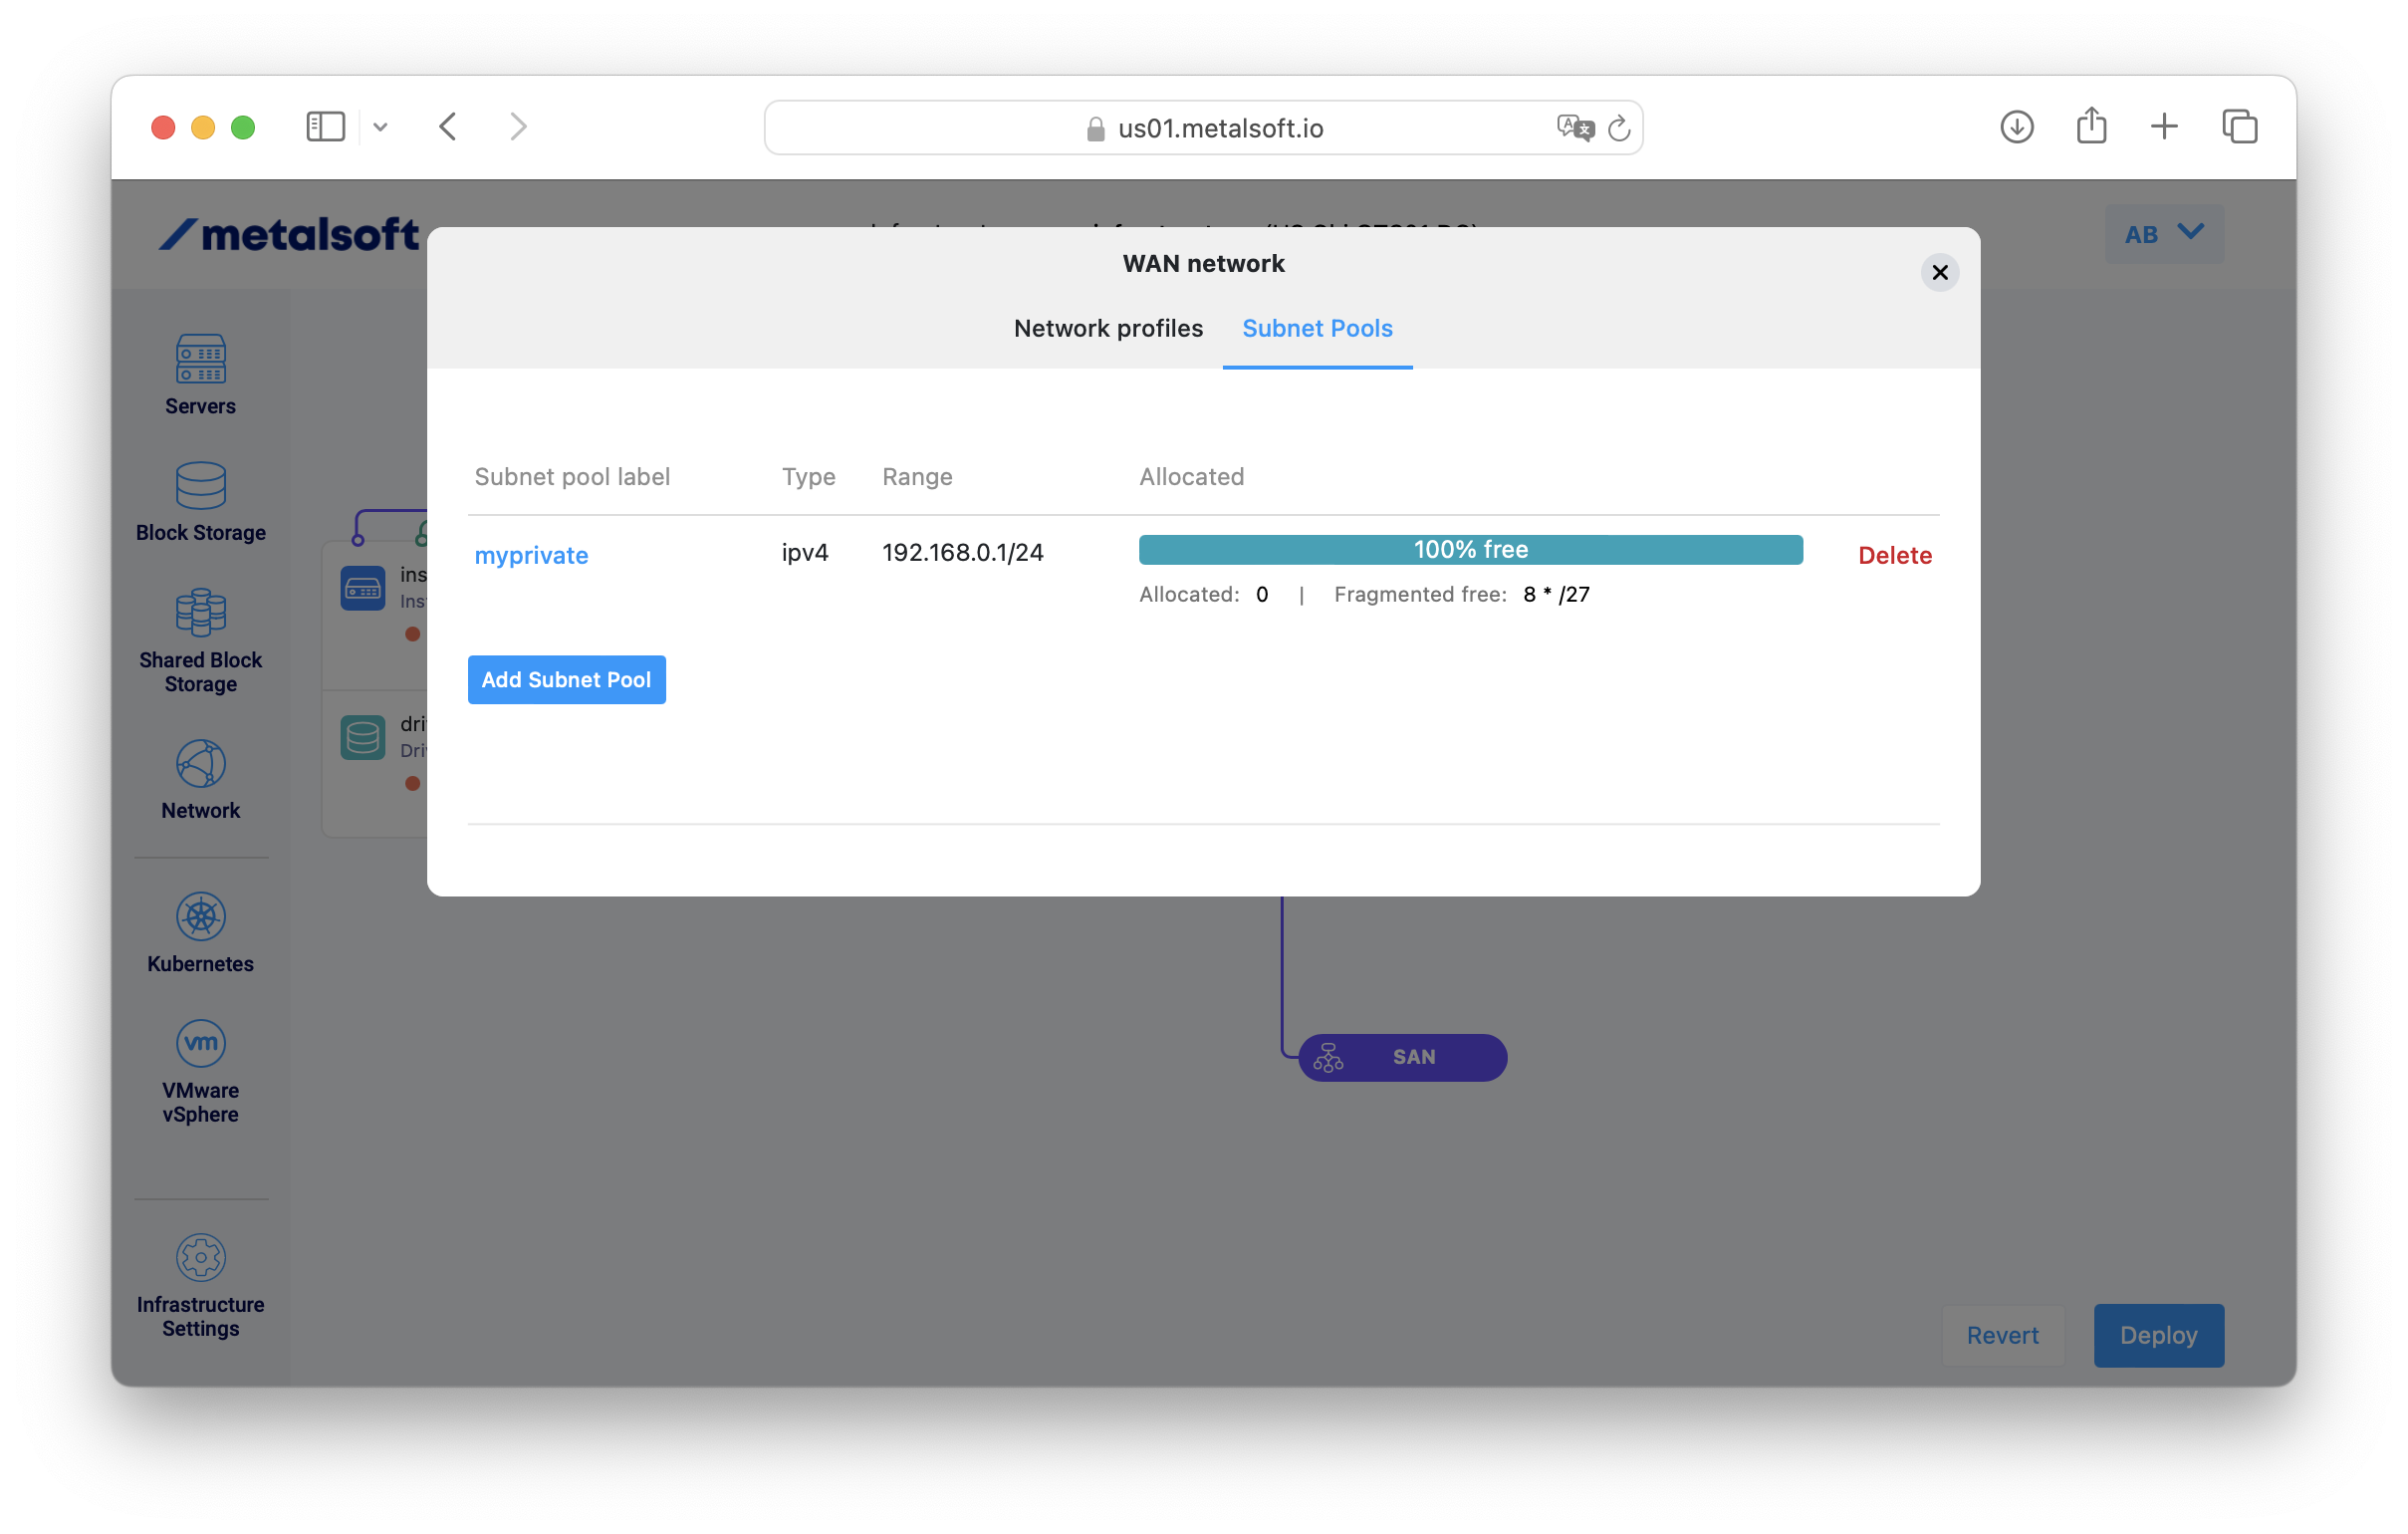
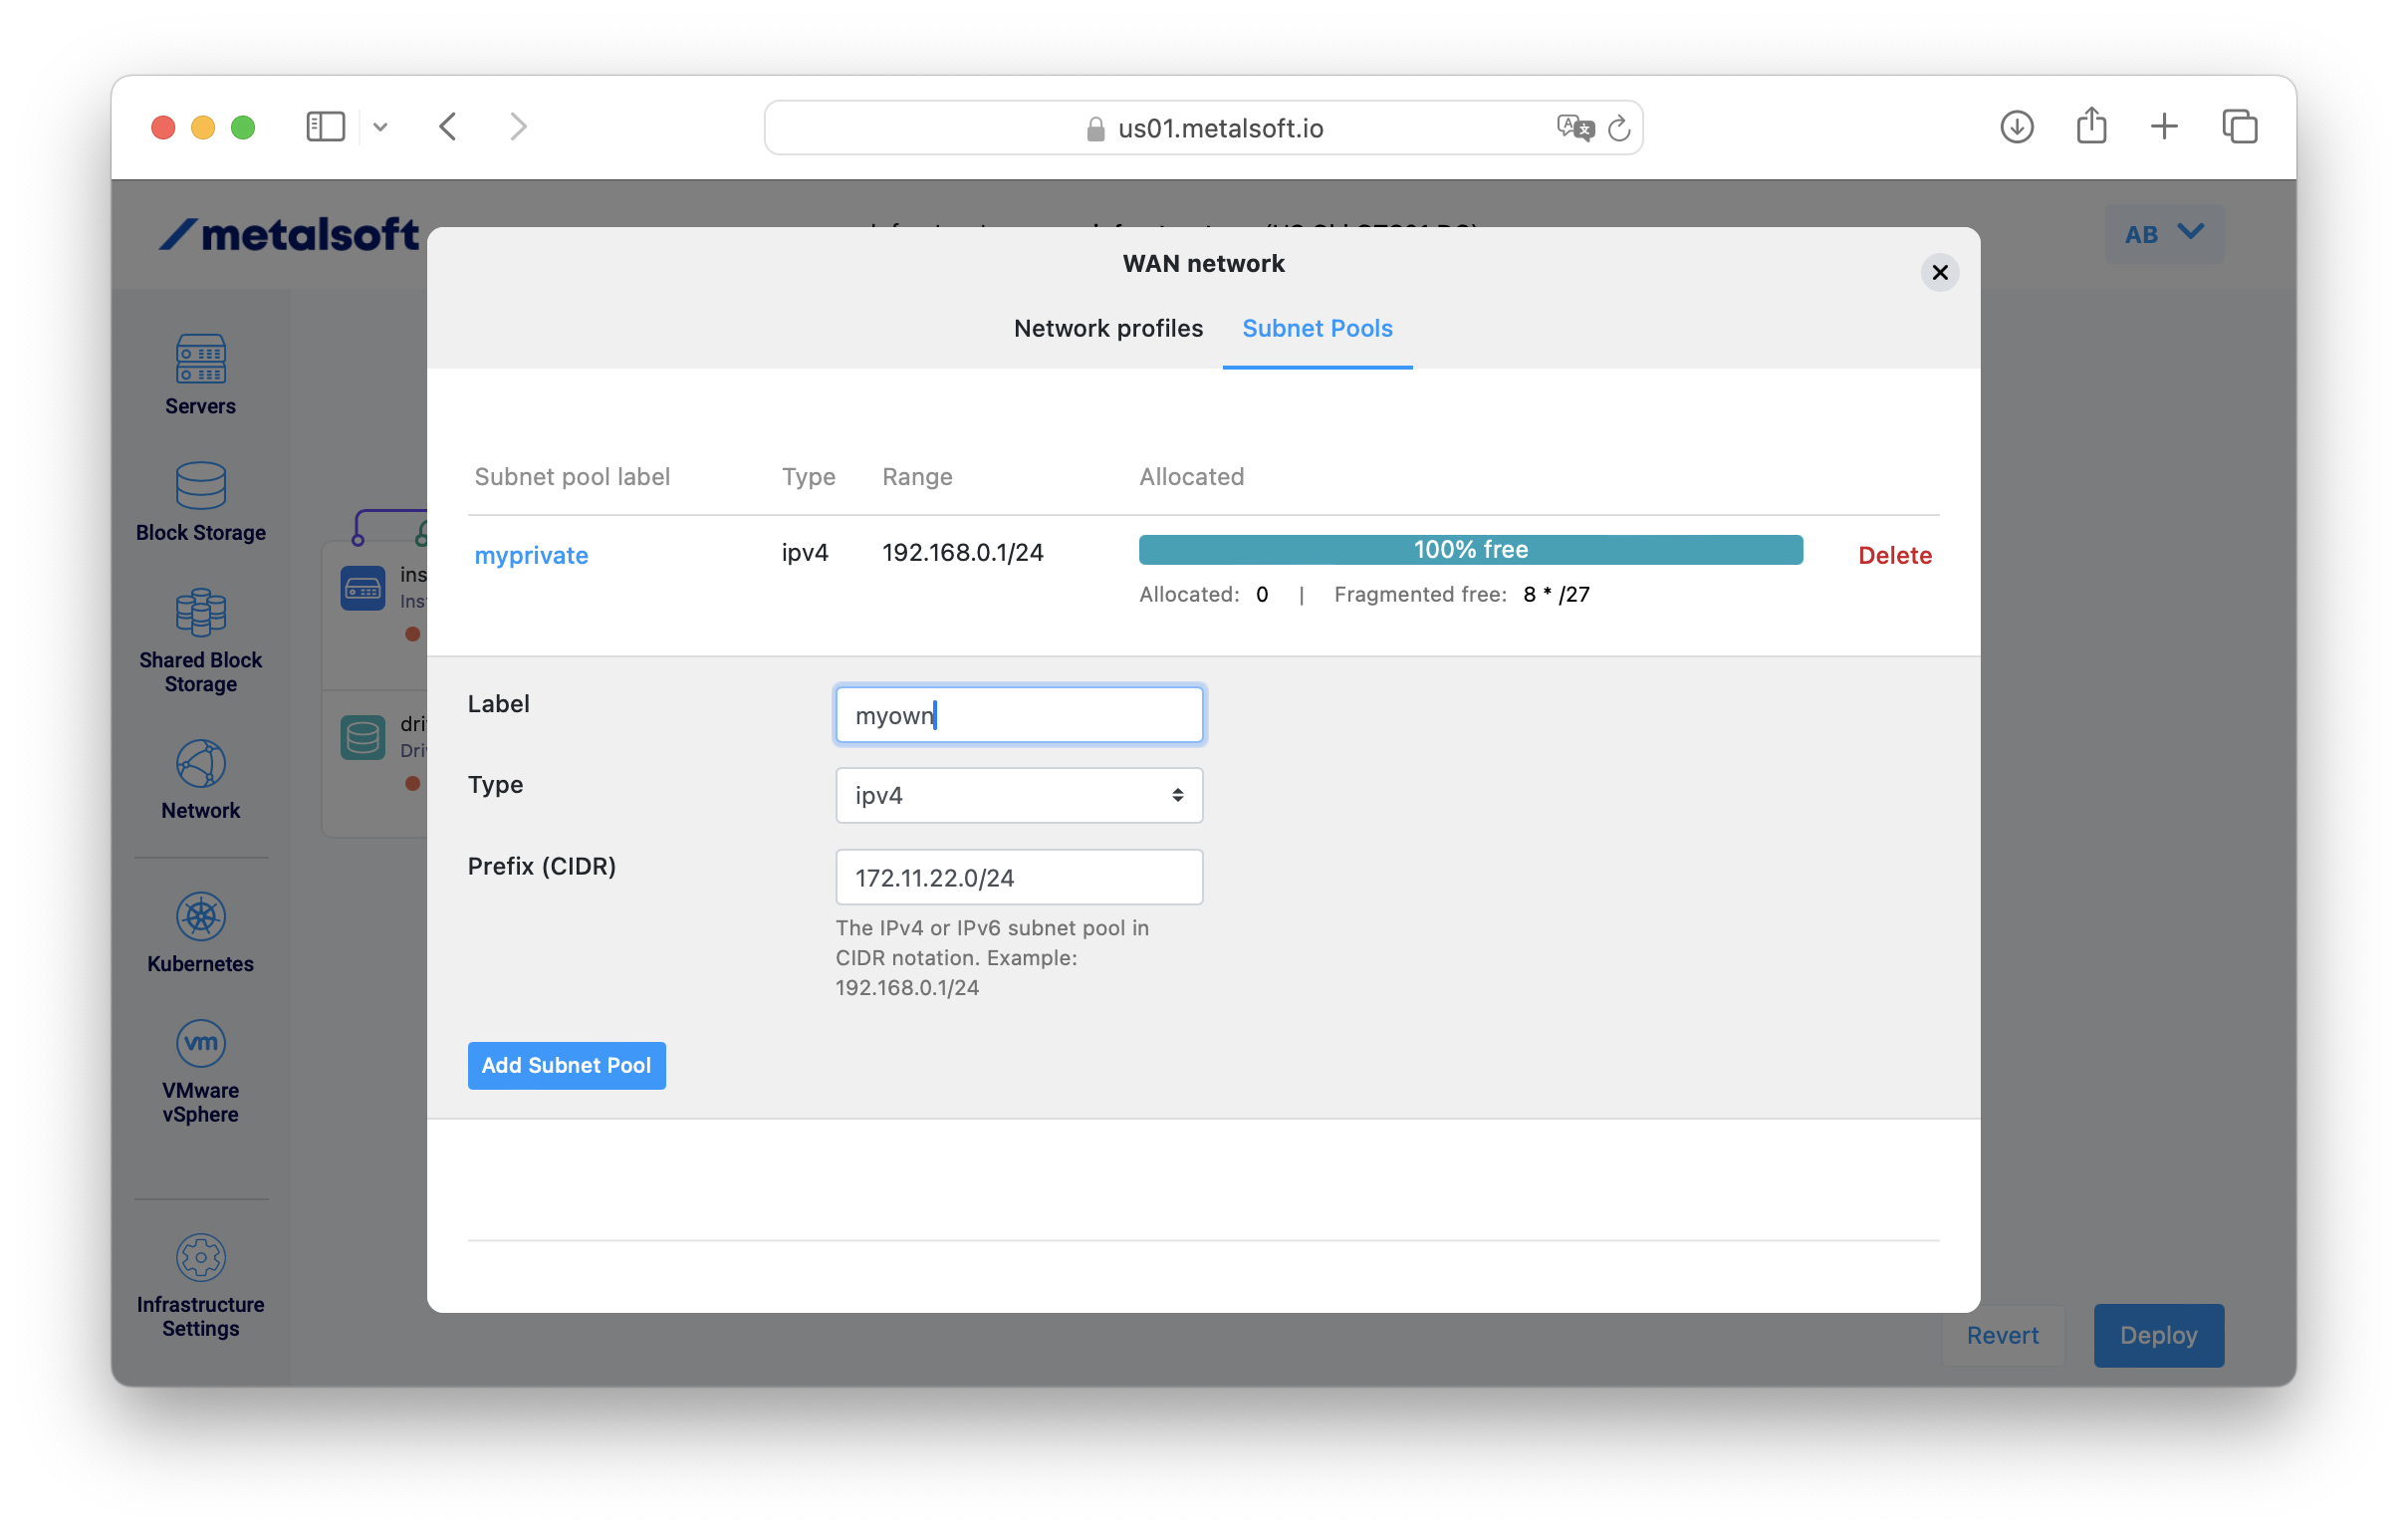
Specify the label of the subnet and the network in CIDR notation:
Advanced: Network profiles
Section titled “Advanced: Network profiles”You can create network profiles and reuse them across networks and infrastructures.
These network profiles alter how the network is provisioned for a given instance’s connection to a particular network. Admins usually create these network profiles, and clients use them, but in certain situations, such as when the client needs to connect to on-premises infrastructure, the client must configure them.
To create a network profile as a user
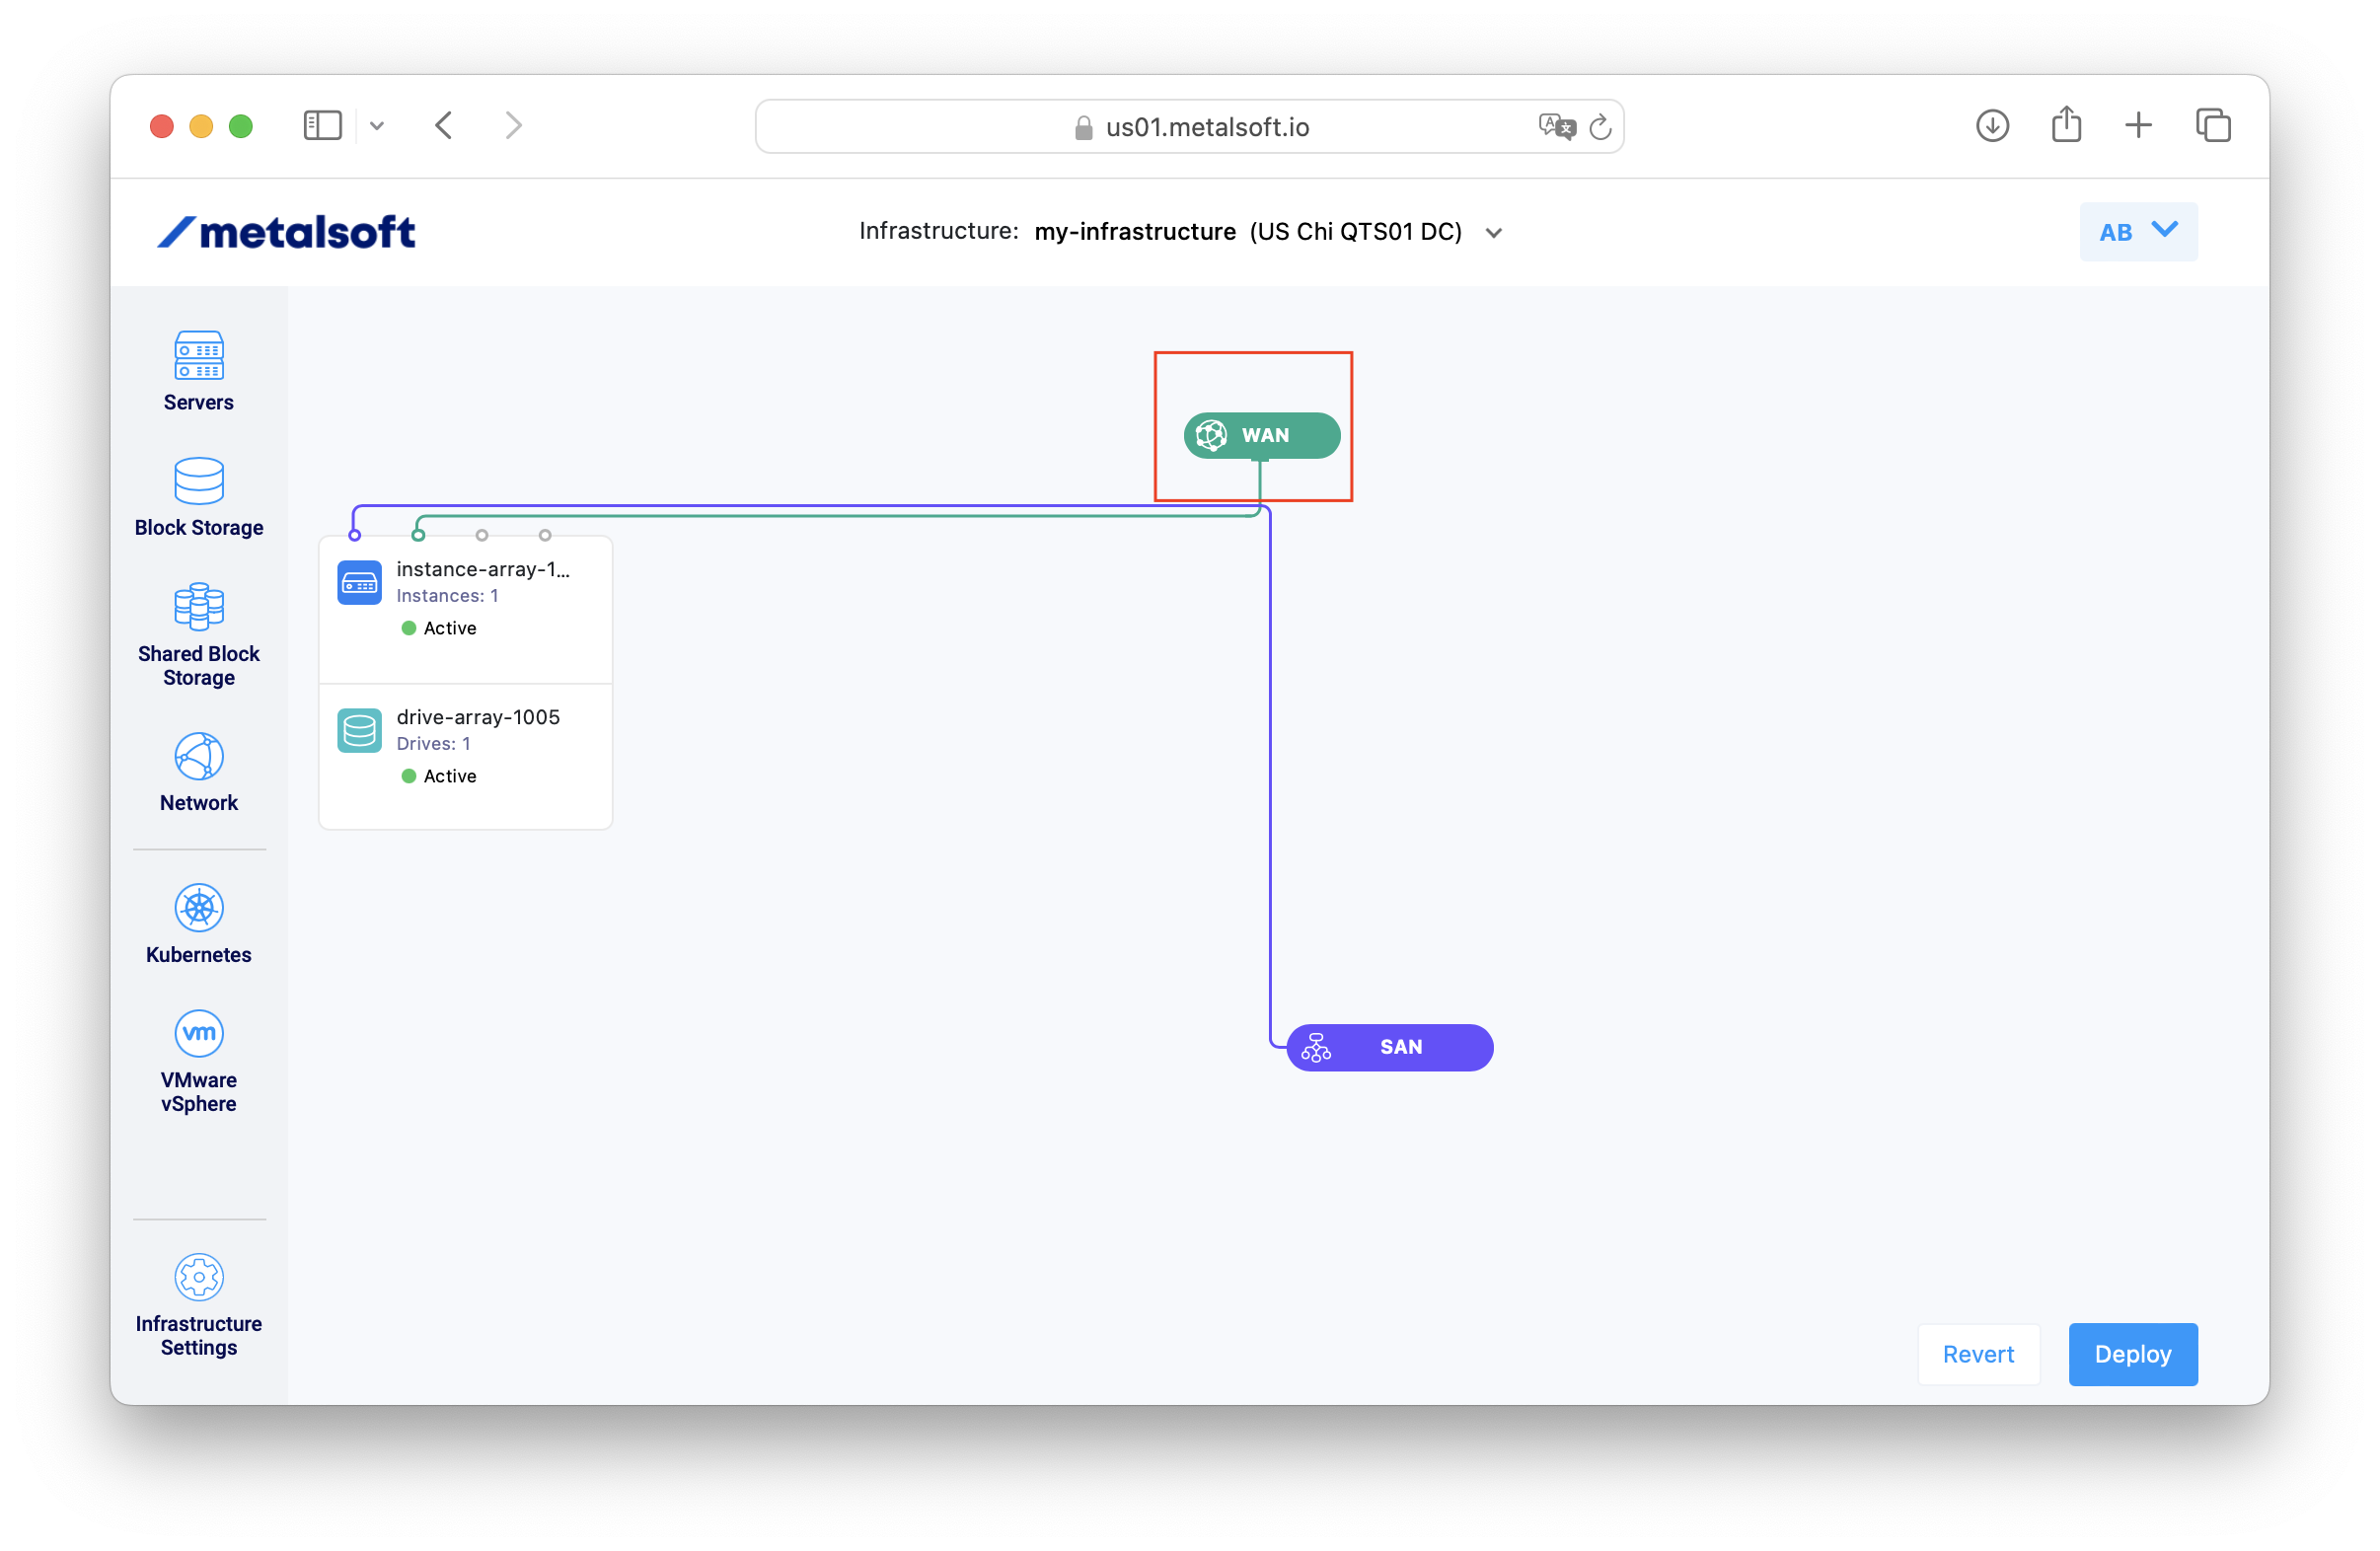
Section titled “To create a network profile as a user”Click on the network icon:
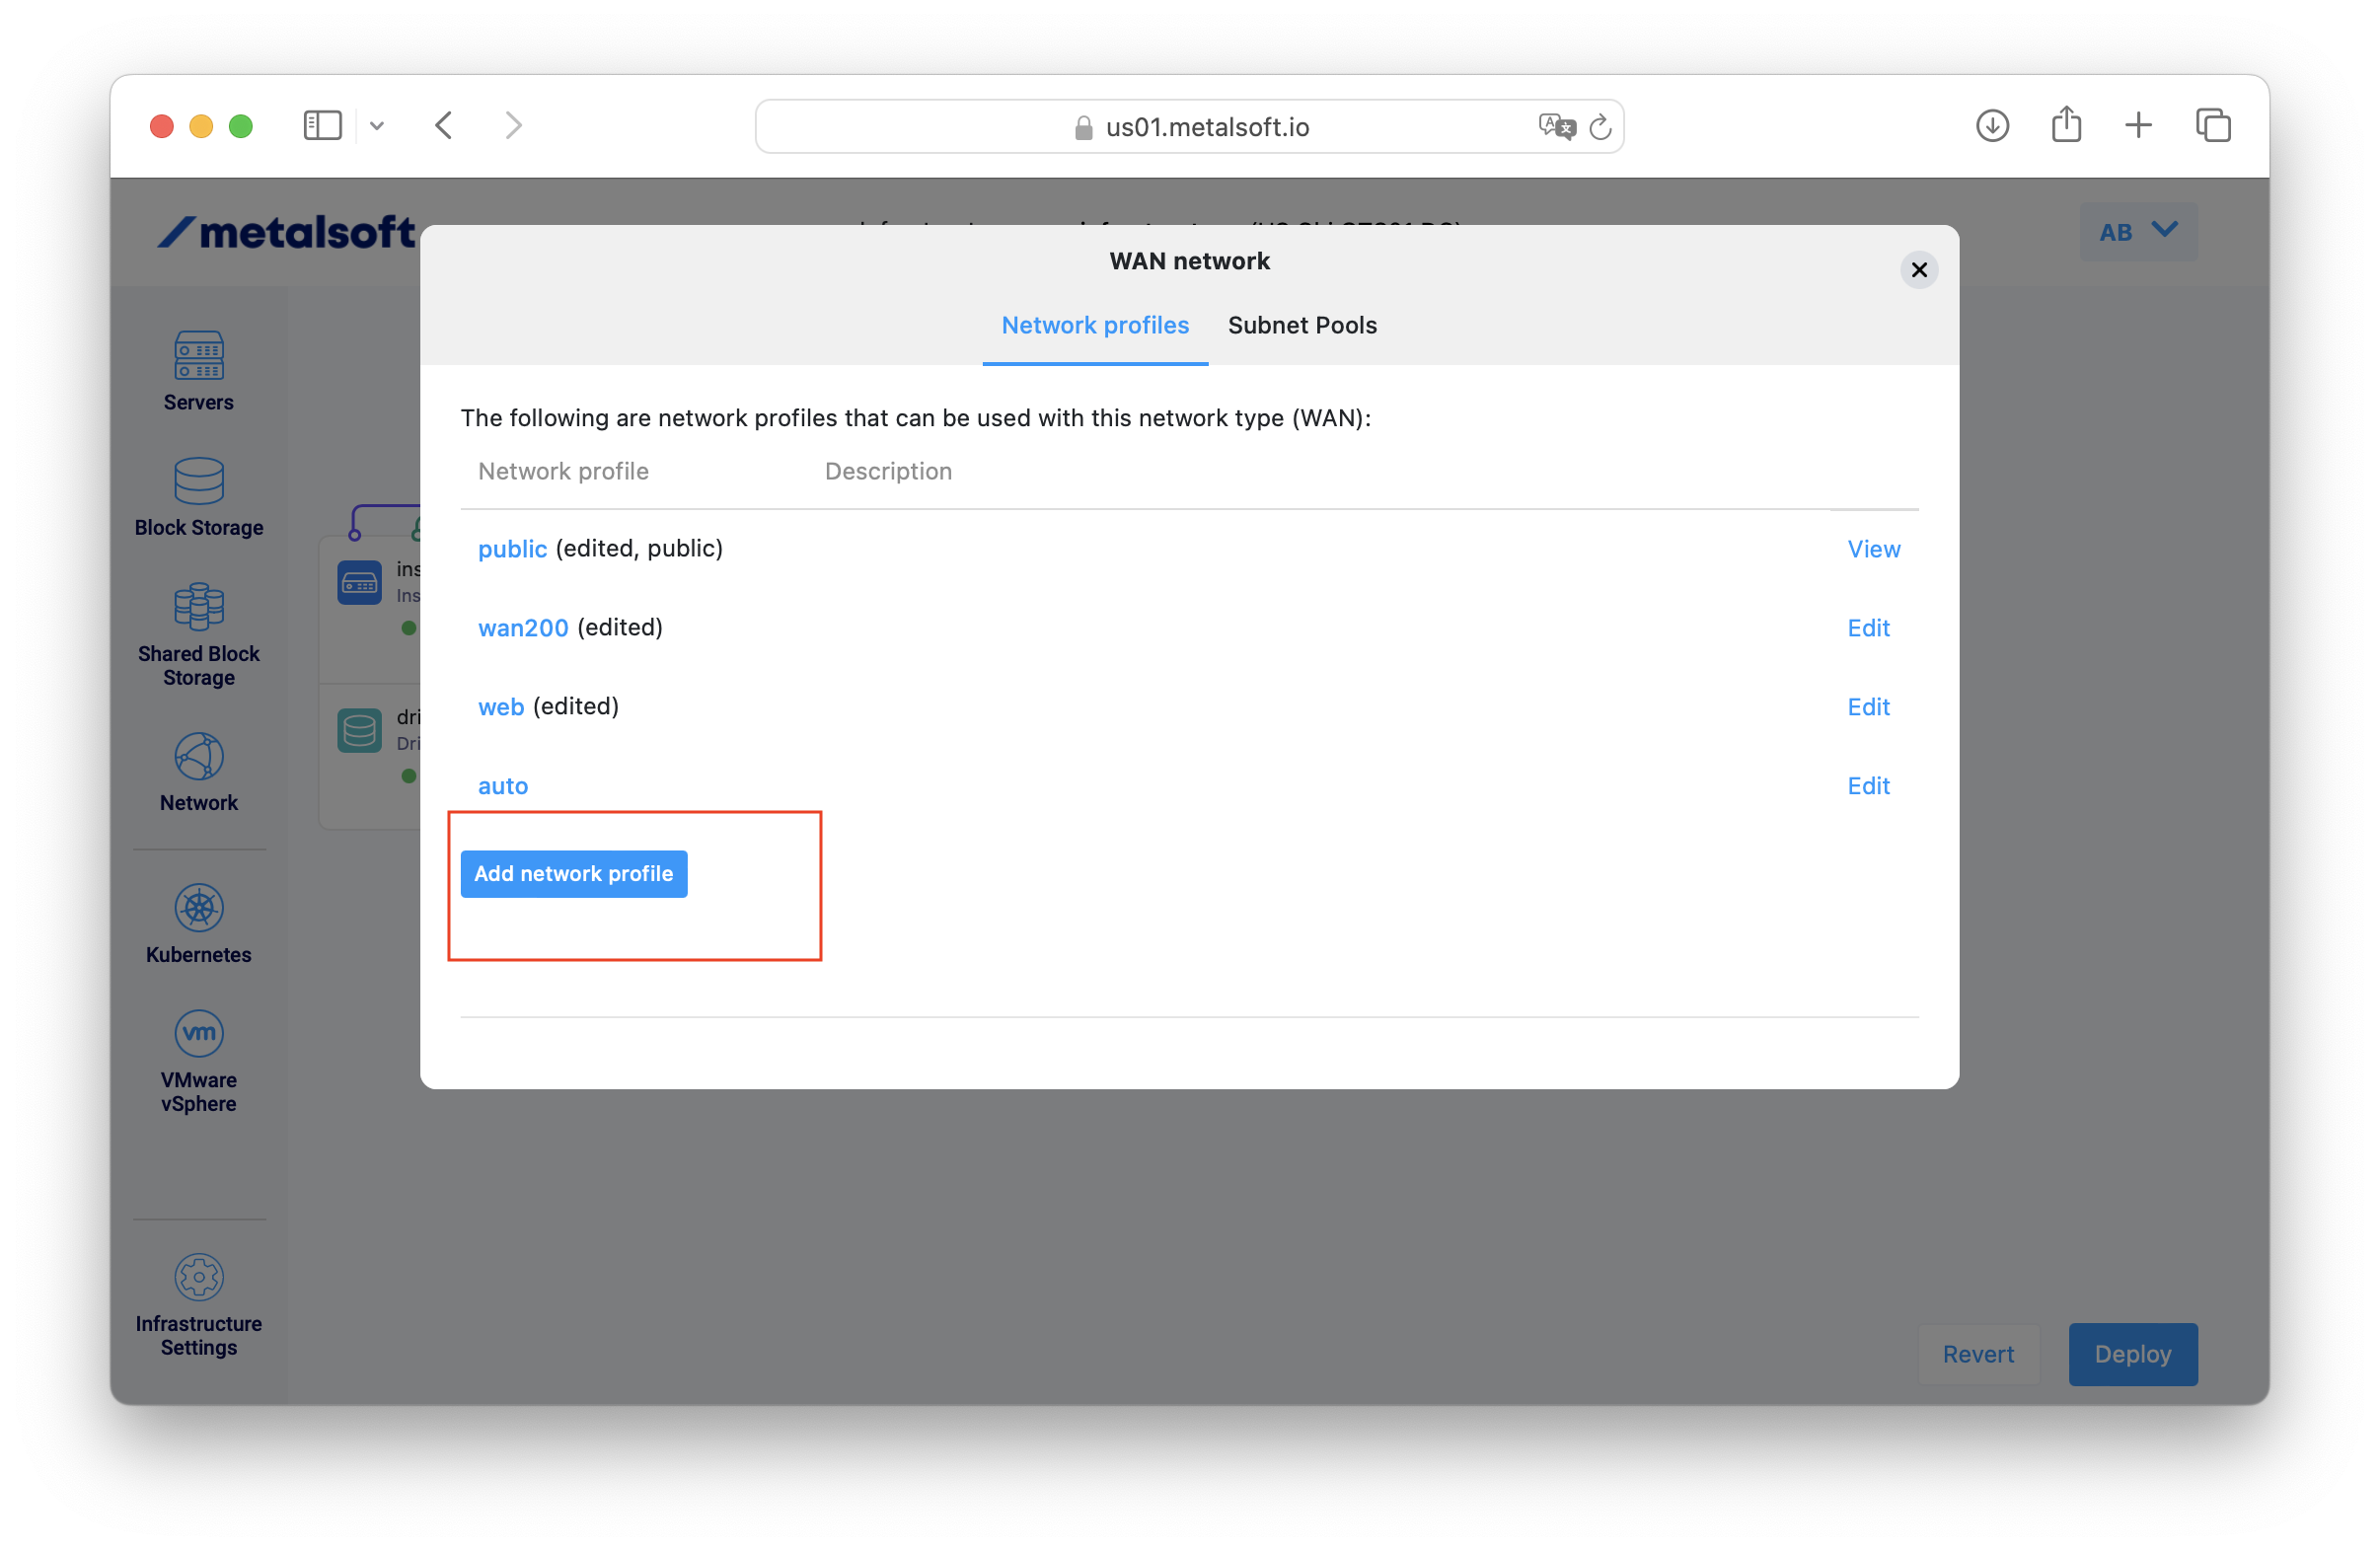
Go to the network profiles tab, click on Add network profile:
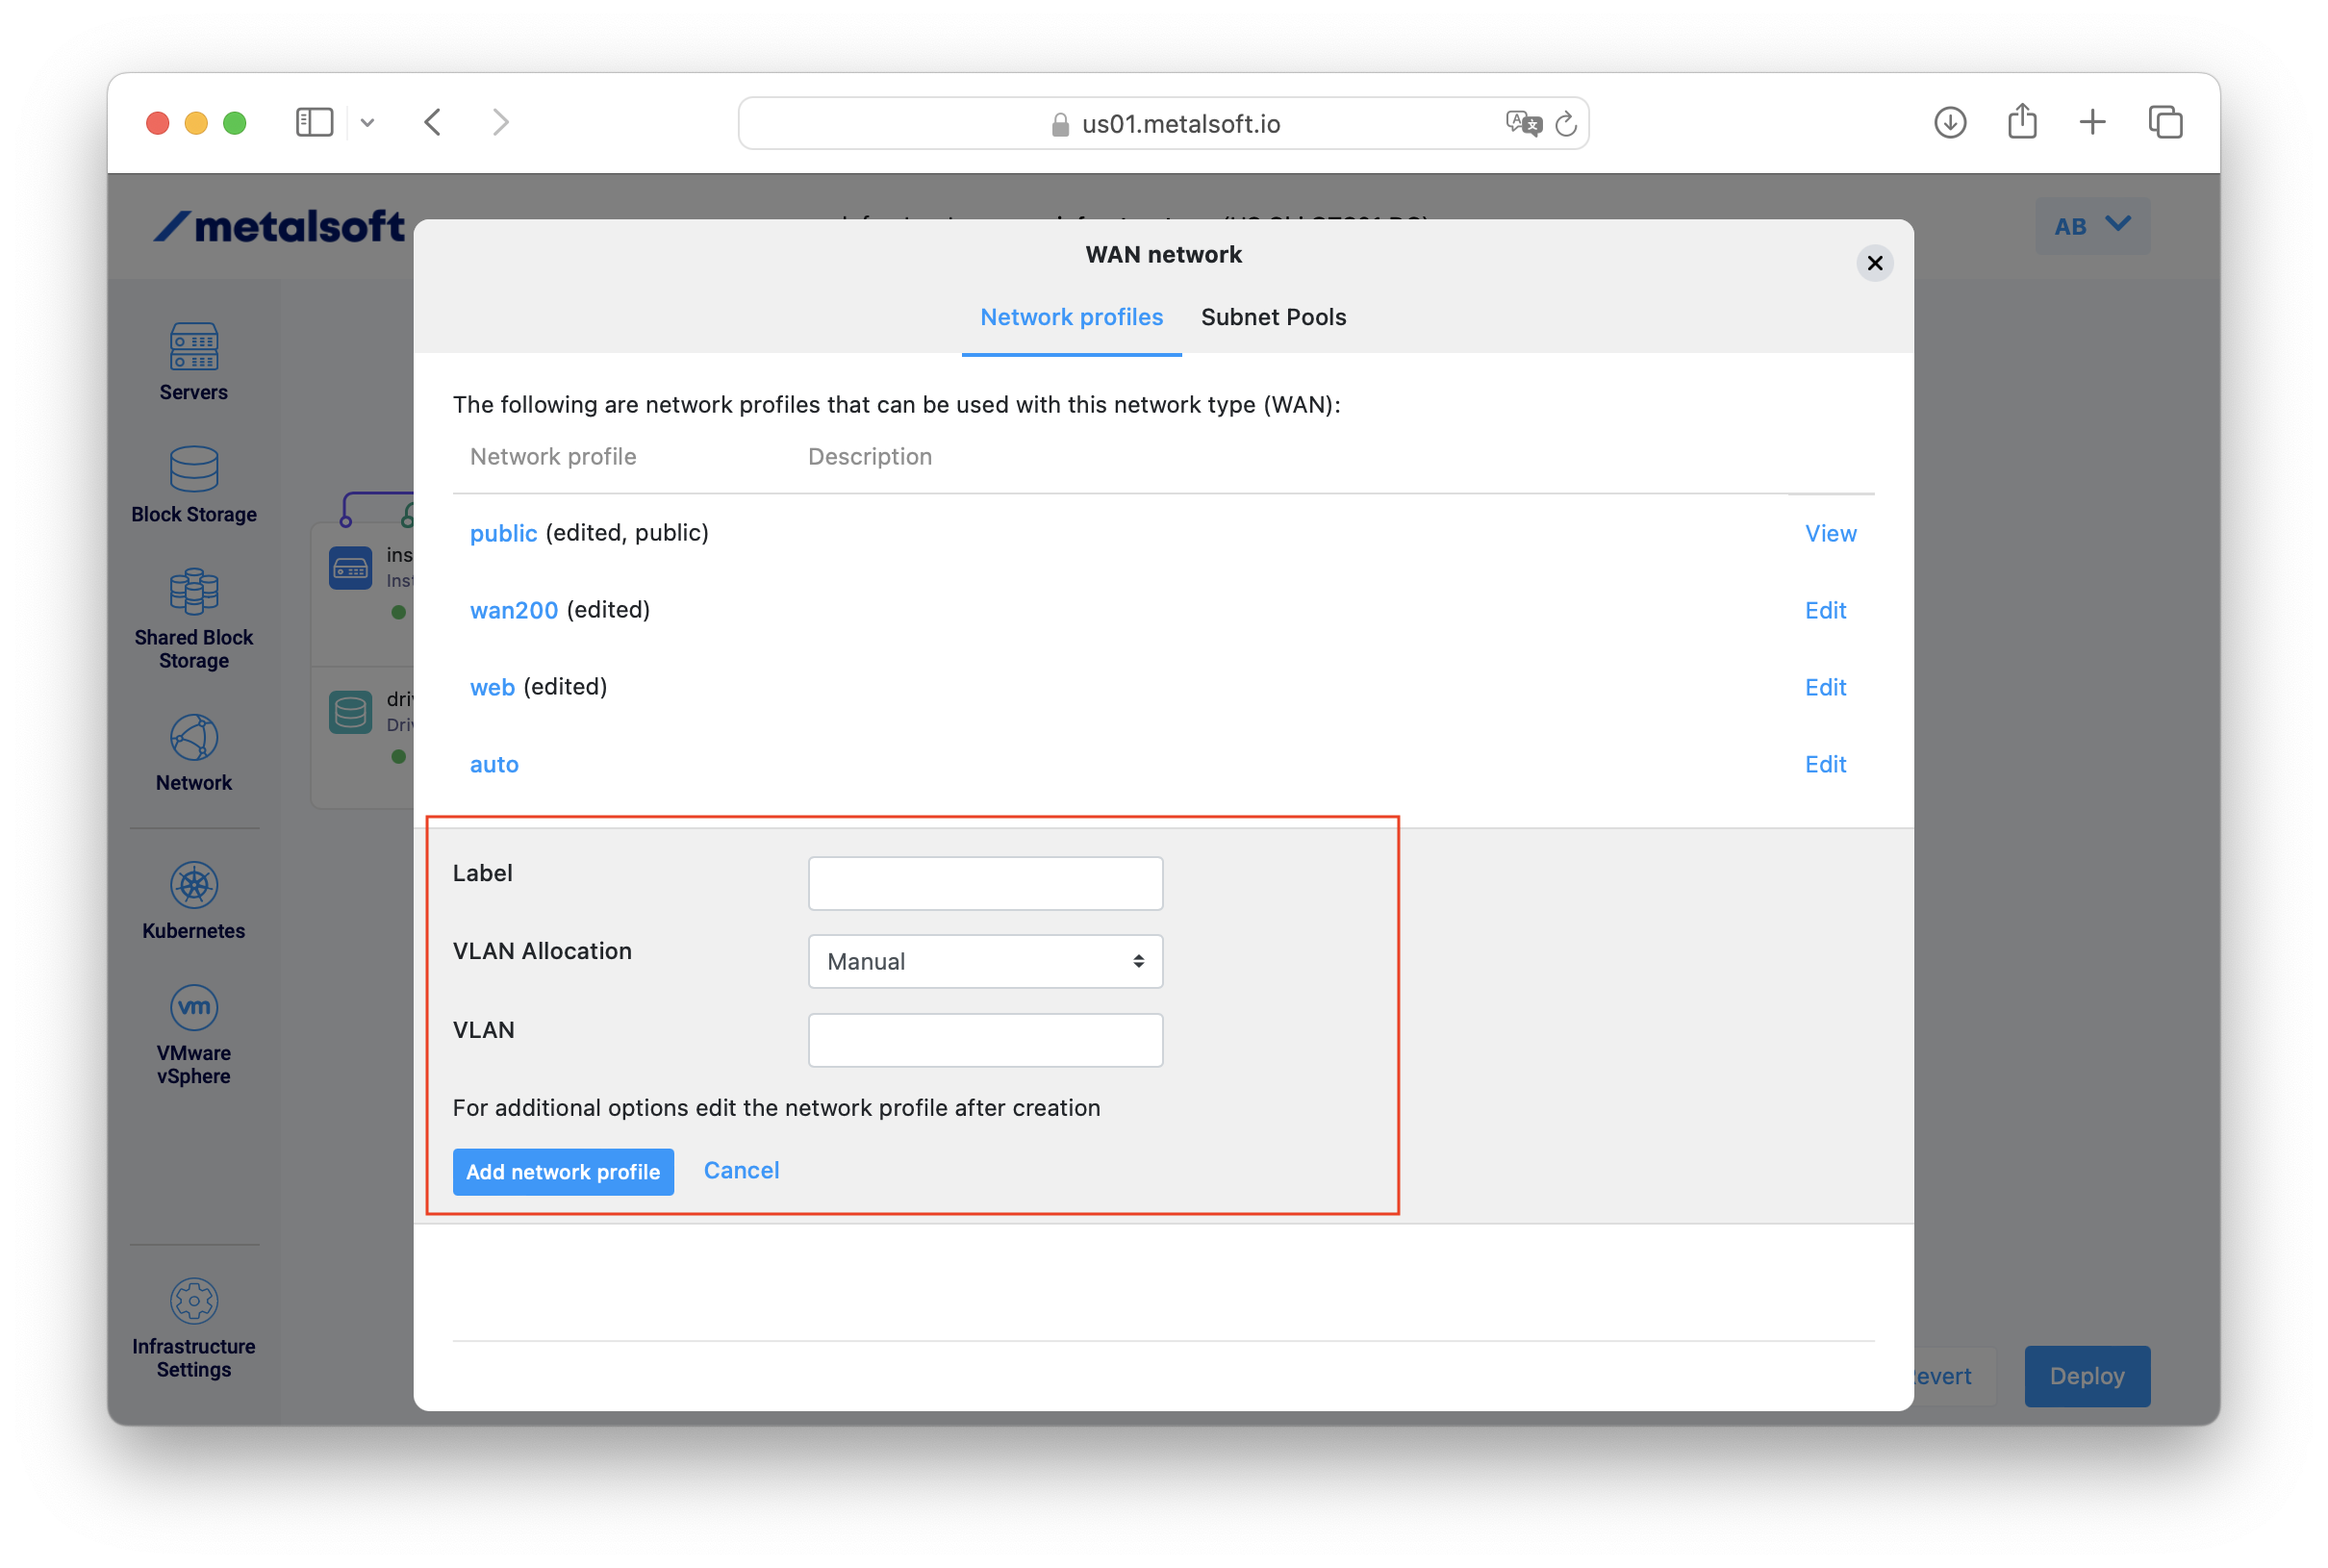
Input the label and set a VLAN ID for the native (access mode VLAN). Additionally, trunk mode VLANs can be added later. Note that manual allocation requires a special permission. By setting it to automatic, MetalSoft automatically allocates and configures a unique VLAN ID on the port. This is the default behavior.
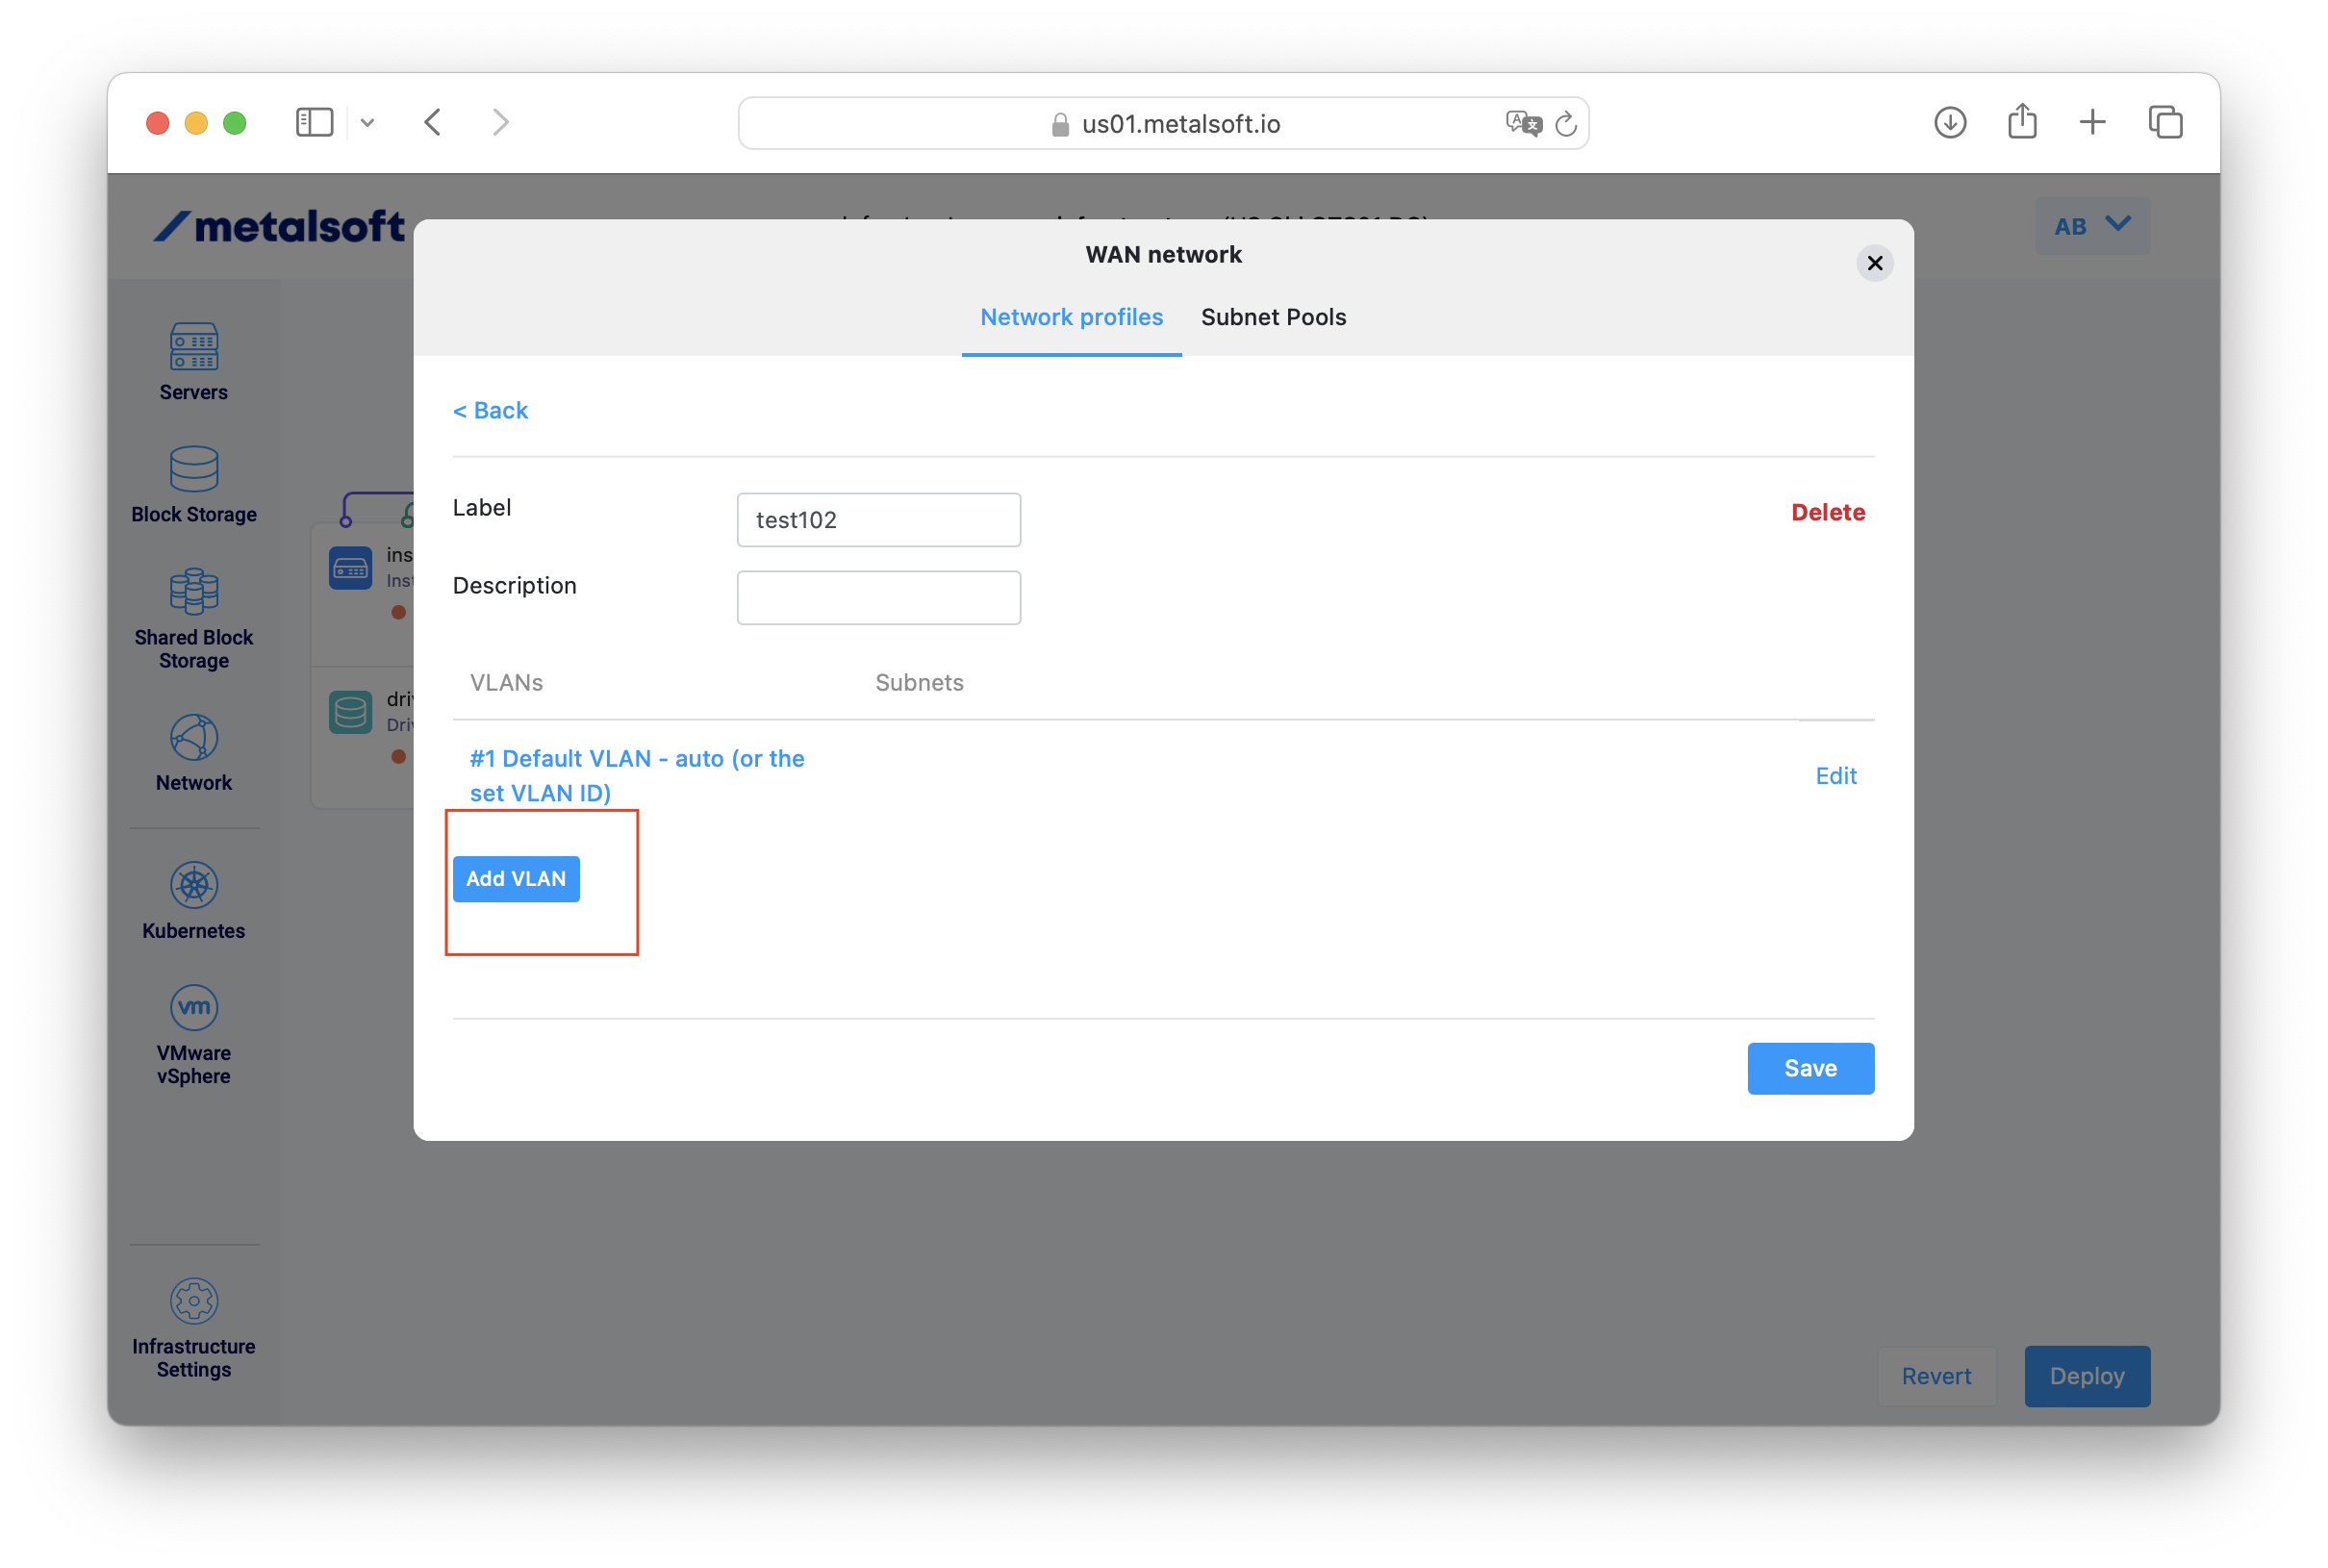
To add additional trunk mode VLANs to the same network profile
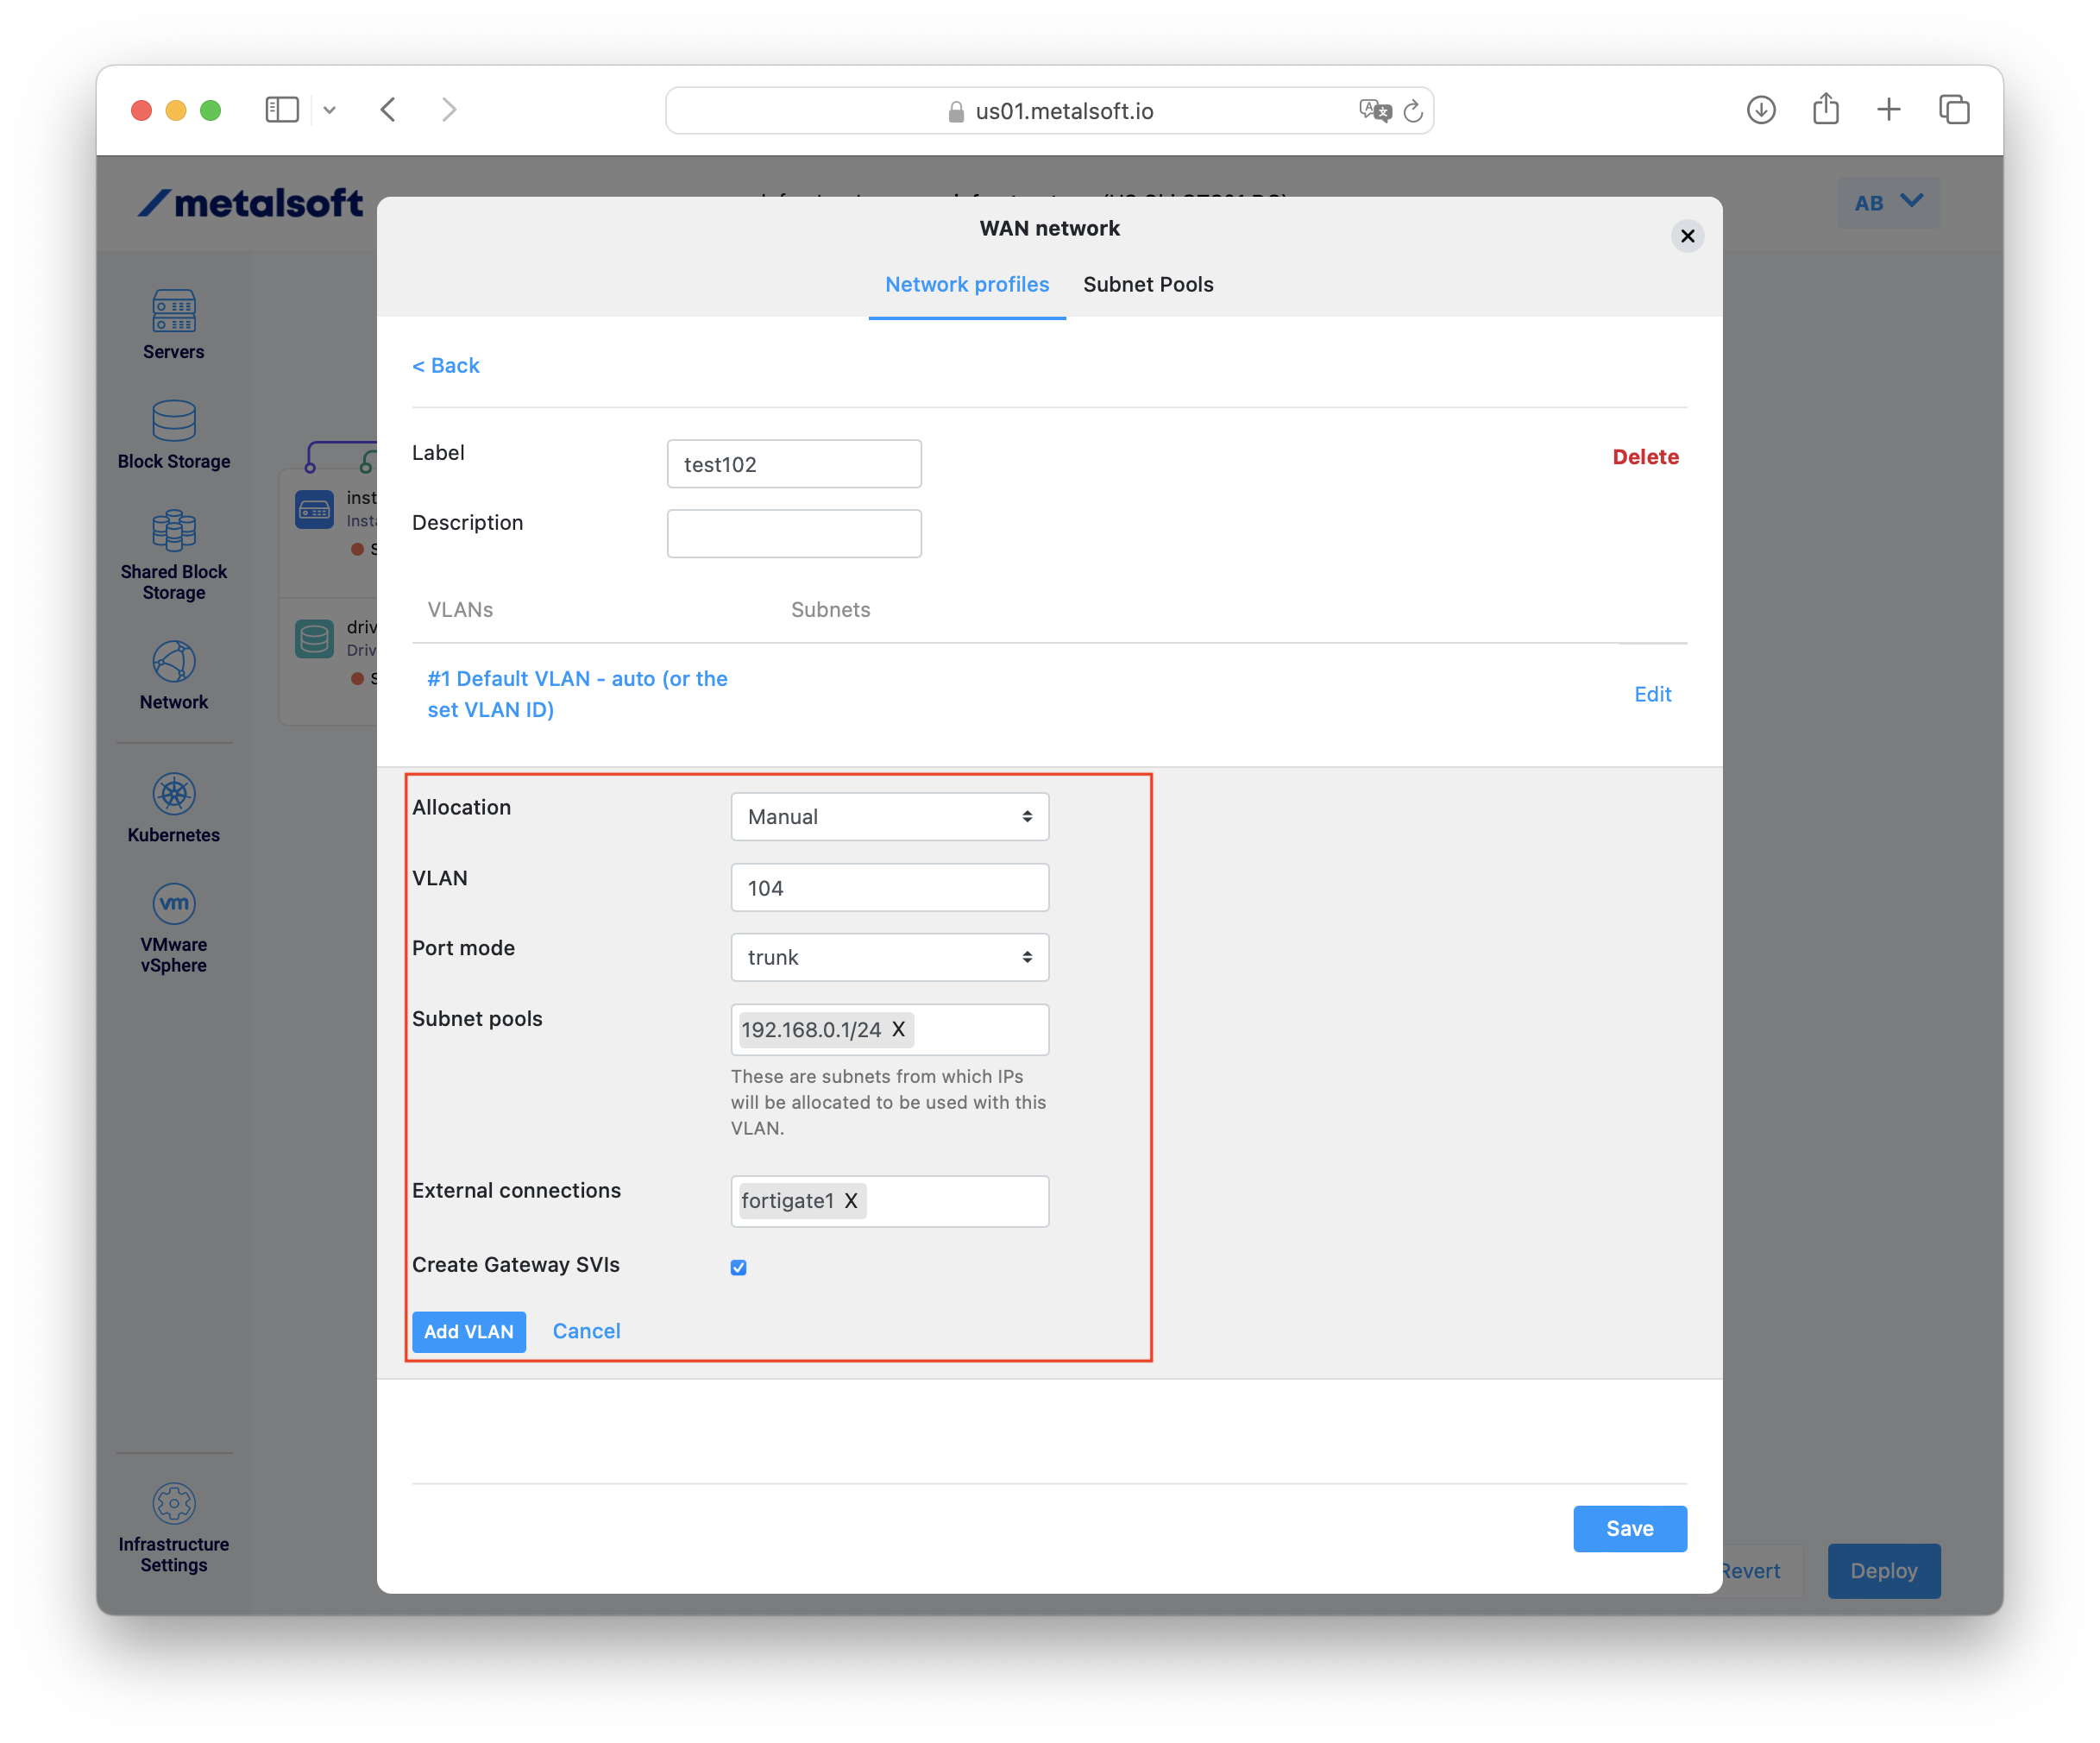
Section titled “To add additional trunk mode VLANs to the same network profile”To add additional tagged (802.1q - trunk mode) VLANs to the network profile, select the network profile and click Add VLAN.
- Select the required VLAN allocation and, if in manual mode, set the VLAN ID to use.
-
Available since 6.2: Set a VLAN Auto-Allocation Index. This is used to support multiple automatically allocated VLAN IDs and to refer to the auto-allocated VLAN ID across multiple network profiles.
-
Select the required subnet. The subnet you use is either a private subnet created in the Subnet Pools tab or a subnet provided by the admins. Only IPv4 IPs are supported at the moment. MetalSoft allocates IPs from this subnet to the interfaces connected and configured with this network profile. If you configure more than one subnet, MetalSoft allocates IPs from all the subnets.
-
Select the external connection. External connections are endpoints (ports) on border leaf switches where the respective VLAN terminates. MetalSoft attaches the VLAN ID as a trunk mode VLAN to the external connection. End-users cannot define external connections.
-
Available since 6.2: Set a VRF ID. Use this when using overlapping IP addresses.
-
Available since 6.2: Set a VRF Auto-Allocation Index. This is used to support multiple automatically allocated VRF IDs and to refer to the auto-allocated VRF ID across multiple network profiles.